The sawdust in a custom-built home always smells different depending on what’s spinning on the miter saw. Red oak carries a sharp, tannic bite that catches in the back of your throat, while MDF throws up a fine, ghostly flour that settles relentlessly into the creases of your work pants. Standing in a half-finished foyer on a crisp autumn morning years ago, I watched a framing carpenter named Sal try to force a pair of 5-inch baseboard miters into a corner that looked roughly like a slightly rounded 90 degrees. He cursed under his breath, hit the wood with a rubber mallet, and watched in quiet despair as a jagged hairline crack gaped open right down the center of the joint. It was a frustrating, all-too-common ritual.
That single, stubborn corner sparked an obsession that sent me across the country, tape recorder in hand, interviewing dozens of master finish carpenters, historical restoration experts, and architectural millwork specialists. I wanted to understand the invisible geometry that separates amateur weekend projects from heirloom-quality millwork. Over decades of late-night workshop chats, job-site walk-throughs, and sawdust-dusted interviews, one immutable truth echoed back from every veteran craftsman I met: miters on inside corners are a lie. The only way to achieve a permanent, seamless joint that survives the shifting humidity of changing seasons is to cope the trim.
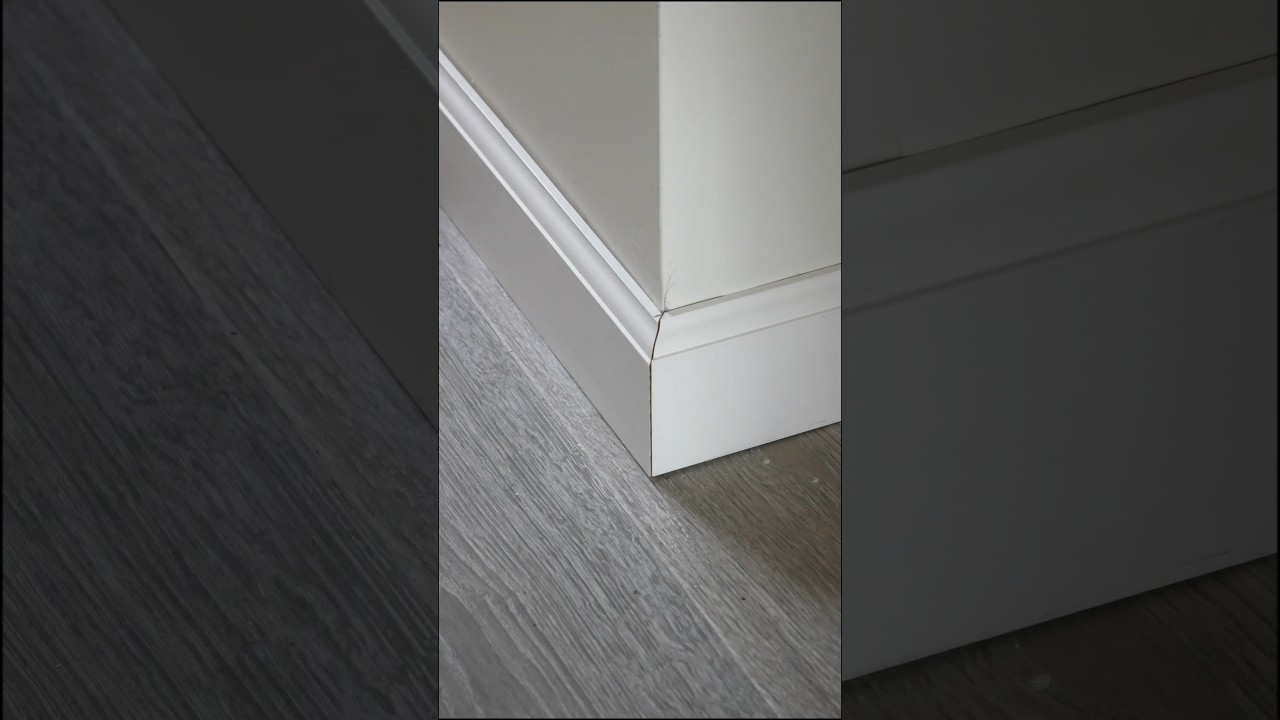
Most people first encounter interior trim installation through the lens of a cheap compound miter saw and a standard 45-degree setting. On paper, two 45-degree cuts make a perfect 90-degree inside corner. But houses are living, breathing structures built by humans using framing lumber that warps, bows, and twists the moment it leaves the mill. Drywall compound builds up thick in corners, studs twist under load, and foundation settlement subtly shifts framing members. When you force two rigid 45-degree mitered pieces into an imperfect corner, you are fighting physics. The moment relative humidity plummets in the winter and the wood dries out, those mitered joints open up like fault lines, revealing unsightly gaps that scream for gallons of caulk.
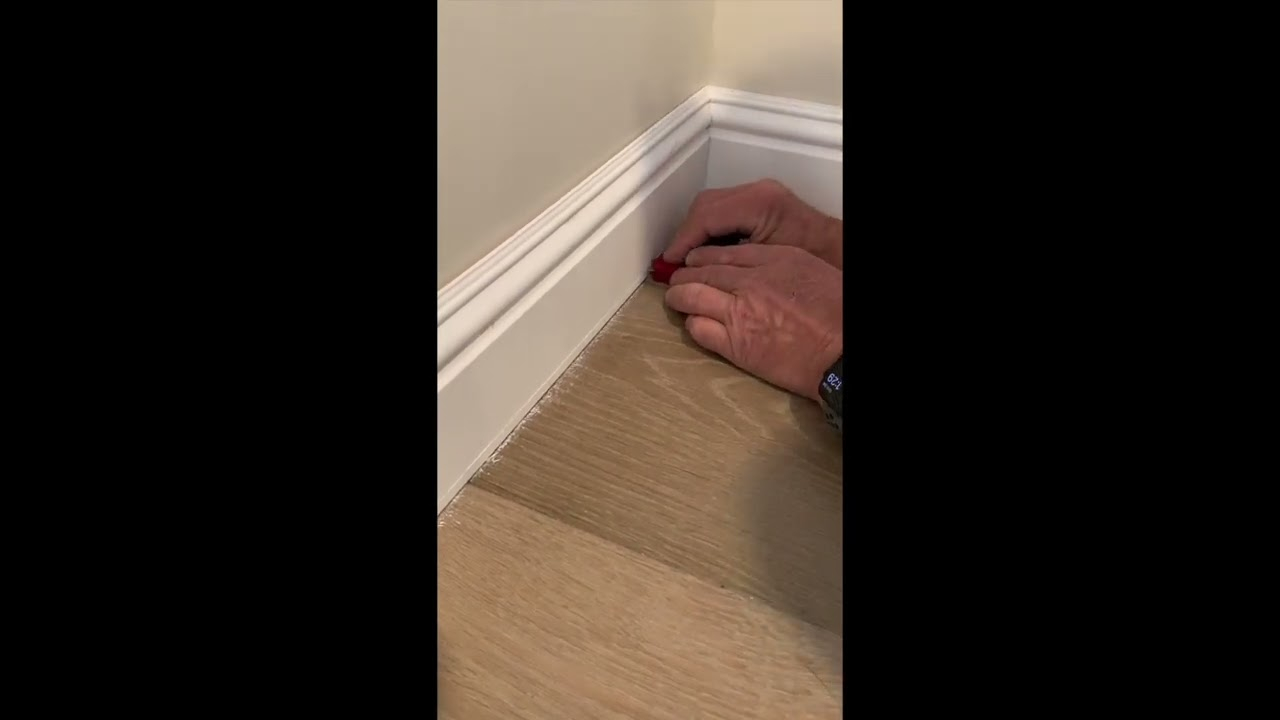
Coping trim bypasses this structural deceit entirely by embracing the geometry of the room itself. Instead of trying to guess an angle, a carpenter runs the first piece of molding straight into the corner, butt-jointed hard against the adjacent wall. The intersecting piece is then cut on a miter, and its decorative profile is manually hollowed out using a coping saw. This leaves a razor-thin, knife-edge profile that overlaps the face of the first piece. Because the overlapping edge is profile-matched, it acts like a three-dimensional puzzle piece. Even if the corner isn’t a true 90 degrees, or if it opens up to 92 degrees, the coped joint slides flush and maintains continuous contact, looking immaculate without relying on a bead of white acrylic latex to hide sloppy joinery.
The Geometry of Wood and Why Miters Fail on Inside Corners
To truly grasp why master tradesmen view coping as a sacred craft, you have to understand the cellular anatomy of wood and how atmospheric moisture dictates interior architecture. Wood is hygroscopic, meaning it absorbs and releases water vapor from the surrounding air to reach equilibrium with its environment. This dimensional change does not happen evenly across all axes. While wood boards change very little in length, they shrink and swell significantly across their width and thickness. When you cut a miter joint at a 45-degree angle, the end-grain fibers are exposed diagonally across a wide surface area. As the wood cells lose moisture during dry winter months, they contract perpendicular to the grain.
This differential movement causes mitered inside corners to twist and pull apart from the inside out. The exterior point of the miter might stay compressed against the wall, but the interior heel pulls back, creating a triangular wedge of empty space that catches shadows and collects dust. Master carpenters know this phenomenon intimately because they are often called back to fix failing work done by cheap production contractors. Interviewing these veterans revealed that they look at a house not as a static box, but as a dynamic, moving assembly that demands flexible engineering at every single joint.
Furthermore, drywall installers rarely achieve crisp, perfectly square interior corners. Corner beads add layers of metal or paper tape, heavy coats of joint compound, and multiple layers of primer and paint, all of which distort the true framing angle. A mitered joint assumes an absolute, unchanging 90-degree geometry. If the wall angle is 91.5 degrees—which is remarkably common even in high-end custom homes—a standard 45-degree miter will leave an embarrassing wedge-shaped gap at the front of the joint. Coping completely neutralizes this error because the intersecting piece is essentially sculpted to wrap over the face of the stationary piece, masking variations in the wall angle with an overlap rather than a tight butt-to-butt collision.
The cultural shift in modern construction has unfortunately prioritized speed over durability. Production builders slap up pre-primed finger-jointed pine or medium-density fiberboard (MDF) using pneumatic nailers and speed miters, relying heavily on painters to caulk the sins away. But true architectural preservationists and high-end cabinetmakers hold the line. They recognize that a properly coped joint is structurally superior because it creates a mechanical lock between two intersecting pieces. Even if seasonal expansion causes minor movement, the profile overlay hides the shift, maintaining the illusion of a single, continuous piece of molding wrapping organically around the room.
Essential Tools and Shop Setup for Professional-Grade Coping
You cannot master the art of coping trim with dull blades and flimsy hardware store tools. Every master carpenter I interviewed emphasized that precision coping is a symbiotic relationship between hand tools, power tools, and proper workholding setups. While a fancy sliding compound miter saw helps get you in the ballpark, the real magic happens at the workbench where your hands guide the blade through intricate, delicate contours. Investing in the right kit transforms a frustrating chore into a meditative, highly satisfying woodworking ritual that yields gallery-grade results every single time.
The cornerstone of the operation is a high-tension coping saw equipped with quality German- or Swiss-made blades. Cheap, flexible blades twist and wander off the pencil line the moment you apply slight pressure, ruining the back-cut. Master artisans swear by blades with a high tooth-count per inch (typically 15 to 24 TPI), which produce a clean, fine kerf without tearing out the fragile face veneer of expensive hardwood moldings like walnut, white oak, or cherry. The frame of the saw must be rigid enough to maintain blade tension under heavy lateral twisting, as navigating complex ogee and cove profiles requires aggressive directional changes mid-cut.
Equally critical is how you hold the workpiece while sawing. Trying to cope a piece of baseboard or crown molding while holding it in your lap is a recipe for disaster and uneven cuts. Professionals rely on a heavy-duty portable workbench equipped with a quick-release woodworking vise or a dedicated coping block clamped to a stable surface. The coping block—often a scrap piece of 2×4 with a custom profile notched into it—supports the molding at the exact angle needed, preventing vibration and chatter. Without a rock-solid foundation, the saw blade binds, teeth break, and your clean knife-edge gets chewed up before you even reach the decorative quirk of the molding.
Lighting and layout gear round out the essential arsenal. A high-lumen, adjustable LED task light directed straight down at the work surface is non-negotiable. Shadows can trick your eyes into thinking a back-cut is plumb when it is actually drifting at a hazardous 3-degree angle. Coupled with a sharp 0.5mm mechanical pencil and a fine-tip permanent marker for darkening cut lines, proper illumination ensures you can track your pencil line with microscopic accuracy. Skimping on any of these foundational elements guarantees an uphill battle that leaves you with sloppy joints and wasted stock.
Step-by-Step Methodology for Executing a Flawless Coped Joint
Mastering the physical motion of coping requires breaking the process down into distinct, repeatable mechanical phases. If you rush through the sequence, you will inevitably snap a fragile delicate tip or leave a unsightly gap that requires remedial sanding. Here is the field-tested, step-by-step methodology synthesized from decades of observing master craftsmen on high-end residential jobsites.
- Step 1 (The Straight Wall Run): Install the first piece of molding into the inside corner by cutting it square (90 degrees) and running it flush against the adjoining wall, nailing it securely into the studs.
- Step 2 (The 45-Degree Setup): Take the second piece of molding—the one that will be coped—and place it on your miter saw, cutting a standard 45-degree miter facing the direction that exposes the decorative face profile clearly.
- Step 3 (Revealing the Paint Line): Take a soft pencil or a fine-tip permanent marker and darken the entire freshly cut 45-degree face, creating a high-contrast roadmap that highlights the exact boundary of the molding profile.
- Step 4 (The Back-Cut Operation): Tilt your coping saw blade slightly backward (about 5 to 10 degrees off vertical) so that when you cut away the waste material, you create a sharp, knife-edge relief on the front face while clearing away the material behind it.
- Step 5 (Refining and Fitting): Carefully navigate the blade along the dark pencil line, using slow, deliberate vertical strokes, then refine the tight curves with a half-round file or sandpaper wrapped around a dowel before dry-fitting the joint into place.
Executing these steps demands patience and a delicate touch, particularly when working with ornate profiles like crown molding or heavy Victorian baseboards. As you guide the coping saw through the material, let the weight of the saw do the work; forcing it forward causes the blade to wander. Once the bulk of the waste wood falls away, use your file to gently pare down the remaining material right up to the pencil line. A proper coped joint should slide into place with a slight, satisfying friction fit, requiring zero wood filler or excessive hammering to seat correctly.
Avoiding Common Mistakes and Mastering Field Workarounds
Even experienced woodworkers stumble when they encounter tricky molding profiles or unstable materials. Throughout my interviews, master carpenters shared their battle scars, highlighting the most frequent errors that derail a coping job and the clever, field-tested workarounds they use to rescue imperfect cuts. Understanding these pitfalls before you pick up a saw will save you hours of frustration and mountains of wasted lumber.
- Pitfall 1 (Snapping the Fragile Tip): Beginners frequently break the delicate top corner of the molding profile because they leave too much unsupported material during the saw cut. Workaround: Always make a relief cut from the bottom edge of the molding up toward the complex profile curve first, allowing the waste chunks to drop away safely without stressing the delicate visible edge.
- Pitfall 2 (Failing to Back-Cut Properly): Cutting straight down at a 90-degree angle relative to the face causes the back of the joint to bind against the wall, preventing the front face from closing tightly. Workaround: Always angle your coping saw slightly outward (under-cutting by 5 to 10 degrees) to ensure the visible front edge makes 100% contact while the hidden rear material provides clearance.
- Pitfall 3 (Wandering Off the Profile Line): Forcing a dull or high-tension blade too quickly causes it to drift into the decorative contour, ruining the profile. Workaround: Slow down your stroke rate, use a sharp new blade, and clear away accumulated sawdust frequently so your pencil line remains clearly visible throughout the cut.
- Pitfall 4 (Ignoring Wall Variations): Assuming every corner is a strict 90 degrees and blindly relying on factory saw settings leads to unsightly gaps. Workaround: Check every corner with a digital angle finder or sliding T-bevel before cutting, and adjust your miter saw setup accordingly to accommodate out-of-square framing.
- Pitfall 5 (Over-Filing the Face Edge): Aggressively filing or sanding the front edge of the coped profile creates an ugly white gap where the raw wood core is exposed. Workaround: Stop filing just a hair shy of your pencil line, and use a sharp utility knife to pare the final fibers for absolute crispness without rounding over the edge.
Applying these workarounds transforms a frustrating exercise in trial-and-error into a controlled, highly predictable craft. When a joint doesn’t close on the first try, resist the urge to grab the hammer. Instead, pull the piece down, inspect where the friction points are leaving dark burnish marks on the wood, and use a fine diamond file or chisel to shave away those exact high spots. This disciplined diagnostic approach is what separates a novice installer from a seasoned finish carpenter.
The Long-Term Value and Economic Wisdom of Traditional Joinery
In an era dominated by disposable home decor, flat-pack furniture, and fast-track residential flipping, taking the time to hand-cope trim might seem like an anachronistic luxury. Yet, when you analyze the long-term economic and structural realities of homeownership, traditional joinery proves to be the most pragmatic choice you can make. Cheaply installed miter joints degrade rapidly, requiring constant maintenance, caulking, and repainting every few years as seasonal temperature swings tear them apart. A properly executed coped joint, by contrast, is built to outlast the drywall surrounding it.
Investing the extra minutes required to set up a coping station pays massive dividends in aesthetic longevity and property value. Prospective home buyers and high-end real estate appraisers subconsciously register the quality of finish carpentry. Crisp baseboards that meet seamlessly in the corners, crown molding that floats effortlessly against undulating ceilings, and chair rails that maintain continuous alignment signal that the entire home was constructed with uncompromising standards. It establishes an atmosphere of architectural integrity that cheap materials and rushed labor simply cannot fake.
Furthermore, mastering coping is an empowering exercise in self-reliance. It shifts your relationship with your living space from passive consumer to active custodian. When you can walk into any room in your house, look at a complex corner, and effortlessly wrap a piece of custom millwork around it with knife-edge precision, you unlock a deep sense of craftsmanship. The skills acquired at the workbench translate directly to other areas of home improvement, teaching patience, geometric spatial reasoning, and a profound respect for the physical properties of natural materials.
Ultimately, the lessons learned from decades of interviewing master carpenters transcend the mere mechanics of cutting wood. They serve as a powerful reminder that true quality cannot be rushed, automated, or faked with chemical sealants. Whether you are restoring a 1920s craftsman bungalow or finishing out a modern basement studio, the humble coping saw remains an irreplaceable tool of truth. It forces us to slow down, read the quirks of the building, and respond with intelligent, hands-on skill.
Actionable Recommendations for Perfecting Your Next Trim Project
To synthesize everything we have unpacked into a clear, high-impact framework for your workshop or job site, keep these core recommendations front and center:
- Invest in Quality Hardware: Never compromise on saw blades, coping saw frames, and workholding vices. Cheap tools introduce play and vibration that make precision joinery nearly impossible.
- Embrace the Hand File: Power tools get you 95% of the way there, but a set of needle files and half-round rasps are your ultimate insurance policy for dialing in a microscopic fit.
- Prioritize Practice Stock: Always buy 10% extra molding material specifically dedicated to practice cuts, especially when learning new or complex profiles like heavy crown molding.
- Test Dry-Fit Before Nailing: Never drive a finish nail into a coped piece until you have dry-fitted it and confirmed the front edge closes completely under light finger pressure.
- Respect the Wood’s Environment: Allow your trim material to acclimate to the indoor humidity of the target room for at least 48 hours before cutting or installing to minimize post-installation movement.
By adhering to these structured guidelines, you elevate your woodworking capabilities from frustrating guesswork to a refined, repeatable discipline. The next time you stand before a crooked 91-degree corner with a saw in your hand, you won’t curse the framing crew or reach for the caulk tube. You’ll simply square your shoulders, adjust your blade, and let decades of master carpentry wisdom guide your hands to a flawless finish.
Standing back to look at a completed room where the baseboards and crown molding flow seamlessly from wall to wall is one of the most gratifying experiences in all of residential construction. There are no unsightly gaps, no heavy globs of white caulk masking structural failure, and no apologies required for out-of-square framing. It is just clean, honest joinery that honors both the material and the architecture. The master carpenters who generously shared their decades of accumulated wisdom over the years didn’t just teach me how to cut wood; they taught me how to listen to a building and respect its inherent imperfections.
As residential building materials continue to evolve and modern construction trends lean heavily toward speed and automation, preserving these traditional hand skills becomes an act of quiet rebellion. The coping saw may look like a relic from a bygone era, but in the hands of someone who understands its rhythm, it is as modern and relevant today as it was a century ago.
Take these principles into your next project, embrace the inevitable mistakes as valuable lessons, and slow down enough to do the job right. The sawdust will sweep up, the paint will dry, but a brilliantly coped corner will stand as a silent testament to your patience and skill for decades to come.