Stepping onto an ice-cold porcelain bathroom tile on a freezing January morning is a shock to the nervous system that few people enjoy. For decades, home renovators have sought the luxurious comfort of radiant floor heating, transforming stone and tile from seasonal hazards into soothing thermal surfaces. Yet, beneath the polished finish of a high-end master bath or a modern kitchen lies an intricate electrical network. When installed correctly, an electric underfloor heating system operates silently and invisibly for decades, providing even, ambient warmth from the ground up.
When installed incorrectly, however, the consequences range from localized cold spots to catastrophic electrical shorts that demand tearing up an entire floor. The margin for error in electrical tile warming is remarkably thin. A single nick from a trowel, an unverified wire resistance reading, or an improperly embedded thermostat sensor can turn a dream renovation into an expensive demolition project. Because tile mortar and backer boards lock everything into a permanent matrix, fixing a mistake after the fact is rarely simple.
Understanding the anatomy of a floor heating installation requires looking past the glossy marketing brochures and diving into the raw physics of electricity, thermal dynamics, and cement chemistry. Contractors and DIYers alike often underestimate the sheer rigor required during the rough-in phase. This guide pulls back the layers of professional tile-warming installation, detailing the exact traps that ruin systems and how to sidestep them with precision.
Radiant floor heating systems have evolved from crude heating cables into sophisticated, engineered assemblies consisting of resistance wires, decoupling mats, digital programmable thermostats, and thermal cutoffs. As energy standards shift and smart homes demand greater efficiency by 2026, the expectations placed on these systems are higher than ever. Homeowners want instant thermal response times, energy-tracking capabilities, and absolute safety. Meeting these demands requires respecting the manufacturer’s specifications and the laws of thermodynamics.
The Physics of Resistance and Why Manufacturer Specifications Are Non-Negotiable
Every electric floor heating system relies on a fundamental electrical principle: Joule heating. When electrical current passes through a conductor with high resistance, electrical energy converts into thermal energy. Manufacturers design heating cables and mats with precise linear resistance ratings, measured in ohms per foot. Altering the physical structure of these cables alters their resistance, which directly impacts heat output and current draw. Cutting, shortening, or modifying a heating cable changes its electrical properties, creating a dangerous hotspot or a blown circuit breaker.
One of the most persistent myths in home renovation is that heating wires can be trimmed to fit an awkward corner. This misconception destroys thousands of dollars worth of materials annually. Heating cables are manufactured as complete, balanced circuits with cold leads attached at the factory via specialized crimps and waterproof splices. Shortening the heating wire lowers its overall resistance, causing it to draw excessive current, overheat, and potentially start a fire or trip the thermal overload protection. The factory-sealed end must remain entirely intact and buried within the mortar bed or self-leveling compound, never trapped inside a dry wall cavity or cut short.
Beyond the physical wire, understanding thermal output—typically measured in watts per square foot—is critical for achieving balanced comfort. Standard residential applications usually target 10 to 15 watts per square foot, depending on the subfloor type and room heat loss. Exceeding this density in an effort to make a cold room heat up faster can damage the surrounding tile adhesive, dry out wood subfloors prematurely, or cause localized thermal shock to delicate natural stone. Conversely, under-powering a sunroom with massive window exposures leaves the system incapable of overcoming ambient heat loss.
Electrical load calculations must also account for the total amperage of the system relative to the circuit breaker capacity. A standard 120V or 240V dedicated circuit can only handle a specific maximum square footage before requiring a secondary relay or power module. Ignoring these electrical limits leads to chronic breaker trips. Worse, it forces homeowners to run extension cords or disable safety features, introducing severe electrical hazards into wet environments like bathrooms and kitchens.
Navigating Subfloor Prep, Movement Joints, and Thermal Bridging
The longevity of a heated tile floor depends almost entirely on what happens before the heating wire is even unrolled. A common failure point in tile installations is substrate movement. Wood subfloors flex naturally under heavy foot traffic, while concrete subfloors expand and contract with temperature and moisture fluctuations. If a heating wire is laid directly over a structurally unstable subfloor, the shifting substrate will shear the wire or crack the rigid ceramic tiles above it, destroying the installation from the inside out.
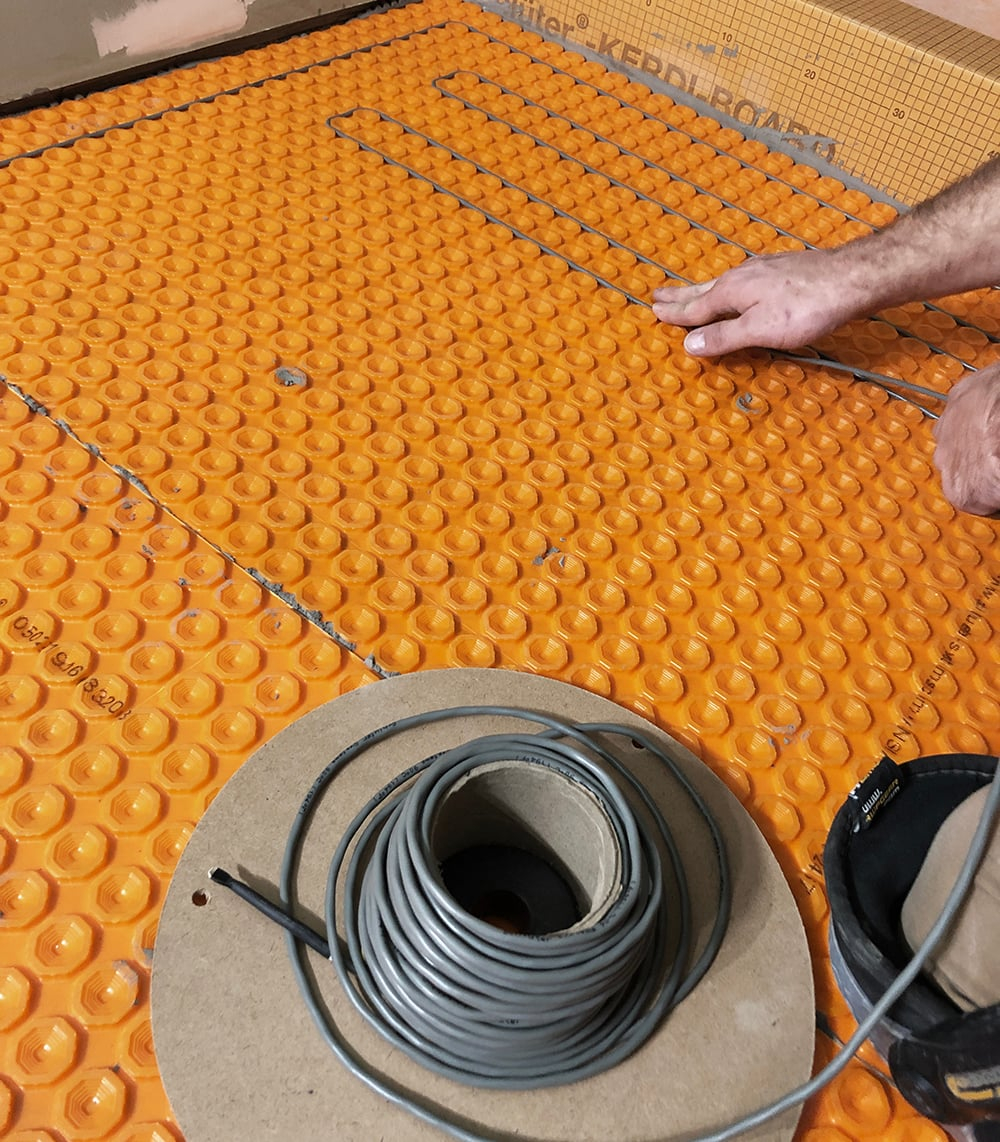
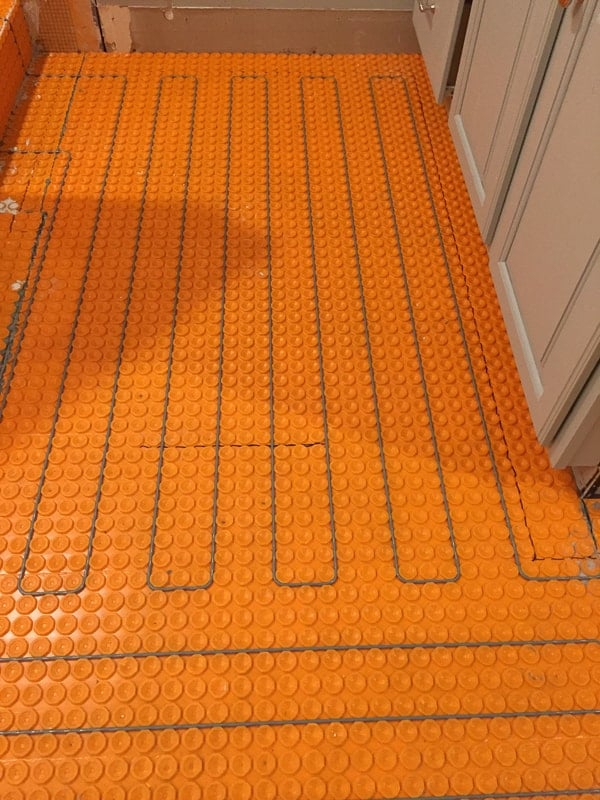
Subfloor preparation requires a multi-layered approach. When working with plywood or OSB subfloors, installers must ensure the deflection rating meets or exceeds the industry standard of L/360 (or L/720 for natural stone). This usually means adding a secondary layer of exterior-grade plywood or installing a high-performance uncoupling membrane like Schluter-DITRA-HEAT or equivalent systems. These membranes serve a dual purpose: they isolate the tile from subfloor movement while providing engineered channels to snap heating cables into place at exact, uniform spacing.
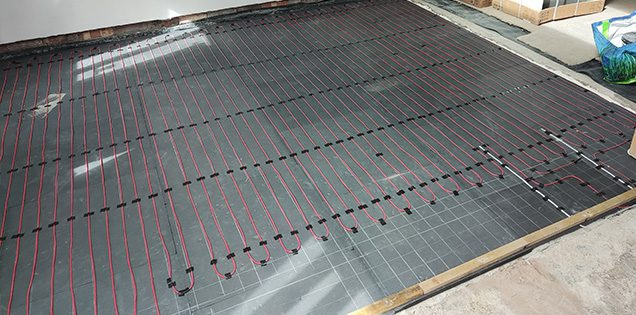
Thermal bridging represents another invisible enemy of floor heating efficiency. If an uninsulated concrete slab sits directly on bare earth, a massive portion of the thermal energy generated by the heating wires will bleed downward into the ground rather than radiating upward into the room. This wastes electricity and drastically increases warm-up times. Installing a high-density thermal insulation board beneath the heating system on concrete subfloors is essential. These extruded polystyrene boards reflect heat upward, cutting warm-up times from hours to mere minutes.
Furthermore, ignoring structural movement joints in large rooms guarantees disaster. When tile is installed across multiple sheets of plywood or across concrete expansion joints, the heating wire running across that joint will inevitably snap when the building settles. Installers must locate structural expansion joints in the subfloor and carry them up through the tile and grout lines, making sure no heating wire bridges the moving gap without proper looping and slack allowance.
The Rigorous Workflow for Layout, Testing, and Safe Wire Deployment
Executing a flawless floor heating installation requires a strict, methodical workflow. Skipping a single verification step can result in sealing a broken wire beneath 500 pounds of thin-set mortar. Professional installers follow a strict sequence of layout, testing, and embedding to protect their investment and ensure code compliance.
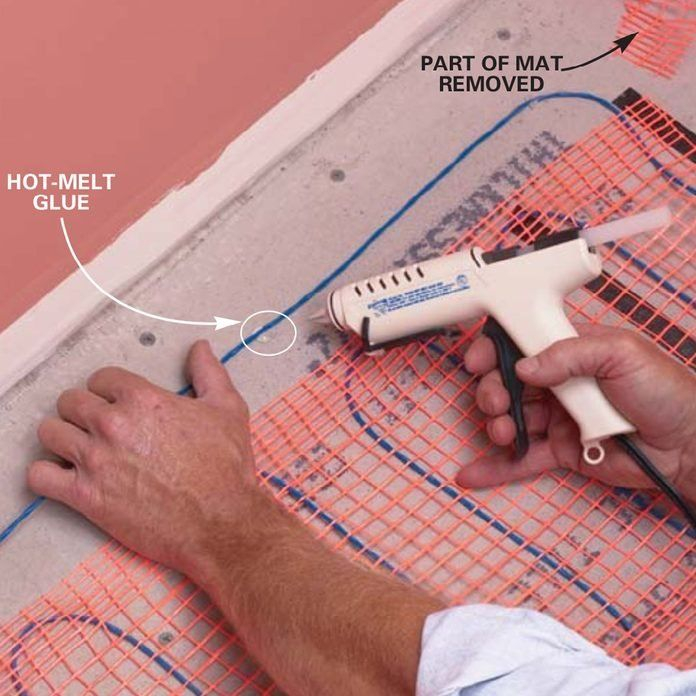
- Step 1 (Subfloor Cleanliness and Inspection): Vacuum the subfloor meticulously to remove every speck of drywall dust, screws, staples, and debris. A single sharp screw left on the floor can puncture the heating cable jacket under foot pressure.
- Step 2 (The Triple-Resistance Test Protocol): Measure and record the cable’s resistance (ohms) using a digital multimeter at three distinct milestones: straight out of the box, immediately after securing the wire to the subfloor, and right after the tile mortar has cured. Compare these readings against the factory specifications on the label.
- Step 3 (Precise Layout and Fixture Avoidance): Plan the wire layout to avoid permanent fixtures like toilets, bathtubs, vanities, and kitchen islands. Trapping heat beneath heavy, low-clearance furniture creates thermal blocks that cause the cable to overheat and fail prematurely.
- Step 4 (Securing and Embedding the Floor Sensor): Install the thermostat floor sensor probe inside a dedicated conduit channel midway between two heating runs. Never cross the sensor wire directly over a heating cable, and ensure the tip of the sensor can be easily pulled out for replacement if it ever fails.
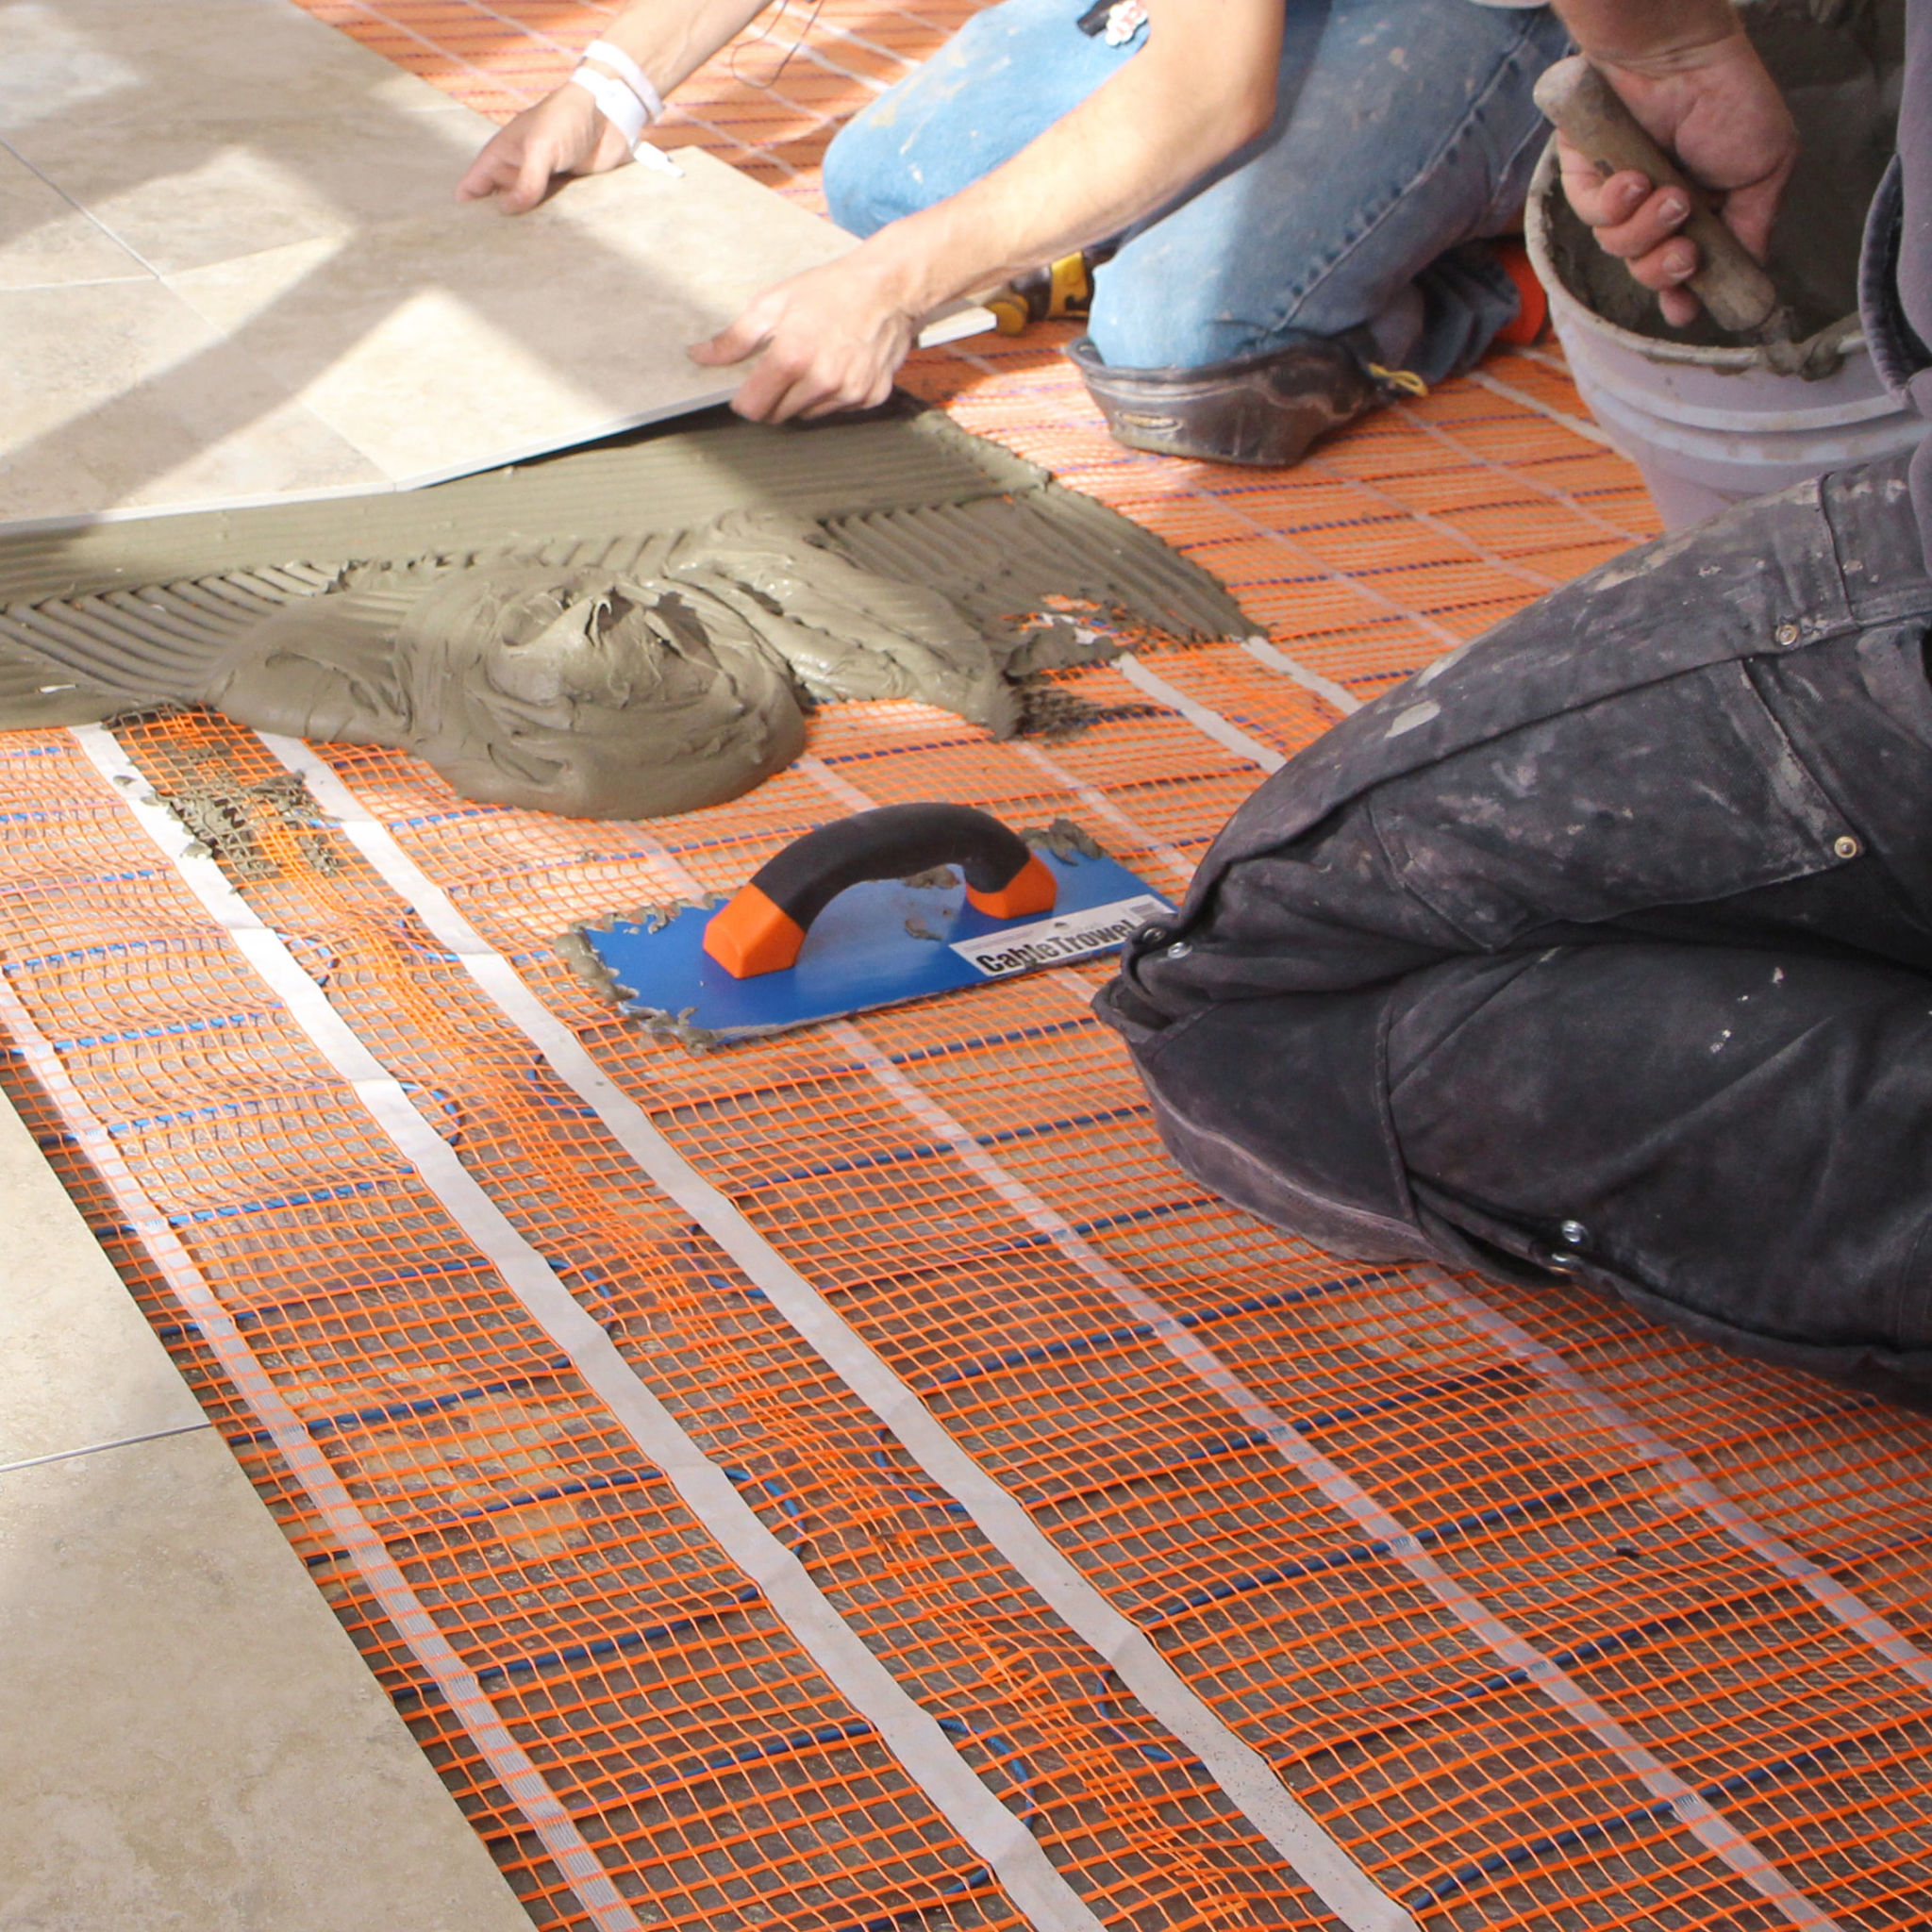
- Step 5 (Gentle Mortar Application and Trowel Selection): Use a flexible, polymer-modified thin-set mortar or self-leveling compound recommended by the manufacturer. Apply the mortar using a flat-side trowel technique first to press the material around the wires, followed by the notched side, ensuring zero air pockets surround the conductors.
Common Pitfalls and Field-Tested Workarounds
Even experienced contractors occasionally fall victim to subtle installation traps that compromise radiant floor systems. Recognizing these pitfalls before picking up a trowel saves thousands of dollars in remediation costs and eliminates the headache of tear-outs.
- Pitfall 1 (Crossed or Touching Heating Wires): Allowing heating cables to touch or cross each other creates a localized thermal choke point, causing extreme heat buildup that melts the wire insulation. Workaround: Maintain the manufacturer’s specified spacing (typically 2 to 3 inches) rigidly. Use uncoupling mats or guide strips that lock wire spacing into place automatically.
- Pitfall 2 (Using Metal Trowels Aggressively): Striking a heating cable with the sharp corner of a heavy steel notch trowel can nick the outer fluoropolymer jacket or inner copper conductor. Workaround: Switch to plastic trowel attachments or exercise extreme caution when pulling mortar over the grid, working parallel to the wires rather than across them.
- Pitfall 3 (Energizing the System Too Soon): Plugging in the thermostat and cranking the heat while the thin-set mortar is still wet forces moisture out too rapidly, causing the mortar to crumble and lose its bond strength. Workaround: Obey the mortar manufacturer’s complete cure time (usually 14 to 28 days) before turning on the heating system, ramping up the temperature by only 1 degree per day.
- Pitfall 4 (Neglecting Electrical Permits and GFCI Protection): Wiring a 120V or 240V floor heating mat directly into a standard wall switch or bypassing dedicated GFCI (Ground Fault Circuit Interrupter) breakers. Workaround: Always install a Class A GFCI-protected thermostat or breaker specifically rated for floor heating, and hire a licensed electrician to verify the final line-voltage connections to the main panel.
- Pitfall 5 (Failing to Document the Installation Map): Omitting the physical layout map and resistance log from the homeowner’s manual, making it impossible to locate wires if future repairs or doorstop installations require drilling into the floor. Workaround: Take clear, high-resolution photographs of the floor with a tape measure laid out across the room before covering it with mortar, and tape the official resistance log directly inside the electrical panel.
The Economics, Energy Efficiency, and Smart Home Integration of Modern Floor Heat
Evaluating electric floor heating requires looking beyond the initial cost of materials and installation to examine long-term energy dynamics. Critics often label radiant floor heating as an expensive luxury, citing electricity costs compared to forced-air gas furnaces. However, this comparison misses the point of zone heating. Heating an entire home to 72 degrees Fahrenheit just to keep a bathroom floor comfortable is inefficient. Electric floor heat allows homeowners to keep the central thermostat lower while enjoying localized thermal comfort precisely where bare feet make contact with cold surfaces.
Modern thermostats have revolutionized how these systems consume energy. In 2026, smart floor-heating thermostats feature adaptive learning algorithms that calculate exact warm-up times based on historical thermal data, outdoor weather forecasts, and time-of-use electricity pricing. Instead of running blindly on a rigid schedule, a smart thermostat learns that a bathroom needs to reach 82 degrees by 6:30 AM, activating the system at the optimal moment to minimize peak electricity rates.
Furthermore, pairing electric radiant heat with rooftop solar arrays and home battery storage systems changes the financial equation entirely. Homeowners generating their own clean electricity can program their floor heating systems to run intensely during peak solar production hours, storing thermal energy in the dense mass of the tile and concrete subfloor for use during the cold evening hours. This turns the floor itself into a low-cost thermal battery.
Durability also plays a massive role in economic sustainability. Unlike mechanical components in a traditional HVAC system—such as compressor motors, blowers, and valves—an electric heating cable has no moving parts. There is nothing to lubricate, filter, or mechanically wear out. When installed without manufacturing defects and protected from physical damage during the tile-setting process, a high-quality heating system outlasts the tile itself, providing decades of trouble-free operation.
Actionable Frameworks for Contractors and DIY Remodelers
Achieving professional results demands an organized framework that bridges electrical trade practices with tile-setting craftsmanship. Whether tackling a small powder room or an expansive open-concept kitchen, successful installers approach the project with a structured mindset that prioritizes safety, documentation, and material compatibility.
First, establish clear lines of communication between the electrician, the tile setter, and the homeowner. Misunderstandings regarding who supplies the thermostat, who tests the wire resistance, and who verifies breaker compatibility are prime causes of on-site friction and botched installations. The person laying the tile must be briefed on the exact path of the cold leads and floor sensors.
Second, treat every layer of the assembly as a chemical and mechanical system designed to work in harmony. Use primers recommended by the membrane manufacturer, select modified or unmodified thin-set mortar strictly according to the substrate and tile type (porcelain versus natural stone), and verify that all products are rated for radiant heat applications. A cheap adhesive that softens under elevated temperatures will cause tiles to debond, destroying both the finish and the heating elements underneath.
Third, maintain an uncompromising attitude toward testing documentation. Keep a paper trail of every ohm reading signed and dated by the installer. If a warranty claim ever arises, manufacturers require proof of proper pre-installation, intra-installation, and post-installation electrical testing. Without these logs, warranty protection is instantly voided, leaving the property owner with zero recourse.
Finally, prioritize user education. Homeowners must understand the operational quirks of radiant floor heating. They need to know that tile-warming systems are designed for thermal comfort rather than primary space heating, that heavy rubber-backed rugs can trap heat and cause localized thermal stress, and that ramping the temperature up too fast offers no advantage. Empowering the end-user with this knowledge ensures the system operates efficiently and safely for generations.
The pursuit of home comfort is a balancing act between aesthetic ambition and technical discipline. Installing electric floor heat beneath ceramic tile bridges the gap between high-end interior design and hardcore electrical engineering. When executed with patience, precision, and respect for manufacturer parameters, the result is an invisible luxury that enhances daily life in subtle yet profound ways.
As building materials continue to evolve and smart home ecosystems become more interconnected, the tools at our disposal will only grow more sophisticated. Yet, the foundational rules remain immutable: electricity demands respect, subfloors demand stability, and shortcuts always exact a heavy toll. By approaching every installation with rigorous testing, meticulous preparation, and flawless execution, renovators can ensure that the warmth beneath their feet remains a source of comfort rather than a costly lesson in hidden mistakes.