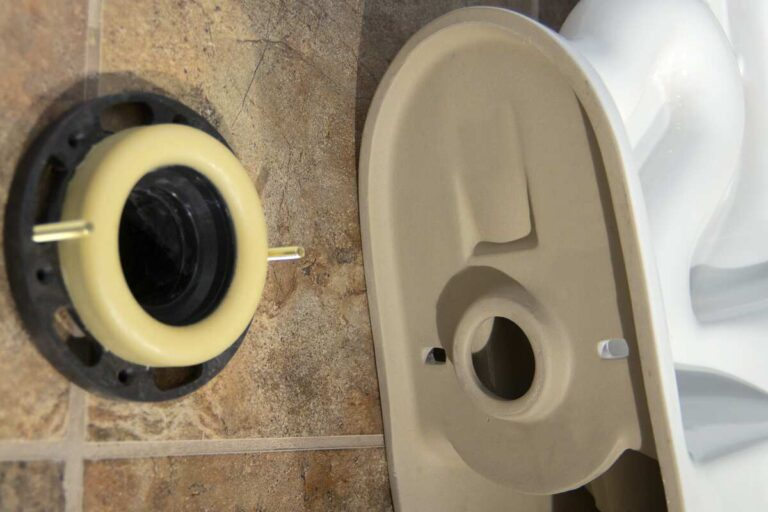
It starts with a subtle shift. You’re sitting there, maybe scrolling through your phone or just staring at the tile, and you feel it. A little rock. A tiny wobble. It’s easy to ignore at first. We tell ourselves it’s fine. It’s just an old house settling, right? But then comes the smell. That faint, sulfurous hint of sewer gas that doesn’t quite go away no matter how much air freshener you spray. Or worse, you notice a damp spot on the ceiling of the room below. That little wobble isn’t just annoying; it’s a warning sign. It means the seal between your toilet and the floor has failed. And that seal is everything.
Most people don’t think about what holds their toilet to the floor until it breaks. We assume it’s magic or just really strong glue. In reality, it’s a humble ring of beeswax and petroleum jelly, compressed into a tight seal against a plastic or metal flange. It’s simple tech, but when it fails, the consequences are messy. Water leaks into the subfloor. Rot sets in. Mold grows. By the time you see water on the bathroom floor, the damage underneath could be extensive. Fixing it isn’t as hard as you might think, though. With the right approach and a bit of patience, you can turn that wobbly nightmare into a rock-solid fixture. Let’s dive into how to get it done right, so you never have to worry about that wiggle again.
Why Your Toilet Wobbles and Why It Matters
A wobbly toilet is more than just a quirky characteristic of an older home. It is a mechanical failure in progress. When you sit on a toilet that isn’t secure, every movement grinds the porcelain base against the floor. This motion breaks the wax seal. Once that seal is compromised, two things happen. First, wastewater can escape every time you flush, seeping into the subfloor and potentially ruining the structural integrity of your bathroom. Second, sewer gases—yes, the stuff from the main line—can bubble up into your home. These gases aren’t just smelly; they can be harmful if inhaled over long periods. So, ignoring the wobble is basically inviting trouble into your house.
The cause of the wobble usually boils down to one of three things. The most common culprit is a dried-out or crushed wax ring. Over time, wax can degrade, especially if the toilet has been moving even slightly for years. Another reason is uneven flooring. If the floor isn’t perfectly level, the toilet won’t sit flat, creating gaps where the wax can’t seal properly. Finally, the closet flange—the pipe fitting in the floor that the toilet bolts to—might be broken, corroded, or installed too low. If the flange is below the level of the finished floor, the wax ring has to stretch too far to make a connection, and it often fails. Identifying which of these is your problem is the first step to a permanent fix.
You might be tempted to just caulk around the base to stop the movement. Don’t do it. Caulk hides the problem, it doesn’t solve it. If you seal the base with silicone while the toilet is still loose, you trap any leaking water underneath. Instead of dripping onto the floor where you can see it, the water will rot the subfloor silently. Always fix the mechanical stability first. The wax ring is designed to be compressed, not stretched or sheared. If the toilet moves, the ring fails. It’s that simple. So, before you buy any parts, accept that you need to pull the toilet up. It’s the only way to do the job correctly.
Gathering Your Tools and Choosing the Right Ring
Before you start unscrewing anything, you need to gather your supplies. This isn’t a job you want to start halfway through because you’re missing a wrench. You’ll need a pair of heavy-duty rubber gloves (seriously, get the thick ones), a putty knife or a specialized wax scraper, a bucket, some old rags or paper towels, and a sponge. For the tools, an adjustable wrench is essential for removing the nuts on the closet bolts. You might also need a hacksaw if the bolts are rusted stuck. Oh, and don’t forget new closet bolts. Never reuse the old ones. They’re cheap, and reusing them is a recipe for having to do this whole thing again in six months.
Choosing the right wax ring is where many DIYers get tripped up. There isn’t just one size fits all. Standard wax rings work great if your flange is level with the floor. But in many homes, especially those with thick tile or vinyl flooring added over time, the flange sits below the floor surface. In these cases, you need an extra-thick wax ring or a wax-free alternative like a rubber gasket with a sliding funnel. These newer options are forgiving and easier to position. If you’re unsure, measure the distance from the top of the flange to the finished floor. If it’s more than a quarter-inch below, go with the jumbo or extra-thick version. Better to have too much wax than too little.
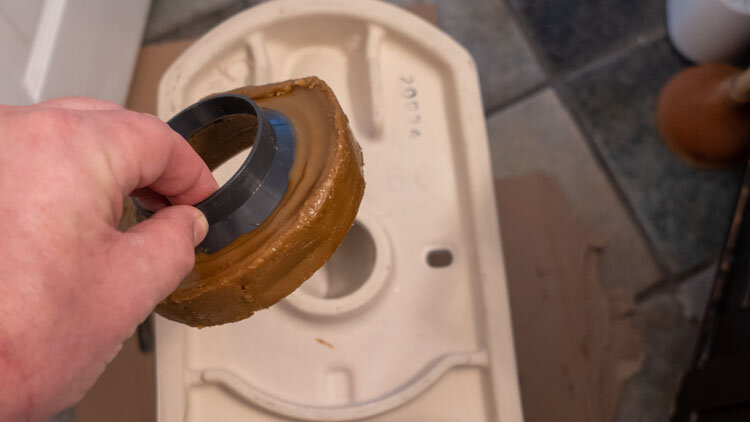
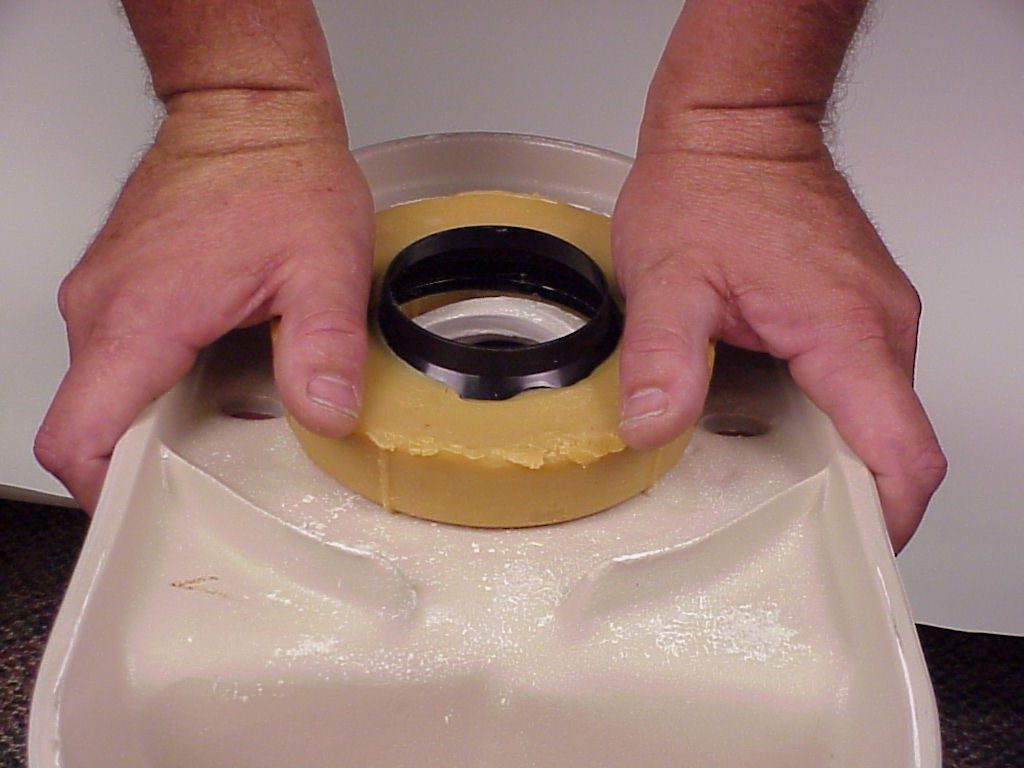
Another decision is whether to use a wax ring with a plastic horn or without one. The horn helps guide waste into the pipe, but it can sometimes get in the way if the alignment isn’t perfect. Many plumbers in 2026 prefer the plain wax rings or the flexible rubber gaskets because they allow for a bit more error during installation. If you’re a beginner, a wax-free gasket might give you more peace of mind. They don’t squish out of shape if you mess up the first time, and you can often reposition them. Whatever you choose, make sure it’s compatible with your specific toilet model. Check the manufacturer’s specs if you can, but generally, standard universal fits work for 95% of residential toilets.
Removing the Old Toilet Safely
Now comes the part nobody looks forward to. Taking the toilet off. Start by turning off the water supply valve located behind the toilet. Flush the toilet to drain most of the water from the tank and bowl. Use a sponge to soak up whatever water is left in the bowl and tank. You want it as dry as possible to minimize spillage. Disconnect the water supply line from the bottom of the tank. Have a small bucket ready here, as a little water will almost certainly drip out. Next, remove the caps covering the bolts at the base of the toilet. If they’re painted shut, carefully score around them with a utility knife.
Unscrew the nuts from the closet bolts. If they’re rusted and won’t budge, don’t force them. You’ll strip the bolt or crack the porcelain. Instead, use a hacksaw to cut the bolts off just above the nut. Be careful not to scratch the porcelain base. Once the nuts are off, the toilet should be free. Here’s the trick: don’t just lift it straight up. Rock it gently side to side to break the old wax seal. Then, lift it straight up and carry it to a pre-laid-out drop cloth or cardboard. Toilets are heavy and awkward. If you have a helper, now is the time to ask for assistance. If you’re alone, take your time and lift with your legs.
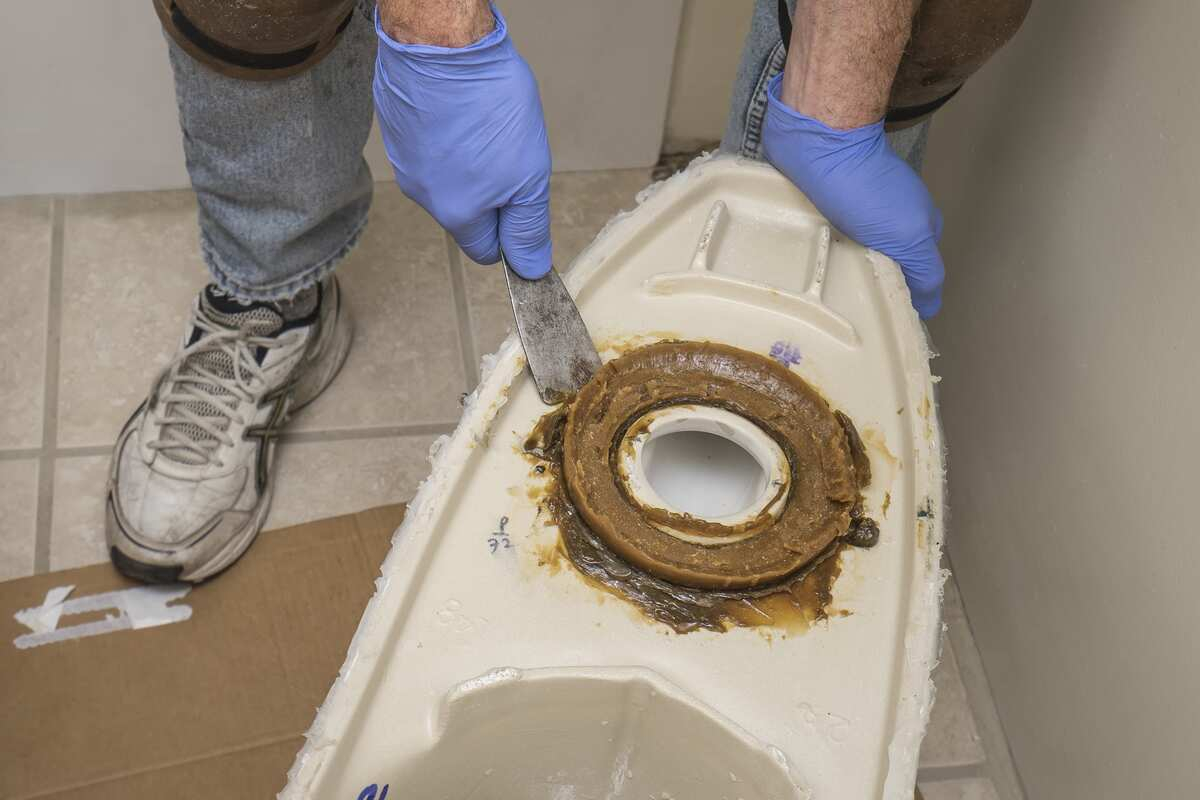
With the toilet moved aside, immediately stuff a rag into the open drain pipe. This prevents sewer gases from filling your bathroom and stops any accidental drops of tools or debris into the sewer line. Now, look at the flange. Scrape away all the old wax residue using your putty knife. It’s going to be messy. Get it as clean as possible so you can inspect the flange for cracks or damage. If the flange is cracked, no amount of new wax will fix it. You’ll need a flange repair kit, which slides inside the existing pipe and creates a new mounting surface. Addressing this now saves you from pulling the toilet up again later. Take a moment to breathe. The hard part is over.
Preparing the Flange and Floor Surface
A clean surface is critical for a good seal. Once you’ve scraped off the bulk of the old wax, use a rag with some mineral spirits or just hot soapy water to wipe the flange and the surrounding floor area. You want to remove any oily residue or sticky bits. Inspect the closet bolts slots on the flange. Are they intact? If the slots are broken, the bolts will spin when you try to tighten them, meaning the toilet will never secure. If this is the case, install a flange repair ring. These are stainless steel or plastic rings that screw into the floor around the existing flange, providing new slots for the bolts. It’s a cheap fix that adds immense stability.
Check the floor levelness. Place your toilet base upside down on the floor (clean it first!) or use a level on the flange area. If the floor is uneven, you’ll need shims. Plastic shims are best because they don’t rot or compress like wood. You’ll place these under the toilet base during installation to eliminate any rocking. Measure where the gaps are. You don’t need to guess; you can test fit the toilet dry (without wax) to see where it rocks. Mark those spots. Having your shims cut and ready before you commit to the wax ring is a pro move. It reduces the time the wax is exposed and getting dirty.
Also, take a look at the bottom of the toilet horn. Clean off any remaining wax or debris. A smooth surface ensures the wax compresses evenly. If there are chunks of old wax stuck in the horn, chip them off. While you’re at it, check the condition of the toilet base itself. Are there any cracks? A hairline crack in the porcelain can leak slowly and is often invisible until the toilet is removed. If you find a crack, unfortunately, you need a new toilet. No sealant in the world will hold back water pressure from a cracked ceramic base. Assuming everything looks solid, you’re ready to install the new hardware.
Installing the New Wax Ring and Setting the Toilet
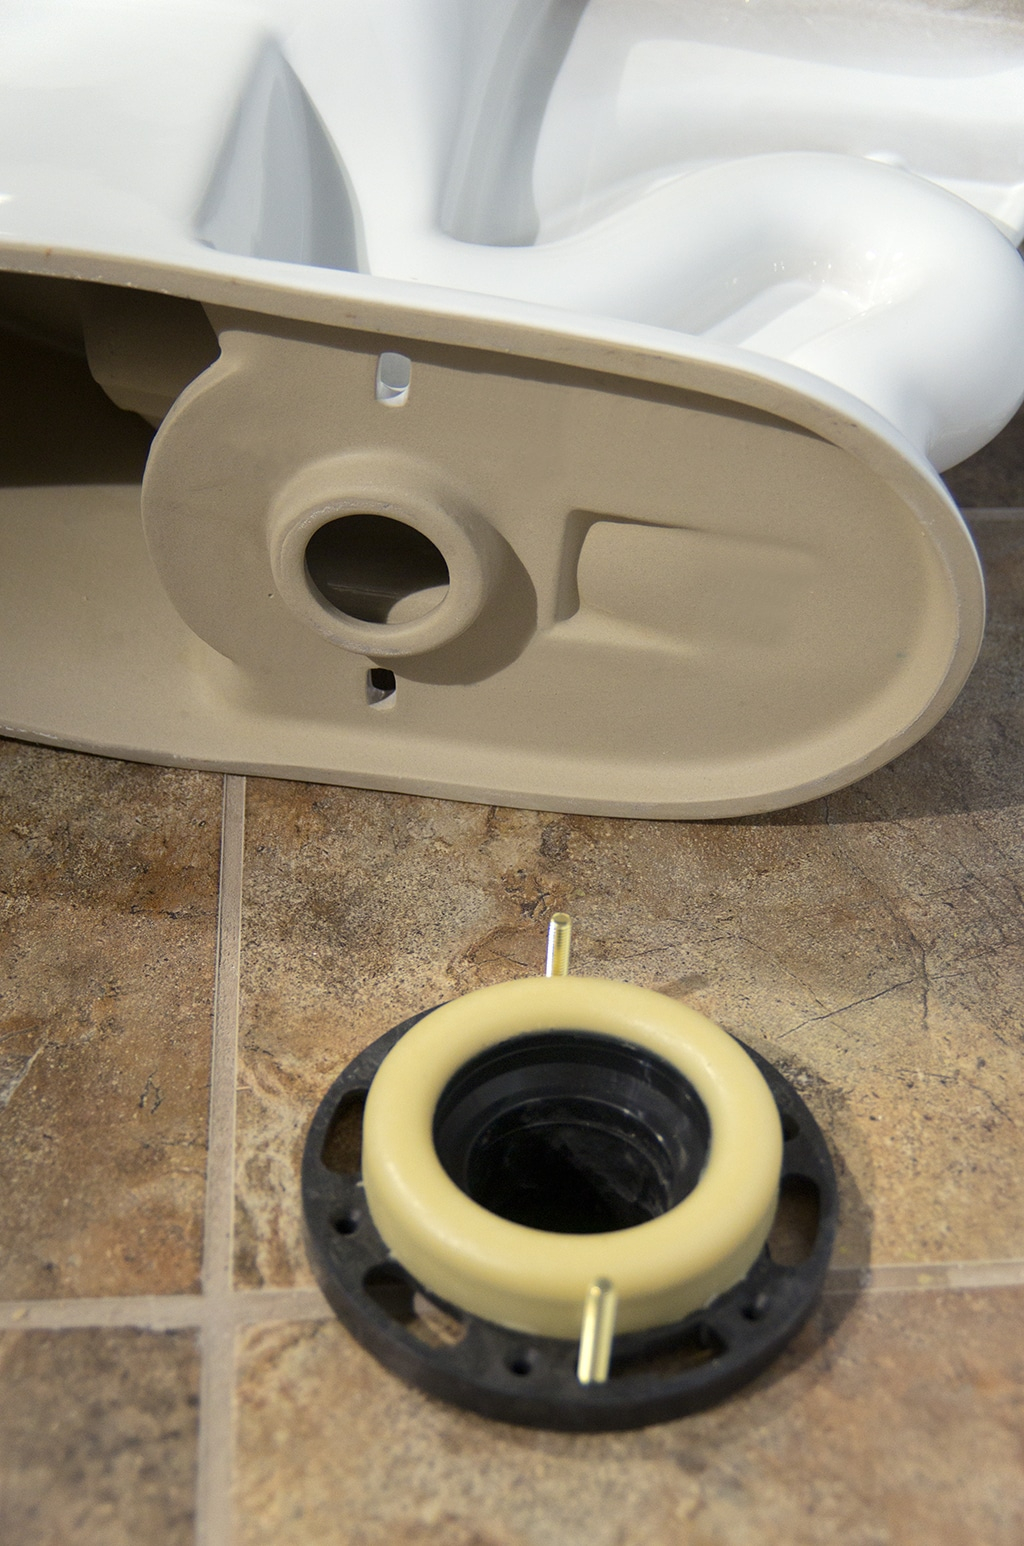
This is the moment of truth. Take your new wax ring. If it’s cold, warm it up in your hands for a minute to make it pliable. Place the ring directly onto the flange, centered over the drain hole. Press it down firmly to ensure it sticks to the flange. Some people prefer to attach the ring to the bottom of the toilet instead. Both methods work, but placing it on the flange is generally safer for beginners because you can see exactly where it sits. If you’re using a wax-free gasket, follow the manufacturer’s instructions, but typically, these also go on the flange. Make sure the orientation is correct if the gasket has a specific top and bottom.
Insert your new closet bolts into the flange slots. Stand them upright. Now, carefully pick up the toilet. Align the holes in the base with the bolts. Lower the toilet straight down. Do not twist it yet. Just let it settle onto the wax ring. Once it’s resting on the floor, apply gentle downward pressure to compress the wax. You should feel it seat. Now, check for wobble. If it rocks, slide your pre-cut shims under the base where needed. Trim the shims flush with the toilet base using a utility knife. Do not overtighten the bolts to stop the wobble; that will crack the toilet. The shims handle the leveling; the bolts just hold it in place.
Once the toilet is stable and level, place the washers and nuts onto the bolts. Tighten them alternately, a little bit on the left, then a little bit on the right. This ensures even pressure. Stop tightening as soon as you feel resistance. You don’t need to crank them down with all your strength. Porcelain is brittle. If you hear a cracking sound, stop immediately. You’ve gone too far. Cut off the excess length of the closet bolts with your hacksaw, leaving enough room for the caps. Snap the decorative caps over the bolts. Reattach the water supply line, turn the water back on, and let the tank fill. Flush it a few times and check for leaks around the base. If it’s dry, you’ve succeeded.
You’re almost done, but don’t pack up your tools just yet. Watch the base of the toilet for a few minutes after flushing. Look for any beads of water forming. If you see water, the seal isn’t tight, or the toilet is still moving. Tightening the bolts more rarely fixes a leak at this stage; it usually means the wax didn’t compress evenly. If it’s leaking, you’ll likely have to pull it up and try again with a new ring. It happens. Don’t get discouraged. If it’s dry, you can optionally caulk around the base. Leave a small gap at the back uncaulked. This allows any future leaks to escape visibly rather than rotting the floor unseen. It’s a smart safety valve.
Maintaining a secure toilet is mostly about avoiding abuse. Don’t use the toilet as a step stool. Don’t let kids swing on it. These actions stress the bolts and the wax seal. Periodically check the tightness of the bolts, maybe once a year. Just a gentle tug to see if they’re snug. If you notice the toilet starting to rock again, address it immediately. Replace the wax ring before water damage occurs. Remember, a wax ring can last 20 to 30 years if the toilet doesn’t move. Stability is the key to longevity. By keeping it secure, you’re protecting your home’s infrastructure.
Finally, dispose of your old materials responsibly. The old wax ring is trash; don’t flush it or try to recycle it. Clean your tools thoroughly. Wax is stubborn, so use hot water and plenty of soap. Store your leftover shims and bolts for future projects. You’ve just completed a plumbing repair that many homeowners pay hundreds of dollars for. You saved money, prevented potential water damage, and gained a valuable skill. Plus, you can now sit on your throne with confidence, knowing it’s not going anywhere. Enjoy the silence. And the lack of smells.