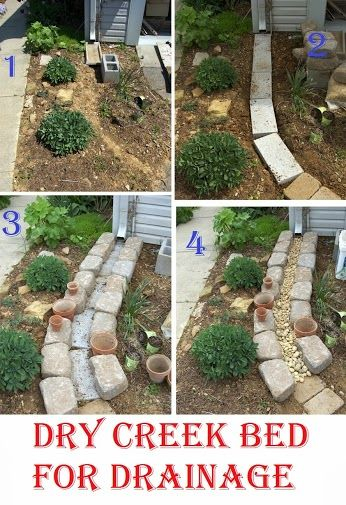
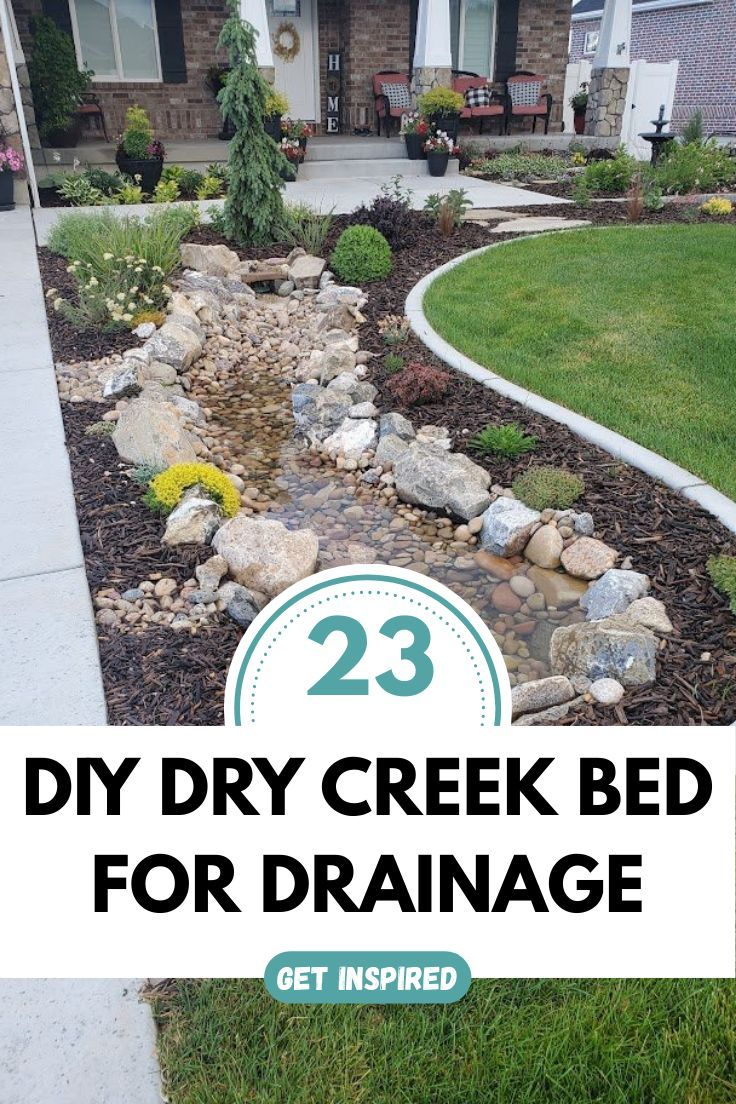
You’ve probably seen them. Those lovely, rock-lined channels winding through backyards, looking all rustic and serene. They promise to solve that pesky puddle problem by your patio or the muddy mess near the foundation. It sounds simple enough, right? Just dig a ditch, throw in some stones, and call it a day. But here’s the thing. So many of these projects fail. Spectacularly.
Instead of channeling water away, they become stagnant ponds. Or worse, they direct water straight into your basement. It’s frustrating. You spend weekends hauling heavy rocks, only to watch your hard work get undermined by the next rainstorm. Why does this happen? Usually, it’s not bad luck. It’s bad planning. And a few critical missteps during construction. Let’s talk about what goes wrong and how you can get it right the first time. Because a dry creek bed should be a solution, not a new headache.
Ignoring the Natural Flow of Water
The biggest error people make is guessing where the water goes. They look at their yard on a sunny Tuesday afternoon, decide a diagonal line looks nice, and start digging. This is a recipe for disaster. Water doesn’t care about your aesthetic preferences. It follows gravity and the path of least resistance. If you fight nature, nature wins. Every single time.
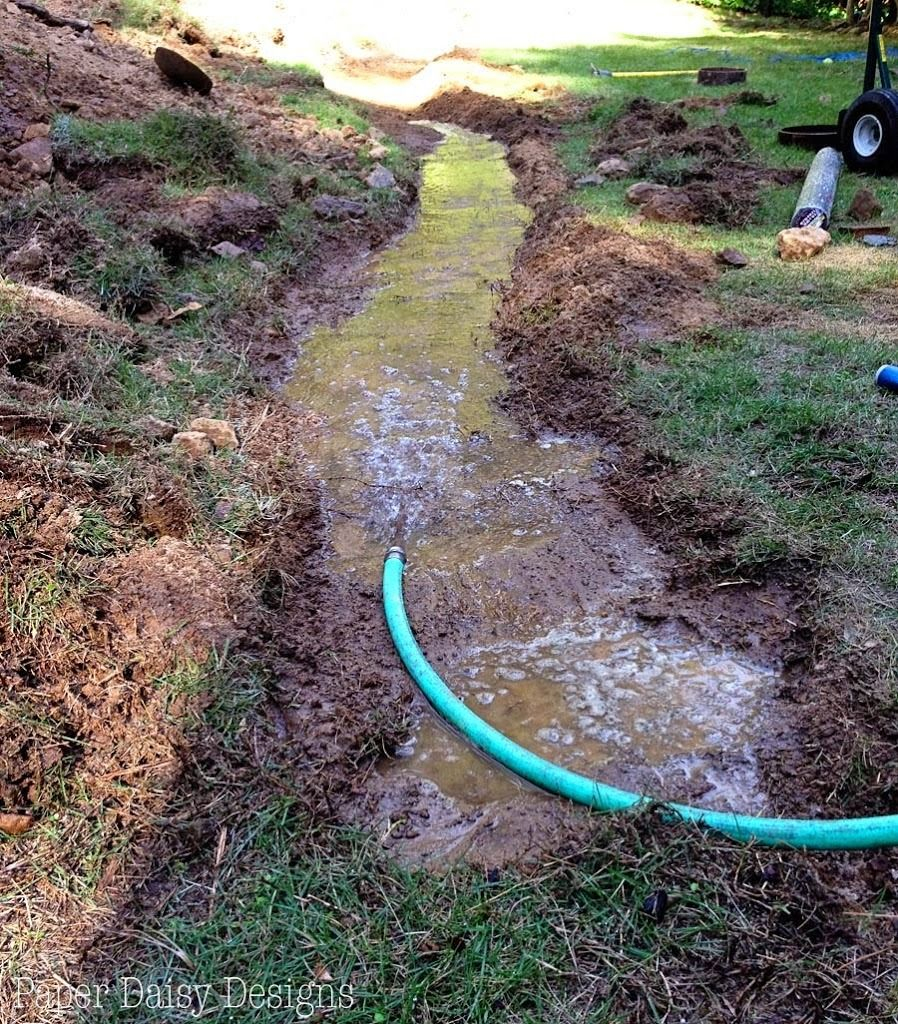
Before you even pick up a shovel, you need to do your homework. Wait for a heavy rain. Grab a cup of coffee and watch. Where does the water pool? Which way does it run? Experts recommend observing at least three storm cycles to get a true picture of your drainage patterns. Use spray paint to mark the actual wet paths. These marks are your guide. Your creek bed must follow these natural channels. If you try to force water into a new direction without proper grading, it will just overflow the banks and cause erosion elsewhere.
It’s also smart to check the slope. Water needs a gradient to move. A flat creek bed is just a decorative trench that holds water. You want a consistent drop, usually around 1-2% slope, to keep things flowing. If your yard is flat, you might need to create artificial grade changes using larger boulders to step the water down. But don’t guess. Use a level or a laser tool to measure. Precision here saves you from a soggy lawn later.
Skipping the Fabric or Using the Wrong Type
Here’s a debate that splits landscapers. To fabric or not to fabric? The short answer is: yes, use it. But not just any fabric. Many DIYers grab the cheapest black plastic sheeting they can find at the hardware store. This is a mistake. Plastic blocks water. It creates a barrier that causes pooling above the layer instead of letting it seep into the ground. You want drainage, not a bathtub.
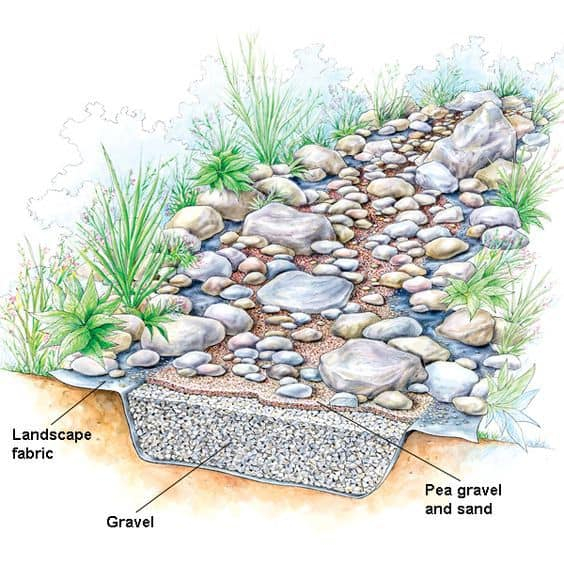
You need permeable geotextile fabric. This material allows water to pass through while keeping the soil separate from the rocks. Why does this matter? Without it, your expensive river rocks will slowly sink into the mud. Within a year or two, your beautiful creek bed will look like a rocky mud pit. Weeds will also take over, pushing up between the stones. The fabric acts as a filter. It keeps the structure intact and reduces maintenance significantly.
When installing, make sure you overlap the seams by at least six inches. Secure it with landscape staples every few feet. Don’t pull it too tight; give it a little slack so it conforms to the shape of the trench. And remember, the fabric goes under the rocks, but it shouldn’t be visible from the top. Cover the edges with soil and mulch or larger stones to hide it. This small step adds years to the life of your project. It’s worth the extra few dollars for quality material.
Choosing the Wrong Rock Sizes and Shapes
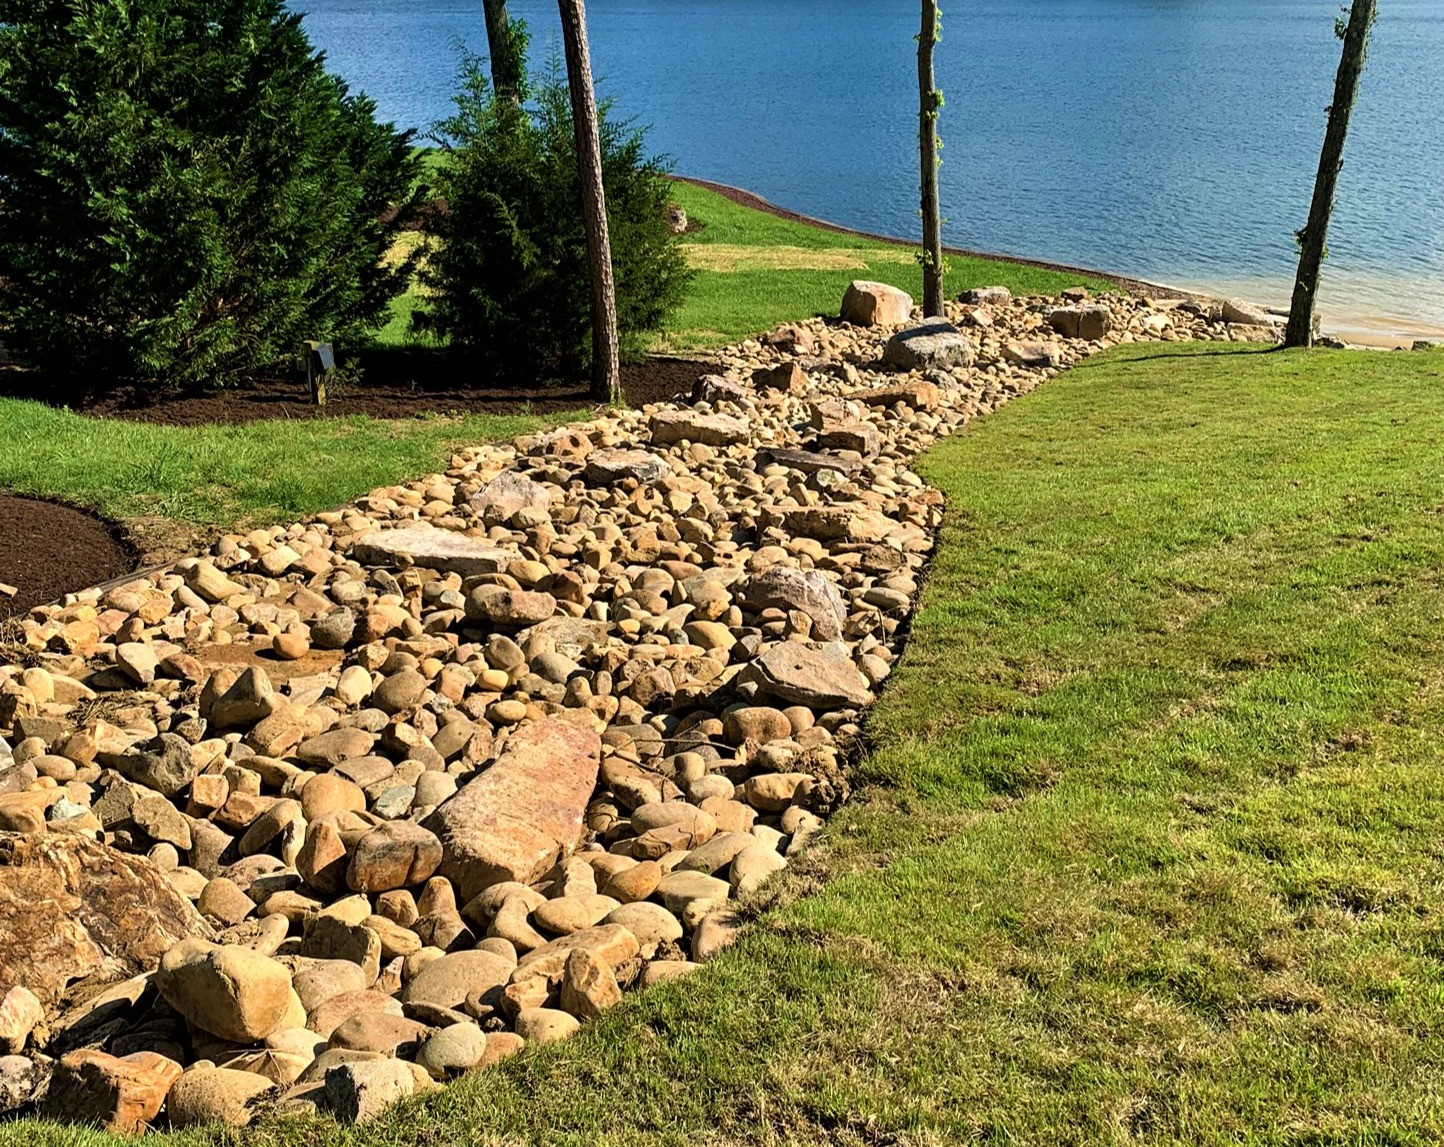
Aesthetics often drive rock selection. People pick smooth, uniform stones because they look clean. Or they choose one size of gravel for the whole bed. This looks unnatural and functions poorly. Nature is messy. A real creek bed has a mix of sizes. From tiny pebbles to massive boulders. This variety isn’t just for show. It’s functional.
Large rocks, or boulders, act as anchors. They break up the flow of fast-moving water, reducing its energy and preventing erosion. Place these strategically along the edges and in the center of the channel. Smaller stones fill in the gaps. They create a natural look and help filter debris. If you use only small gravel, heavy rains can wash it all away. If you use only huge boulders, water might tunnel underneath them, undermining the structure.
Also, consider the shape. Angular rocks lock together better than round river rocks. Round stones roll and shift more easily. For the base layer, angular crushed stone provides a stable foundation. For the top visible layer, you can use smoother river rocks for that polished look. But mix in some irregular shapes to keep everything in place. Think of it like building a wall. You need interlocking pieces to hold firm against the pressure of moving water. Don’t be afraid to get creative, but keep physics in mind.
Making the Channel Too Uniform and Straight
Let’s be honest. Straight lines look fake. In nature, water meanders. It curves around obstacles. It widens in some spots and narrows in others. When you dig a perfect V-shaped trench with straight walls, it looks like a ditch. Not a creek. And functionally, it’s less effective. Straight channels accelerate water flow, which can increase erosion at the outlet point.
Embrace the curves. Make your creek bed wider in some areas and narrower in others. This variation slows down the water, allowing sediment to settle out rather than being carried downstream. It also creates visual interest. A winding path draws the eye through the landscape. It feels more organic. Use your spray-painted guides, but don’t be afraid to soften the edges.
Vary the depth too. A uniform depth is boring and inefficient. Create pools and riffles. Deeper sections can handle larger volumes of water during heavy storms. Shallower areas allow for plant growth and add texture. By mimicking the irregularities of a natural stream, you improve the hydraulic performance. The water moves more gently. It spreads out. This reduces the impact on any single point of your yard. Plus, it just looks better. Who wants a concrete-looking canal in their garden?
Neglecting the Outlet and Erosion Control
You’ve built a beautiful channel. The water flows nicely. But where does it go? This is the most overlooked part of the process. If you dump all that water onto a bare patch of dirt at the end of the creek bed, you’re just moving the problem. You’ll create a new erosion zone. The soil will wash away, creating a gully that gets deeper every time it rains. Eventually, it could threaten your neighbor’s property or your own fence line.
The outlet needs protection. Extend the creek bed into a dispersed area where water can spread out safely. Use large, flat stones at the end to dissipate the energy of the flow. This is called an apron or a splash pad. It breaks the force of the water before it hits the ground. You can also direct the water into a rain garden, a swale, or a existing drainage system like a storm drain (if local codes allow).
Check your local regulations too. In 2026, many municipalities have strict rules about runoff. You can’t just divert water onto public land or neighboring properties. Make sure your outlet is legal and ethical. Consider adding plants at the outlet. Their roots help hold the soil in place. Native grasses and sedges are great for this. They absorb excess moisture and stabilize the bank. Think of the entire system, from start to finish. The journey of the water matters as much as the path it takes.
A dry creek bed isn’t just rocks. It’s a living part of your landscape. Planting along the banks softens the look and adds ecological value. But many people skip this step. Or they plant the wrong things. Don’t put thirsty tropicals in a spot that’s dry most of the time. Choose native, drought-tolerant plants. They’re adapted to the local climate and require less care.
Plants like ornamental grasses, ferns, and creeping thyme work well. Their roots help bind the soil, preventing the banks from collapsing. They also filter pollutants from the runoff. This makes your creek bed an eco-friendly feature. Arrange them in clusters for a natural effect. Avoid rigid rows. Let them spill over the edges slightly. This blurs the line between the hardscape and the softscape.
Maintenance is minimal, but it’s not zero. Check the bed after major storms. Remove any debris like leaves or branches that might block the flow. Occasionally, you might need to rearrange stones that have shifted. Pull weeds if they sneak through the fabric. Rinse the rocks if they get muddy. A little attention goes a long way. It keeps the system functioning and looking fresh. Think of it as a partnership with nature. You provide the structure, and nature does the rest. But you still need to check in now and then.
So, there you have it. Building a dry creek bed is rewarding, but it demands respect for the elements. It’s not just a decoration. It’s a functional piece of engineering disguised as art. By avoiding these common pitfalls, you ensure your project stands the test of time. You save money on repairs. You protect your home from water damage. And you create a space that brings you joy every time you look out the window.
Don’t rush the process. Take the time to observe. Plan carefully. Choose quality materials. And listen to what the land is telling you. When you get it right, the result is magical. A serene, flowing feature that handles the chaos of a storm with grace. It’s a win for your home and a win for your peace of mind. Now, go out there and get your hands dirty. Your yard will thank you.