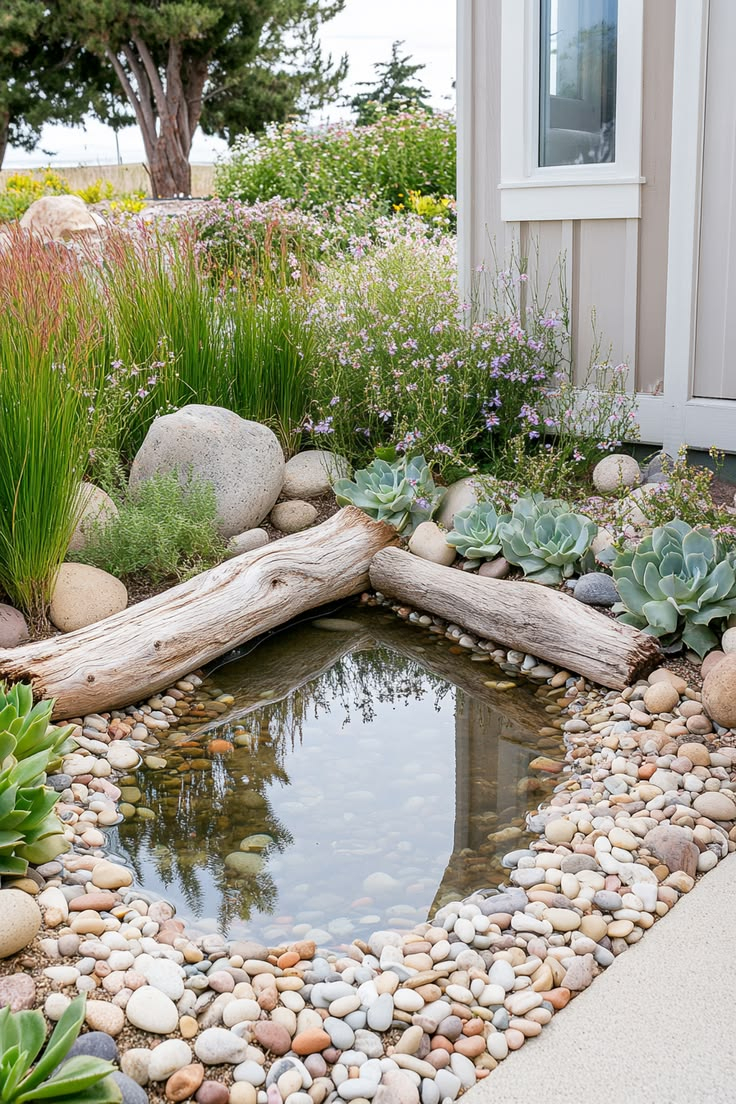
My back still twitches at the memory of clay clods wedged under my fingernails and the dull, rhythmic thud of a mattock striking hidden tree roots in the July heat. I had envisioned a serene aquatic oasis—a tranquil mirror reflecting weeping willow branches, punctuated by the lazy flash of orange koi. What I got instead was a muddy crater that leaked three inches of water a night, a pump that choked on string algae within forty-eight hours, and an escalating sinking fund of regret.
Building a backyard water feature looks deceptively simple on television home-improvement segments. You dig a hole, drop in a heavy black sheet of rubber, fill it with a garden hose, and toss in a few goldfish. Reality, however, is an unforgiving landscape of physics, biology, and civil engineering. When you ignore the subtle mechanics of water weight, soil shifting, and nutrient cycles, nature happily steps in to turn your expensive weekend project into a mosquito-breeding swamp.
The appeal of adding an aquatic ecosystem to a landscape runs deep. For centuries, garden ponds have served as centerpieces of tranquility, bringing the soothing acoustics of moving water and a diverse micro-habitat right to our back patios. Yet, the DIY community is littered with the ghosts of failed water features. Homeowners routinely spend thousands of dollars on equipment only to rip the entire installation out two seasons later because they missed foundational principles of sizing, filtration, and layout.
The Seduction of the Spade: Miscalculating Excavation, Shelves, and Soil Stability
My initial mistake happened before I even touched a shovel, driven by an eagerness to start moving dirt. I mapped out a kidney-shaped footprint on the lawn using a garden hose and immediately began digging straight down like I was sinking an in-ground swimming pool. This is a fatal structural error. Vertical dirt walls cannot support the immense hydrostatic pressure of thousands of gallons of water indefinitely. Within a week of filling, sections of my pristine sidewalls sheared off, dragging heavy sod straight down into the basin and distorting the entire geometry of the liner.
Professional pond builders know that earth is fluid until compacted and terraced. A successful excavation requires stepping down in distinct vertical drops and horizontal benches, typically called plant shelves. These shelves serve a dual purpose: they stabilize the surrounding soil walls against collapse and provide the necessary shallow zones for marginal aquatic plants like irises and rushes to thrive. Furthermore, ignoring the local water table is a gamble that rarely pays off. If you live in an area with heavy seasonal rainfall, an unvented pond shell can literally float out of the ground like a boat when the surrounding earth becomes fully saturated, popping the liner out of place and destroying your stonework.
Digging a pond also means confronting what lies beneath the root zone. I encountered a stubborn network of oak tree roots that I simply chopped through and ignored, assuming the thick pond liner would bridge the gap. It did not. Over the following months, the decaying root material beneath the underlayment decomposed, causing localized settling and creating sharp points of pressure that eventually compromised the rubber. Every boulder, stone, and root stub must be meticulously cleared, and the raw earth must be compacted and armored with a heavy-duty geotextile underlayment before the primary waterproof membrane ever touches the ground.
Choosing the Wrong Armor: Liner Selection, Underlayments, and Punctures
There is a distinct moment of panic that occurs when you realize your hundred-pound rubber liner has a slow, undetectable leak located somewhere beneath three tons of river rock. I had opted for a cheap, thin PVC liner advertised on a discount hardware site, seduced by the initial cost savings. PVC is stiff, difficult to mold around complex shelf contours, and degrades rapidly under ultraviolet exposure when edges are left unprotected from the sun. Within two years, my budget liner became brittle, developing microscopic fissures that drained the water level down to the shallowest shelf and forced a complete, back-breaking teardown.
When it comes to longevity, EPDM (Ethylene Propylene Diene Monomer) rubber is the undisputed industry standard for backyard water features. With a thickness of at least 45 mils, high-grade EPDM offers remarkable elasticity, stretching up to three hundred percent without tearing, and easily conforms to the irregular contours of hand-dug earth shelves. For high-traffic koi ponds or installations exposed to heavy claws from local wildlife, reinforced polyethylene or thicker polypropylene membranes provide an even higher threshold of puncture resistance. Skimping on the liner is the single most expensive mistake a DIYer can make because replacing it requires dismantling every single rock, waterfall weir, and plumbing connection you painstakingly built.
Equally critical to liner longevity is what goes underneath it. Skipping a professional-grade non-woven geotextile underlayment is an invitation for disaster. Sharp stones, jagged shale, burrowing rodents, and aggressive perennial roots will slowly work their way upward through the soil profile. The underlayment acts as a shock absorber and a protective cushion, shielding the delicate waterproof membrane from mechanical stress. When installing the liner, dragging it across sharp rocks or wearing heavy work boots while positioning it can cause instant punctures. Every square inch of the excavation floor must be inspected, cleared of debris, and padded before the membrane is gently unfolded and settled into place by the weight of the water itself.
The Plumbing Paradox: Undersized Pumps, Hidden Leaks, and Flow Dynamics
Water movement is the lifeblood of any healthy garden pond, yet my initial hydraulic setup was a masterclass in inefficiency. I bought a cheap submersible pump based solely on its attractive upfront price tag, completely ignoring the dynamic head pressure calculations. Head pressure accounts for the vertical height the water must be pumped, the friction loss inside the flexible tubing, and the resistance created by UV clarifiers and filter boxes. My little pump struggled to push a pathetic trickle up to the waterfall spillway, leaving the biological filter starved of oxygen and turning the main body of the pond into a stagnant, nutrient-rich soup.
To achieve a healthy aquatic balance, your entire volume of pond water should ideally cycle through the filtration system at least once every one to two hours. If you have a thousand-gallon pond, you need a pump capable of delivering a true flow rate of five hundred to a thousand gallons per hour after accounting for head loss. Furthermore, rigid PVC piping is vastly superior to corrugated flexible tubing for underground runs. Corrugated pipe creates immense internal friction that strangles pump output and catches organic debris in its ridges, eventually clogging the system and breeding harmful anaerobic bacteria.
Another common hydraulic trap is the improper placement and concealment of tubing and electrical lines. In my rush to finish, I buried cheap garden hoses loosely in the dirt and ran extension cords across the lawn. This created massive headaches when lines inevitably kinked under shifting soil or were accidentally punctured during routine garden weeding. All underground plumbing should be housed within protective sleeves or conduits, and anti-siphon check valves must be installed strategically to prevent the pond from completely draining backward into your filter pit if a power failure occurs or a hose disconnects.
The Biological Desert: Why Chemical Clears Fail and Filtration Matters
For the first month of my pond’s existence, I waged a relentless, losing war against green water. Every time the water turned pea-soup murky, I panicked, drained half the basin, scrubbed the liner with a brush, and refilled it with chlorinated tap water. This aggressive cycle destroyed the nascent beneficial bacteria colonies, reset the nitrogen cycle back to zero, and actually fueled explosive algae blooms by dumping fresh nitrates and minerals straight into the system. I learned the hard way that a clear pond is not achieved through chemical warfare or sterile cleanliness; it is achieved through complex biological management.
A balanced pond requires a two-tiered filtration approach: mechanical and biological. Mechanical filtration—such as skimmer baskets and filter mats—removes physical debris like leaves, twigs, and fish waste before it can rot on the bottom. Biological filtration provides a sprawling surface area for beneficial nitrifying bacteria (Nitrosomonas and Nitrobacter) to colonize. These microscopic workhorses convert toxic ammonia excreted by fish into nitrites, and subsequently into relatively harmless nitrates that aquatic plants utilize as fertilizer. Without adequate bio-media capacity, your water parameters will spike, creating a toxic environment that stresses or kills your fish population.
UV-C (Ultraviolet-C) clarifiers are another essential tool for combating single-celled green water algae. When water passes over a UV bulb, the radiation destroys the cellular structure of microscopic algae, causing them to clump together so the mechanical filter can trap them. However, a UV clarifier is merely a band-aid if your pond is overloaded with nutrients from overfeeding fish or an excess of rotting organic matter from surrounding trees. Striking the right balance means calculating your fish stocking density carefully—general guidelines suggest allowing roughly ten inches of adult fish length per hundred gallons of water—and avoiding the temptation to overfeed your aquatic pets.
The Margin Magic: Edge Finishing, Splash-Out, and Landscaping Integration
The most glaring giveaway of an amateur pond build is the "bathtub ring" effect—neat rows of uniform round boulders stacked like bowling balls around the perimeter, with a glaring strip of black rubber liner peeking out just above the water line. When I first finished filling my pond, the exposed liner looked harsh and artificial, completely failing to blend into the surrounding landscape. Worse yet, because I had failed to level the perimeter rim precisely, a low spot on the eastern edge allowed water to constantly wick out into the surrounding soil, causing a mysterious, steady drop in the water level that I initially mistook for a liner leak.
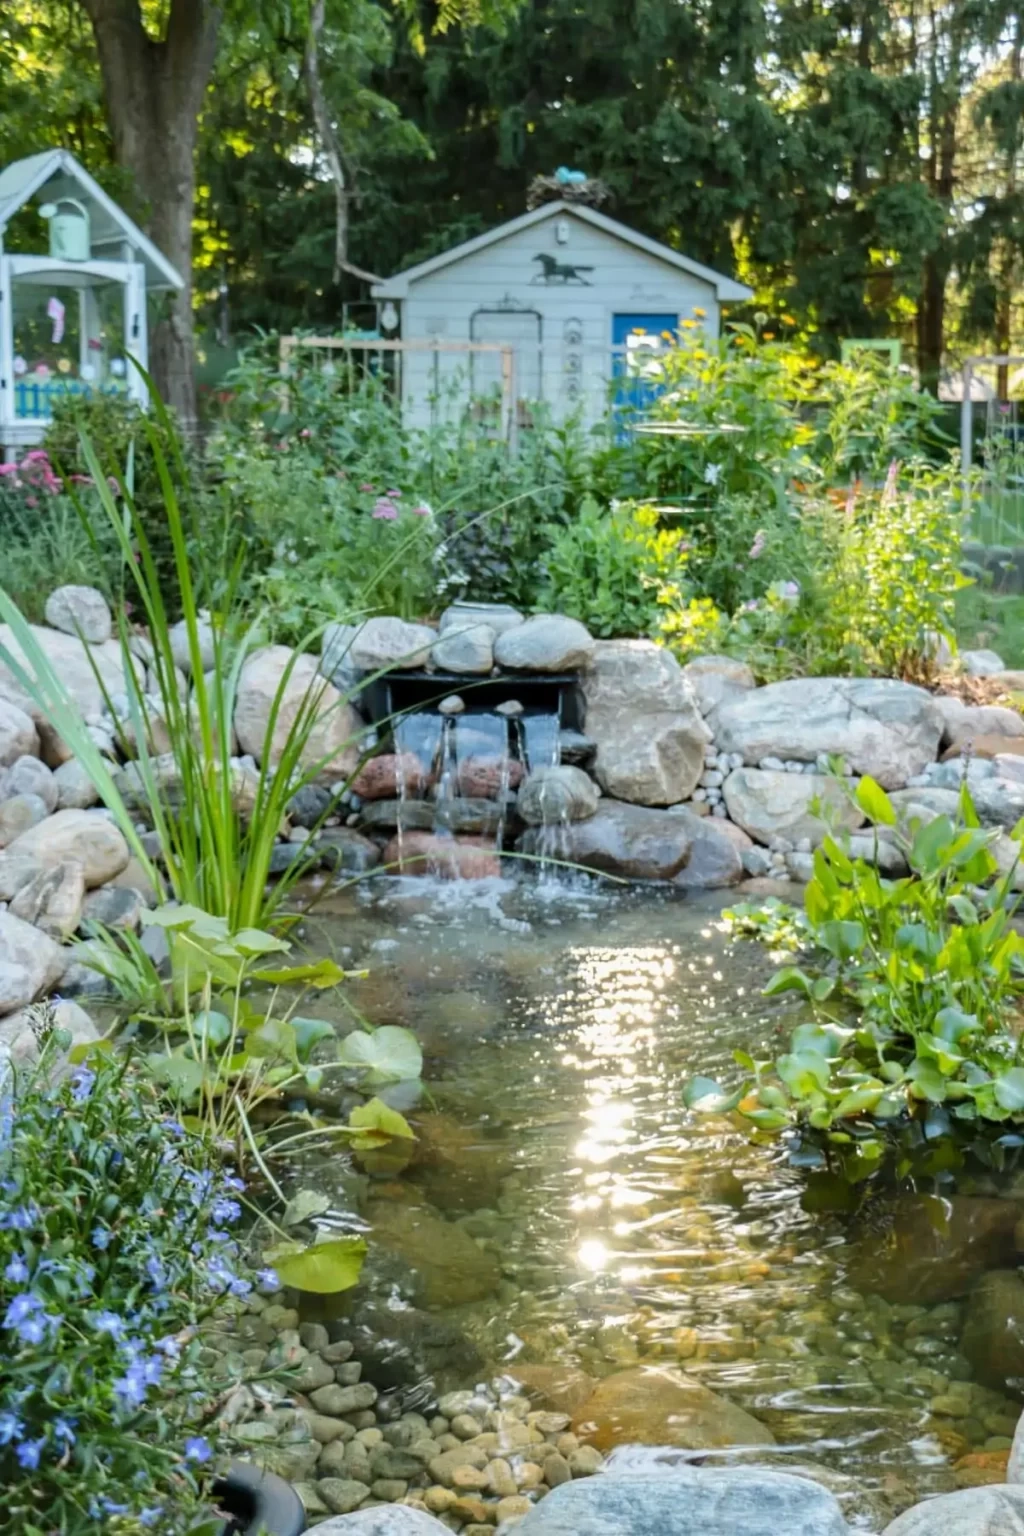
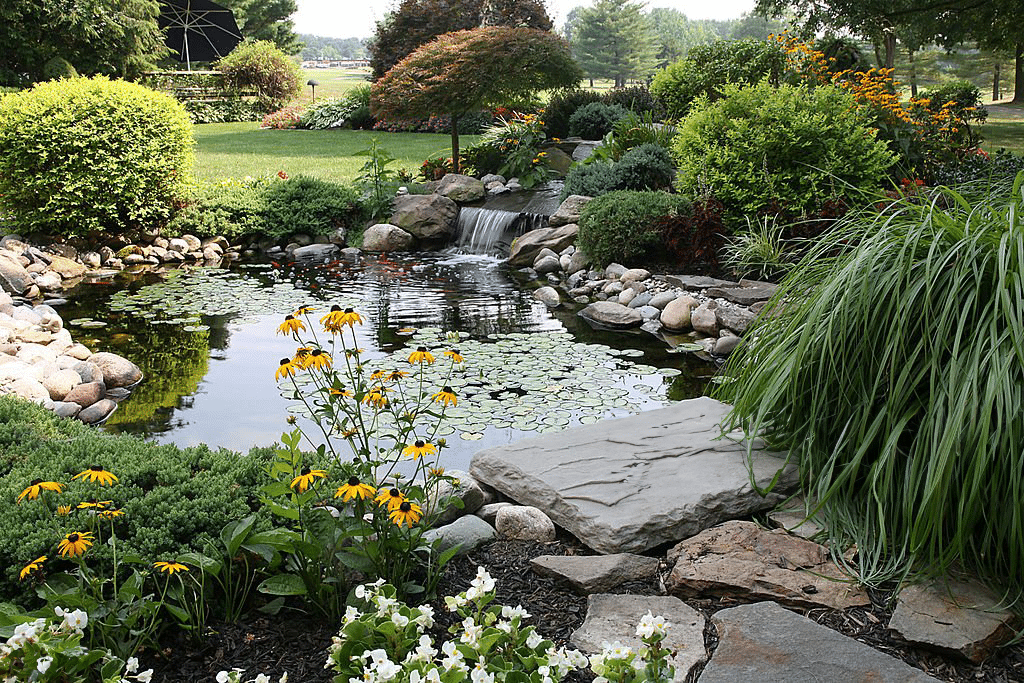
Creating a naturalistic edge requires patience and an understanding of capillary action. To prevent water from wicking out of the pond into the surrounding earth, the edge must be built slightly higher than the surrounding grade, and the liner must be folded over a vertical earth dam before being concealed. Large, irregular flat stones should overhang the water’s edge by a few inches, casting natural shadows and hiding the synthetic membrane entirely. Creeping perennials, mosses, and marginal plantings can then be tucked into the crevices between boulders, softening the transition from land to water.
Splash-Out is another overlooked physics problem. If your waterfall spillway is too high or angled too steeply, wind and forceful water impact will launch droplets over the edge of the liner, quietly draining hundreds of gallons of water into the garden beds every week. Installing splash mats—flat stones placed strategically where water lands—disperses the kinetic energy and keeps the water safely inside the basin. Proper grading around the entire perimeter ensures that heavy rain runoff flows away from the pond rather than carrying lawn fertilizers, pesticides, and silt directly into your delicate aquatic ecosystem.
Seasonal Resilience: Freezing Winters, Summer Evaporation, and Maintenance Realities
By November of my pond’s first year, the initial excitement had faded into dread as I watched fallen leaves transform the water surface into a soggy carpet of organic rot. I had neglected to install a pond net during the autumn leaf drop, and as the debris settled to the bottom, it released toxic gases under the ice layer that winter. When spring finally arrived, the resulting foul-water explosion killed half my goldfish and left me spending entire weekends scooping out reeking black muck with a handheld net.
Preparing a garden pond for seasonal shifts requires proactive maintenance schedules. In autumn, netting the pond before heavy leaf drop saves countless hours of cleanup. In freezing climates, maintaining an opening in the ice during deep winter is non-negotiable; toxic gases generated by decomposing matter must be allowed to vent, and oxygen must reach any fish resting in the warmer, deeper zones at the bottom of the pond. A floating pond de-icer or a dedicated aeration bubbler keeps a small surface hole open without disturbing the thermal layers where fish enter dormancy.
Summer brings the opposite challenge: extreme evaporation. In arid climates or during intense heatwaves, you may lose an inch or more of water daily to evaporation. Relying entirely on a garden hose to top off the pond can be dangerous if you forget to turn it off, as chlorinated water floods the system and shocks the fish. Installing an automatic fill valve connected to a dechlorinating inline filter provides peace of mind. Furthermore, establishing a regular routine of water testing for pH, ammonia, nitrite, and hardness ensures that minor chemical imbalances are caught and corrected before they cascade into biological disasters.
Step-by-Step Practical Implementation Guide
- Step 1 (Site Selection and Layout): Choose a location that receives 4 to 6 hours of direct sunlight daily for plant growth, avoiding low-lying areas prone to runoff and keeping the water feature away from heavy leaf-dropping trees. Use a garden hose or rope to map out the exact contours and mark utilities before digging.
- Step 2 (Excavation and Terracing): Dig the basin with stepped shelves (at least 8-12 inches wide) for marginal plants and stability, ensuring the perimeter rim is perfectly level across all sides to prevent water loss and liner exposure.
- Step 3 (Underlayment and EPDM Liner Installation): Clear all rocks, roots, and sharp debris from the excavated earth, compact the soil, and install a heavy-duty non-woven geotextile underlayment. Lay the 45-mil EPDM membrane loosely into the basin, letting the weight of filling water gently stretch and mold the rubber into place.
- Step 4 (Filtration and Plumbing Integration): Size your submersible pump and UV-C clarifier according to total water volume and head pressure requirements, utilizing rigid PVC or high-grade kink-free tubing to connect the skimmer box, biological filter, and waterfall weir.
- Step 5 (Edge Treatment and Ecosystem Balancing): Conceal the exposed liner with overhanging flagstones and boulders, establish marginal plants on the shelves, introduce beneficial bacteria, and slowly stock fish after allowing the water parameters to stabilize through the initial nitrogen cycle.
Common Pitfalls and Field-Tested Workarounds
- Pitfall 1 (Uneven Perimeter Rim): Water finds its own level instantly; if one side of your pond edge is half an inch lower than the rest, water will constantly spill out into the dirt. Workaround: Always use a long carpenter’s level laid across a straight 2×4 board spanning the pond excavation to check edge levels continuously during digging and rock placement.
- Pitfall 2 (Burying Electrical Lines Without Conduit): Exposing low-voltage or 120V lines directly to garden soil invites accidental shovel strikes and rodent chewing. Workaround: Run all underwater and underground cables through heavy-duty PVC electrical conduit buried at least twelve inches deep.
- Pitfall 3 (Overstocking Fish Too Early): Adding a dozen large koi to a newly filled pond before the biological filter has matured leads to immediate ammonia poisoning and fish loss. Workaround: Wait at least two to three weeks after filling for beneficial bacteria colonies to establish, and introduce hardy goldfish or snails before investing in expensive koi.
- Pitfall 4 (Using Treated Tap Water Directly): Filling a pond with straight municipal tap water introduces chlorine and chloramines that instantly kill beneficial bacteria and sensitive fish gill membranes. Workaround: Always treat fresh makeup water with a professional liquid dechlorinator or install a carbon-block hose filter before it enters the basin.
- Pitfall 5 (Ignoring Winter Gas Venting): Letting the pond freeze completely solid traps toxic decomposition gases under the ice, suffocating fish life. Workaround: Utilize a floating thermostatically controlled pond de-icer combined with a gentle aeration pump to maintain an open vent hole all winter long.
Building a garden pond is ultimately an exercise in humility. Nature cannot be bullied into submission with high-powered tools or synthetic chemicals; it must be understood, guided, and respected. My initial disaster taught me that patience during the planning and excavation phases pays massive dividends later. When you take the time to calculate head pressure, select commercial-grade EPDM liners, establish robust biological filtration, and seamlessly integrate the edges into your landscape, the result is more than just a water feature—it becomes a living, breathing ecosystem that anchors your entire outdoor living space.
The sound of water trickling over weathered mossy stones on a quiet summer evening carries a restorative power that washes away the exhaustion of daily life. Watching dragonflies dart across the surface, watching frogs claim the marginal shelves, and seeing healthy fish cruise through crystal-clear depths transforms a backyard into a sanctuary. Avoid the shortcuts, respect the engineering physics of water and soil, and your garden pond will reward you with decades of low-maintenance beauty, wonder, and profound horticultural peace.