You know that sinking feeling. You’ve spent hours sanding, maybe even days building that beautiful oak bookshelf or refinishing your grandma’s pine table. You wipe on the stain, step back to admire your work, and… yikes. It looks like a map of a muddy island chain. Dark spots here, pale patches there. It’s blotchy. And it’s heartbreaking.
We’ve all been there. In 2026, with all the advanced finishes and "easy-application" products on the market, you’d think this problem would be solved. But it isn’t. Why? Because wood is alive. Well, it was. And it remembers every knot, every grain shift, and every density change. Those memories show up as blotches when you slap a liquid color on top without asking permission first.
But here’s the good news. You don’t have to live with it. You don’t have to strip it all off and start over (though sometimes that’s the nuclear option). Most of the time, blotchiness is a prevention game. It’s about what you do before the can opens. This guide is your roadmap to stopping those ugly splotches before they even think about forming. Let’s get into it.
Understanding Why Wood Gets Blotchy in the First Place
So, why does this happen? It’s not bad luck. It’s physics and biology having a little party on your project. Wood is porous, but it’s not uniformly porous. Think of it like a sponge that has some parts made of dense rubber and other parts made of loose cotton. When you pour water (or stain) on it, the cotton soaks it up instantly, turning dark. The rubber repels it, staying light. That contrast is what we call blotching.
Softwoods like pine, fir, and spruce are the usual suspects. They have wide variations in density between their earlywood (the light, fast-growth rings) and latewood (the dark, slow-growth rings). The earlywood acts like a straw, sucking up stain like crazy. The latewood is tighter, resisting absorption. Hardwoods can do it too, especially cherry and maple, which have tight grains that can close up if you sand them wrong, trapping stain in weird pockets.
In 2026, we’re seeing more people work with reclaimed wood and exotic species thanks to sustainability trends. These woods are even more unpredictable. Reclaimed pine might have old oil residues deep in the grain. Exotic woods might have natural oils that fight your water-based stains. Knowing why your specific wood is acting up is half the battle. If you understand that the wood is absorbing unevenly because of density differences, you stop fighting the wood and start working with it.
The Critical Sanding Sequence You Can’t Skip
Let’s talk sanding. Most folks think sanding is just about making things smooth. Nope. It’s about opening the pores consistently. If you skip grits or jump straight to fine paper, you’re basically polishing the surface shut. This is where the "burnishing" effect happens. The wood fibers get flattened and compressed, creating a barrier that stain can’t penetrate evenly.
The golden rule for 2026 prep? Stick to the sequence. Start coarse enough to remove mill marks or old finish, usually around 80 or 100 grit. Then move to 120, then 150, and stop at 180 for most softwoods. For hardwoods, you can go to 220, but be careful. Going beyond 220 on woods like maple or pine often polishes the surface too much, leading to more blotching because the stain sits on top instead of soaking in.
Here’s a pro tip that saves energy and results: use a sanding block or an orbital sander with a vacuum attachment. Hand sanding is great for final touches, but machines ensure consistent pressure. Inconsistent pressure creates uneven surfaces, which leads to uneven stain absorption. Also, always sand with the grain. Crossing the grain creates tiny scratches that trap stain, looking like dark streaks later. Take your time here. Rushing the sanding is the fastest way to guarantee a blotchy mess.
Using Pre-Stain Conditioners Effectively
Okay, you’ve sanded perfectly. Now what? For blotch-prone woods, this is the magic step: pre-stain conditioner. Think of it as a primer for your wood’s appetite. It partially seals the porous areas so they don’t gulp down all the stain at once. This levels the playing field, allowing the denser areas to catch up in color absorption.
Not all conditioners are created equal. In 2026, we have water-based and oil-based options. Match your conditioner to your stain. If you’re using an oil-based stain, use an oil-based conditioner. Same for water-based. Mixing them can lead to adhesion issues or cloudy finishes. Apply the conditioner generously with a rag or brush, let it soak in for about 5-15 minutes (check the can, brands vary), and then wipe off the excess. Don’t let it dry on the surface.
Timing is everything. You usually need to apply your stain within two hours of conditioning. If you wait too long, the conditioner cures fully and blocks the stain entirely. If you apply too soon, it might not have done its job of regulating absorption. It’s a delicate dance. Test this on a scrap piece first. Seriously. A five-minute test on a hidden corner or scrap offcut can save you five hours of stripping later.
Choosing the Right Stain Type for Your Project
Not all stains are built the same. In recent years, gel stains have become a huge favorite for DIYers tackling blotchy woods. Why? Because they sit on top of the wood rather than penetrating deeply. This means the density variations matter less. Gel stains are thicker, like pudding, so they don’t rush into the open pores of pine or cherry. They give you more control over the color intensity and reduce the risk of dark splotches.
Traditional penetrating stains are still great for hardwods with uniform grain, like oak or ash. But for pine, maple, or birch? They’re risky. If you love the look of traditional stain, consider using a toner instead. Toners are lightly pigmented sealers that add color without the heavy penetration. They’re more forgiving and easier to layer if you want a darker shade.
Also, pay attention to the base. Water-based stains have come a long way in 2026. They dry faster, have less odor, and raise the grain less than they used to. However, they dry fast, which means you have to work quickly to avoid lap marks. Oil-based stains stay wet longer, giving you more time to blend, but they require mineral spirits for cleanup and take longer to cure. Choose based on your skill level and ventilation. If you’re a beginner, gel or water-based might be your best friends.
Application Techniques That Ensure Even Coverage
You’ve prepped, conditioned, and picked your stain. Now, how do you put it on? Dumping a puddle and spreading it around is a recipe for disaster. The key is consistency and speed. Use a high-quality natural bristle brush for oil stains or a synthetic one for water-based. Or, use a clean, lint-free rag. Rags are great because they let you feel the wood and control the amount of stain being applied.
Apply the stain in the direction of the grain. Work in manageable sections, maybe 2-3 feet at a time. Don’t try to do the whole table at once. Apply a wet coat, let it sit for a few minutes (again, check the can for recommended penetration time), and then wipe off the excess. This wiping step is crucial. It removes the stain that hasn’t penetrated, preventing it from drying sticky and dark on the surface.
Watch out for "laps." This is when you overlap a wet area with a previously applied area that’s starting to dry. It creates a dark line. To avoid this, keep a "wet edge." Always blend your new section into the previous one while it’s still wet. If you’re staining a large deck or floor, work with a partner. One applies, one wipes. It’s faster and ensures a more uniform look. And please, wear gloves. Stain on skin is no joke.
Troubleshooting and Fixing Minor Blotches
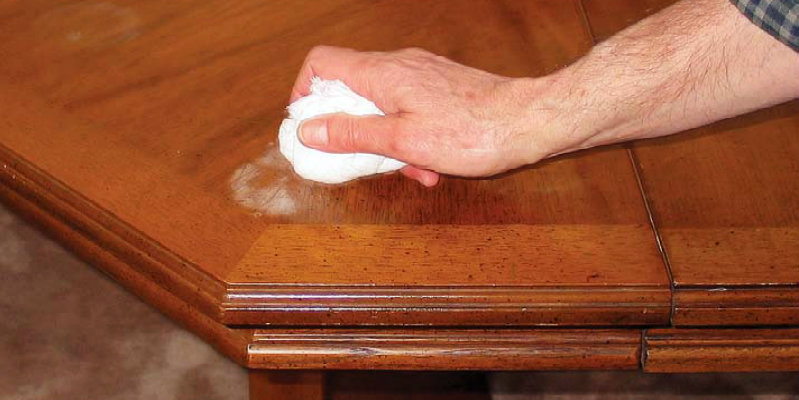
Despite your best efforts, maybe you still got a few blotches. Don’t panic. In 2026, we have better fix-it tools than ever. If the blotches are minor, you can often blend them out. Take a clean rag dampened with the appropriate solvent (mineral spirits for oil, water for water-based) and gently rub the dark spot. This lifts some of the stain and blends it into the surrounding area. It takes patience, but it works.
If that doesn’t work, you might need to lighten the dark spots. Some woodworkers use a bit of bleach or oxalic acid on the dark areas to lift the color, then restain. This is advanced stuff, so test it first. Another option is to use a glaze or a tinted topcoat. Instead of trying to fix the stain underneath, you apply a semi-transparent colored layer over everything. This unifies the tone and hides minor inconsistencies.
For severe cases, unfortunately, sanding it off and starting over might be the only way. But before you grab the scraper, try a "wash coat." This is a very thin layer of shellac or lacquer diluted with solvent. It seals the wood slightly. You can then apply a gel stain over it. The wash coat prevents the stain from going too deep, giving you a second chance without full removal. Remember, perfection is rare in woodworking. Character is common. Sometimes, a little blotch adds history.
Stopping blotchy stains isn’t about magic. It’s about method. It’s about respecting the wood and understanding how it drinks. By following a strict sanding sequence, using pre-stain conditioners, choosing the right product for your species, and applying with care, you’re setting yourself up for success. The 2026 landscape of wood finishing offers us better products and more knowledge than ever before. Use it.
Don’t be afraid to test. Always, always test on scrap. It’s the cheapest insurance policy you can buy. And remember, woodworking is a journey. Even the pros get blotches sometimes. The difference is they know how to prevent it, or how to fix it without losing their mind. Take a breath. Prep well. Stain smart.
Your projects deserve to look their best. And you deserve the satisfaction of a job well done. So grab that sandpaper, get that conditioner ready, and go make something beautiful. No blotches allowed. Well, maybe just a few. They add character, right?