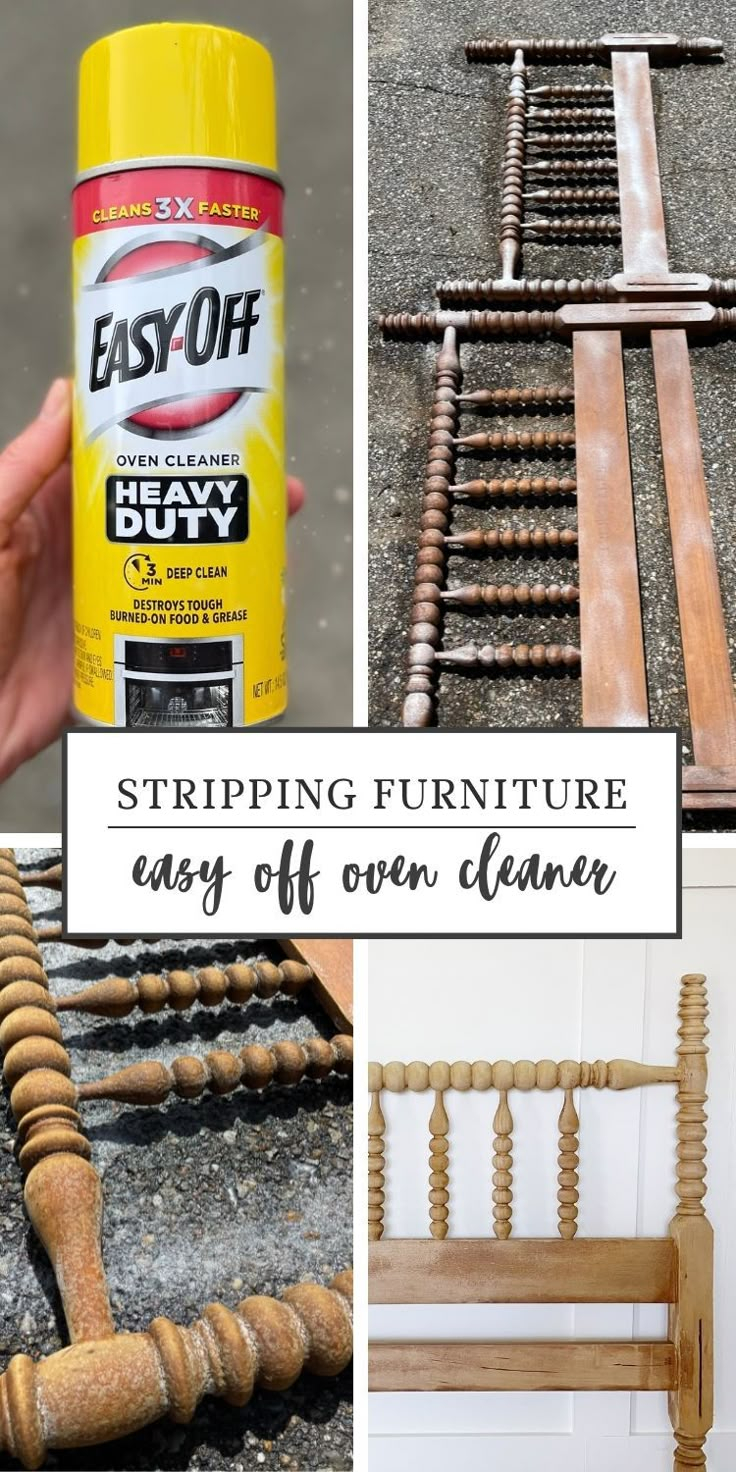
Have you ever run your hand over an old dresser or a chunky window frame and felt… something? Maybe it was the weight of it. Or the way the light hit a corner that wasn’t quite square. There is a story trapped under those layers of beige, white, or that awful avocado green from the seventies. We often rush to cover things up. We slap on a new coat of trendy gray or slap some wallpaper over the cracks. But what if we stopped hiding?
Stripping paint isn’t just about home improvement. It’s an act of discovery. It’s archaeology in your own living room. In 2026, the trend isn’t just about "flipping" furniture for a quick buck anymore. It’s slower. It’s more intentional. People are tired of the toxic smell of chemical strippers that burn your nose hairs and leave you with a headache that lasts for days. They want to know what’s underneath. They want the grain. The knots. The imperfections that make wood real.
This guide is for anyone who has ever looked at a painted piece of wood and wondered, "What are you?" We’re going to walk through the gentle ways to remove that old skin. No harsh chemicals if we can help it. No rushing. Just you, the wood, and a little bit of patience. It’s not always easy. Sometimes it’s messy. But when you see that first swirl of oak or cherry appear? It’s worth every minute.
Why Go Natural? The Shift Away from Toxic Strippers
Let’s be honest for a second. Traditional paint strippers are nasty stuff. For decades, we relied on methylene chloride and other heavy-duty solvents to melt paint away. They worked fast. Too fast, sometimes. They’d eat through the finish, the paint, and often the wood itself if you weren’t careful. But the cost to our health and the environment was high. Breathing in those fumes is dangerous. Disposing of the sludge is a headache. And in 2026, we know better.
The shift toward natural methods isn’t just a hipster trend. It’s a necessity. Modern research shows that indoor air quality matters more than we thought. When you use a chemical stripper inside your home, those volatile organic compounds (VOCs) linger. They stick to your curtains. They settle in your carpets. By choosing mechanical or natural removal methods, you’re keeping your home safer. You’re protecting your lungs. And you’re being kinder to the planet, since you aren’t pouring toxic goo down the drain.
But there’s another reason to go gentle. Chemical strippers can raise the grain of the wood. They can dry it out. If you’re dealing with an antique or a delicate piece of millwork, harsh chemicals might cause more harm than good. They can bleach the wood or leave behind residues that prevent new finishes from sticking properly. Natural methods, like heat, scraping, and sanding, give you control. You can feel the wood. You can stop when you’ve gone deep enough. It’s a conversation with the material, not an assault on it.
Plus, let’s talk about satisfaction. There is a primal joy in scraping away a layer of gunk and seeing clean wood emerge. It’s tactile. It’s real. You aren’t just waiting for a chemical to do the work. You are part of the process. This connection makes the final result feel more earned. When you finally apply that oil or wax, you know every inch of that surface. You respected it. And that respect shows in the final shine.
The Heat Method: Softening History Without Harm
One of the most effective gentle methods is using heat. Now, I’m not talking about a blowtorch. That’s too aggressive for most folks and risks scorching the wood or starting a fire. We’re talking about infrared heat guns or even specialized electric heat plates. These tools warm the paint just enough to soften it. The bond between the paint and the wood breaks down. The paint lifts. It’s like magic, but it’s just physics.
In 2026, infrared technology has gotten cheaper and safer. Older heat guns used to get so hot they could burn the wood instantly. Newer models have temperature controls. They distribute heat evenly. This is crucial. You hold the gun a few inches away from the surface. You move it slowly. You watch the paint bubble. Not boil—bubble. Once it’s soft, you take a scraper. A simple putty knife or a dedicated paint scraper works wonders. You gently push the paint off. It comes away in ribbons. It’s oddly satisfying.
The key here is patience. If you rush, you’ll dig into the wood. You want to glide the scraper across the surface. Let the heat do the work. If the paint is stubborn, apply more heat. Don’t force it. This method is great for flat surfaces like doors, table tops, and window sashes. It’s less effective on intricate carvings, where the heat might not reach evenly. But for large areas, it’s unbeatable. It produces no dust. It creates no toxic fumes (as long as you aren’t burning lead paint, which we’ll discuss later). It’s clean.
However, there is a catch. You need to be careful with older homes. If your house was built before 1978, there’s a good chance the paint contains lead. Heating lead paint can create toxic fumes. If you suspect lead, test it first. There are cheap test kits available at hardware stores. If it’s positive, skip the heat. Move to the wet scraping or chemical-free gel methods we’ll talk about next. Safety first. Always. But if it’s standard latex or oil-based paint from the last few decades, heat is your best friend.
Scraping and Sanding: The Elbow Grease Approach
Sometimes, technology isn’t the answer. Sometimes, it’s just you and a block of sandpaper. This is the most labor-intensive method, but it’s also the most controlled. You can’t accidentally burn the wood. You can’t inhale fumes. It’s just friction. For small projects, like a chair leg or a picture frame, this is often the best route. It allows you to feel the contours of the wood. You learn its shape.
Start with coarse grit sandpaper. Maybe 80 or 100 grit. You’re not trying to polish it yet. You’re trying to remove the bulk of the paint. Use a sanding block, not just your fingers. This keeps the surface flat. If you use your fingers, you’ll create dips and valleys. Nobody wants a wavy table top. Sand with the grain. Always with the grain. Going against it creates scratches that are a nightmare to fix later. It’s a simple rule, but easy to forget when you’re tired.
Once the bulk of the paint is gone, switch to finer grits. 150, then 220, then maybe 320 if you want a super smooth finish. Each step removes the scratches from the previous one. It’s a progression. You’ll see the wood change color. It will get lighter. Cleaner. The grain will pop. This is where the beauty reveals itself. You might find a knot you didn’t know was there. Or a interesting variation in the wood tone. These aren’t flaws. They’re features.
For larger areas, an orbital sander can save your arms. But be careful. Power sanders can remove wood quickly. Too quickly. Keep the sander moving. Don’t press down hard. Let the tool do the work. And wear a mask. Even natural wood dust isn’t great for your lungs. Some woods, like oak or mahogany, can cause allergic reactions. A simple N95 mask is a small price to pay for healthy breathing. After sanding, wipe the piece down with a tack cloth. This removes the fine dust. Now you’re ready for the finish.
Natural Solvents and Bio-Strippers: The Modern Middle Ground
What if the paint is too thick for sanding? Or the piece is too delicate for heat? This is where bio-strippers come in. These are the new generation of paint removers. They aren’t "natural" in the sense that you made them in your kitchen, but they are far safer than the old-school chemical bombs. They use plant-based solvents, like citrus terpenes or soy gel, to break down paint. They smell like oranges or lemons instead of acetone. It’s a huge difference.
These products work by soaking into the paint. They swell it up. You apply a thick layer with a brush. Then you wait. This is the hard part. You have to let it sit. Sometimes for hours. Sometimes overnight. Cover it with plastic wrap to keep it from drying out. This helps the solvent penetrate deeper. When you come back, the paint will look like wrinkled skin. It’s ready to scrape off. It comes away easily, often in one go.
The benefit here is safety. Most bio-strippers are non-flammable. They don’t emit harsh fumes. You can use them indoors with just a window open. They are also biodegradable, so cleanup is easier. You can often wash the residue off with water and soap. This makes them ideal for indoor projects where ventilation is poor. Like a hallway or a bedroom. They are gentler on the wood too. They don’t raise the grain as much as water-based methods.
But they aren’t perfect. They are slower. Much slower. If you’re in a hurry, this isn’t the method for you. They can also be more expensive than traditional strippers. And they might not work on very old, hardened enamel paints. You might need to apply a second coat. That’s okay. It’s still faster than sanding by hand. And it’s safer. For many people in 2026, the trade-off is worth it. Peace of mind is priceless. Plus, your house won’t smell like a chemistry lab for a week.
Dealing with Details: Carvings, Corners, and Curves
Flat surfaces are easy. But what about the spindles on a Victorian chair? Or the carved flowers on a headboard? This is where the real challenge lies. You can’t use a big scraper. You can’t use a large sander. You need to get creative. This is the detail work. It requires small tools and a steady hand. It’s tedious, yes. But it’s also where the character of the piece lives.
Start with dental picks or small wire brushes. These tools can get into the tiny crevices. Gently pick away the softened paint. If you used a bio-stripper, this is much easier. The paint is soft. You can coax it out. If you’re sanding, use folded sandpaper. Fold a small piece of sandpaper into a point. Push it into the corners. Twist it. It acts like a tiny file. It takes time. You might spend an hour on one spindle. That’s normal.
For intricate carvings, consider using a rotary tool with a soft brush attachment. Be careful. These tools spin fast. They can gouge the wood if you’re not gentle. Use a low speed. Let the bristles do the work. Don’t press hard. You’re dusting the paint away, not grinding the wood down. Another trick is to use steel wool. Fine grade steel wool can conform to curves. It gets into the nooks and crannies. It’s abrasive enough to remove paint but soft enough not to scratch deep.
Don’t forget the backs of pieces. Often, people only strip the front. But if you’re revealing natural wood, you should do the whole piece. Otherwise, it looks unfinished. It looks like a mask. Strip the back. Sand it. Maybe leave it rougher if it’s not visible, but clean it. This consistency matters. It shows you cared about the whole object, not just the showy parts. It adds integrity to your work. And when you move the piece, you won’t have ugly patches staring at you.
So, you’ve done it. The paint is gone. The wood is bare. It looks amazing. But you’re not done. Raw wood is vulnerable. It absorbs moisture. It stains easily. It can dry out and crack. You need to protect it. But don’t just slap on a thick polyurethane. That’s what we were trying to get away from, right? Thick plastics hide the wood. They make it look like plastic. We want to enhance the natural beauty, not bury it again.
Start with a wood conditioner or a pre-stain treatment. This helps the wood absorb finish evenly. Some woods, like pine or cherry, blotch easily. A conditioner prevents that. Then, choose your finish. For a natural look, try tung oil or linseed oil. These penetrate the wood. They harden inside the fibers. They provide protection from within. They give a warm, matte glow. They feel like wood, not plastic. You can apply them with a rag. Just wipe on, wait, wipe off. Easy.
If you want more durability, consider a hard-wax oil. These are popular in 2026 for good reason. They combine the protection of wax with the penetration of oil. They are tough. They resist water and stains. But they still look natural. They can be repaired easily. If you get a scratch, you just rub a little more oil on it. No need to sand the whole table again. It’s forgiving. It’s practical. And it smells nice.
Finally, buff it. Use a clean, soft cloth. Buff the surface until it shines. This brings out the depth of the grain. It makes the wood feel silky. Step back. Look at it. Notice the swirls. The color variations. The history. You didn’t just remove paint. You revealed a soul. You gave an old object a new life. And you did it without harming yourself or the planet. That’s a win. Enjoy it. Sit in the chair. Eat off the table. Let it live.
Stripping paint is a journey. It’s not always linear. You’ll hit snags. You’ll get tired. Your arms will ache. But the result is something mass-produced furniture can never match. It’s unique. It’s yours. In a world of disposable goods, taking the time to restore something old is a radical act. It says that beauty lasts. That quality matters. So grab your scraper. Put on your music. And start digging. You never know what you’ll find.