You’ve spent hours picking out the perfect path lights. You’ve mapped out where the uplights should hit that old oak tree. You’ve even dug the trenches. But then you flip the switch, and… disappointment. The lights near the transformer are blindingly bright, while the ones at the end of the run look like dying fireflies. Or worse, the whole system flickers and dies after a week.
It’s frustrating. It feels like you wasted money. But here’s the secret nobody tells you at the hardware store: the problem probably isn’t the lights. It’s the box powering them. The transformer is the heart of your low-voltage system, and if you get the size wrong, the whole body suffers. In 2026, with LED technology more efficient than ever, the rules have shifted slightly, but the core physics remain the same. Let’s fix this before you buy another bulb.
The "Exact Match" Trap and Why You Need Breathing Room
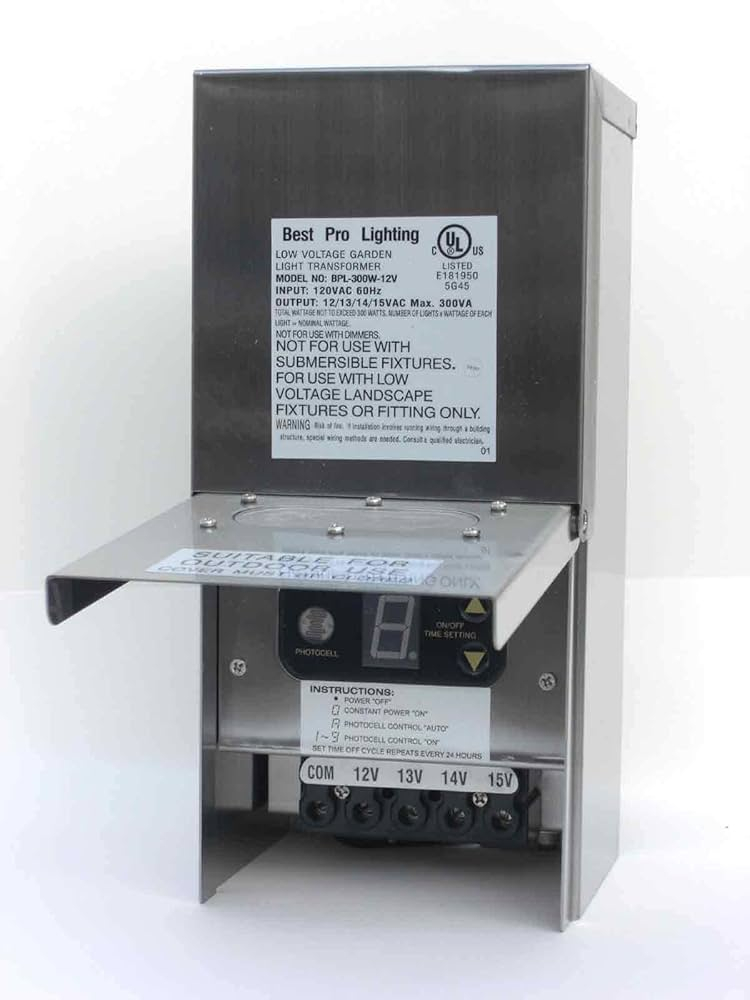
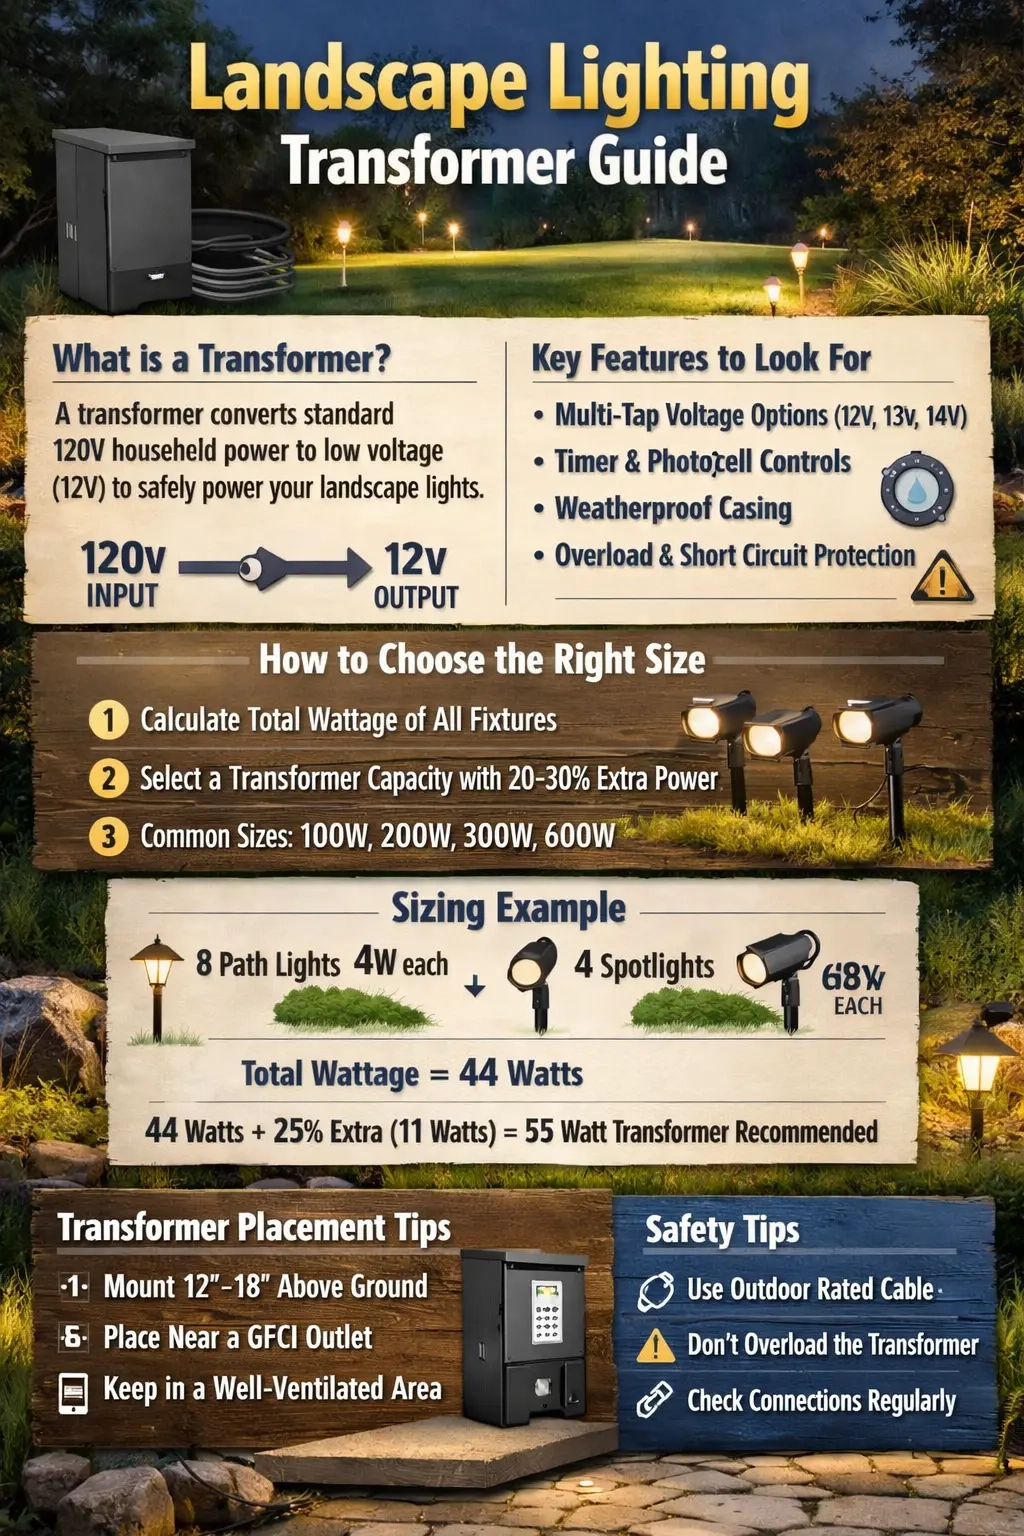
The biggest mistake people make is doing simple addition and stopping there. You have ten fixtures. Each uses 5 watts. That’s 50 watts. So, you buy a 50-watt transformer. Simple, right? Wrong. This is a recipe for disaster. Transformers, like humans, don’t like working at 100% capacity all the time. When they run hot, their lifespan shrinks. They become inefficient. And in the peak heat of summer, an overloaded transformer might just shut itself down to prevent melting.
You need what experts call a "safety margin" or "headroom." Think of it like packing a suitcase. If you stuff it to the absolute brim, the zipper breaks. If you leave a little space, everything fits comfortably and lasts longer. The general rule of thumb in the industry today is to add 20% to 25% to your total wattage calculation. So, for those 50 watts of lights, you’d want a transformer rated for at least 60 or 65 watts. This buffer accounts for minor fluctuations in power and ensures the unit runs cool.
But wait, there’s another layer. In 2026, many modern transformers have smart features, Wi-Fi connectivity, or built-in timers. These components draw a tiny bit of power themselves, known as "phantom load" or idle consumption. While small, it adds up. If you’re right on the edge of your capacity, that extra draw from the brain of the transformer can push it over the limit. Always round up. It’s cheaper to buy a slightly larger transformer once than to replace a burnt-out one every two years.
Ignoring the Vampire of Voltage Drop
Here is where things get technical, but stick with me because this is where most DIY projects fail. Voltage drop is the invisible thief of your lighting system. As electricity travels through wire, it loses pressure (voltage) due to resistance. The longer the wire, and the thinner the gauge, the more voltage you lose. If your transformer puts out 12 volts, but your last light only receives 9 volts because of a long, thin wire run, that light will be dim. It might not even turn on.
Many people size their transformer based solely on wattage, ignoring the distance. This is a critical error. A transformer might have enough power (watts) to run the lights, but if it can’t push that power far enough (volts), the system fails. You have to treat the wire length as part of the sizing equation. If you have a long run—say, over 50 feet—you need to account for that loss. Some pros suggest oversizing the transformer slightly to compensate, allowing you to use the higher voltage taps (like 13V or 14V) often found on modern units to push power further.
Let’s look at a real example. Imagine you have a 100-foot run to a distant gazebo. You calculate 40 watts of LEDs. A 50-watt transformer seems fine math-wise. But because of the distance, you’re losing 2 volts along the way. Your lights are starving. Instead, you might need a transformer with multiple tap settings or a higher total capacity that allows you to boost the output voltage without overloading the amperage. Check the manufacturer’s voltage drop charts. They aren’t just suggestions; they’re the law of physics. Ignoring them means your beautiful backyard looks half-lit.
Mixing Old and New: The LED vs. Halogen Confusion
We are in a transition period. Many homes in 2026 still have older halogen landscape lights mixed with new, ultra-efficient LEDs. This creates a nightmare for transformer sizing if you aren’t careful. Halogen bulbs are power hogs. An old halogen spot might use 20 watts. A comparable LED uses maybe 3 watts. If you replace just a few bulbs with LEDs but keep the old transformer sized for halogens, you might think you’re fine. But there’s a catch: minimum load requirements.
Older magnetic transformers often need a certain amount of load to work correctly. If you swap out ten 20-watt halogens (200 watts total) for ten 3-watt LEDs (30 watts total), you’ve dropped the load significantly. If your transformer has a minimum load of 50 watts, your new 30-watt system might flicker, buzz, or fail to turn on consistently. The transformer is confused. It’s trying to push power into a void. Conversely, if you have a modern electronic transformer designed for LEDs, it might not handle the surge current of old halogens well.
The solution? Know your load type. If you’re mixing, you need a transformer that is compatible with both, often labeled as "LED/Halogen Compatible" or "Universal." These units have wider operating ranges. Don’t assume your old 300-watt transformer can handle a new mix of low-wattage LEDs without checking the minimum load spec. And please, don’t just guess. Look at the label. If it says "Minimum Load 20W," and your total system is 15W, you’re asking for trouble. Upgrade to a smaller, dedicated LED transformer instead. It’s safer and more efficient.
Forgetting the Future: Expansion and Zoning Errors
Life changes. You plant new trees. You build a patio. You decide the dark corner by the shed needs some love. If you size your transformer exactly for what you have today, you’re painting yourself into a corner. One of the most common regrets we hear from homeowners is, "I wish I had bought the bigger one." Adding lights later often means buying a whole new transformer because the old one is maxed out. It’s wasteful and annoying.
Think about zoning, too. Not all lights need to be on at the same time. Maybe your path lights stay on all night, but your accent lights only run for four hours in the evening. If you put them all on one transformer, you size for the total combined wattage. But if you split them into two zones with separate transformers (or a multi-zone unit), you can optimize sizing for each. This reduces the strain on any single unit. It also gives you control. You don’t need to light the whole yard when you’re just taking out the trash.
In 2026, modular systems are popular. Consider a transformer that allows for expandability. Some high-end units let you daisy-chain additional power supplies or have spare terminals for future runs. Even if you don’t use them now, having the capacity means you can add a fixture next year without ripping out the whole system. Plan for at least 10-15% future growth. It’s a small insurance policy against your own evolving taste in landscaping.
Environmental Blind Spots: Heat, Water, and Placement
You can do the math perfectly and still fail if you ignore where the transformer lives. Transformers generate heat. It’s a byproduct of converting electricity. If you bury that transformer in a tight, enclosed box under a deck with no airflow, it’s going to overheat. Overheating reduces efficiency and kills components. I’ve seen transformers fail in months because they were stuffed into a plastic enclosure that trapped heat like a greenhouse.
Placement matters for sizing indirectly. If your transformer is far from the GFCI outlet, you need more wire. More wire means more voltage drop (see above). So, placing the transformer centrally in your landscape, rather than tucked away in a distant corner, can actually allow you to use a slightly smaller unit because the wire runs are shorter and more efficient. Keep it accessible, too. You’ll need to reset it or change timer settings occasionally.
Also, consider the weather. In 2026, we’re seeing more extreme weather events. A transformer rated for "outdoor use" should be mounted at least 12 inches above grade to avoid splash-back from rain or sprinklers. If you live in a humid coastal area, corrosion can affect connections, increasing resistance and worsening voltage drop. Use dielectric grease on your wire nuts. It’s a tiny step that prevents moisture from ruining your carefully calculated system. Don’t let the environment undo your hard work.
This isn’t strictly about the transformer box, but it’s so tied to sizing that it deserves its own spot. You can’t size a transformer without knowing your wire gauge. Using 18-gauge wire for a long run is a classic mistake. It’s cheap, yes, but it has high resistance. To compensate for thin wire, you’d need a massive transformer pushing high voltage, which is inefficient and dangerous for low-voltage fixtures.
Always match your wire gauge to your distance and load. For runs under 50 feet, 16-gauge is usually fine. For 50 to 100 feet, go to 14-gauge. Over 100 feet? You need 12-gauge or even 10-gauge. Thicker wire costs more upfront, but it saves you from buying an oversized transformer and ensures your lights actually shine. It’s a trade-off. Spend a bit more on copper now, save on headaches later.
Check your connections, too. A loose wire nut creates resistance. Resistance creates heat and voltage drop. I’ve walked onto jobs where the transformer was huge, the wire was thick, but one bad connection halfway down the line killed the last three lights. Tighten your connections. Use waterproof connectors. Treat the wiring with the same respect as the transformer. They are partners in this dance. If one leads poorly, the whole performance stumbles.
So, where does this leave us? Sizing a low-voltage transformer isn’t just about adding up numbers on a box. It’s about understanding the ecosystem of your yard. It’s about respecting the physics of electricity and the reality of weather. By avoiding these common traps—undersizing, ignoring voltage drop, mixing incompatible tech, forgetting future needs, neglecting placement, and skimping on wire—you set yourself up for success.
Take a moment to re-evaluate your plan. Grab a calculator. Add that 20% buffer. Check your wire lengths. It might feel like extra work now, but when you flip that switch and see a consistent, warm glow across your entire landscape, you’ll know it was worth it. Your home deserves to look its best, and with the right power behind it, it will. Don’t let a cheap transformer dim your vision. Get it right, and enjoy the light.