So, you finally did it. You bought a bidet. Maybe you saw one at a friend’s house and thought, "Why have I been living like this?" or perhaps you just wanted to be kinder to the planet (and your wallet) by cutting down on toilet paper. Whatever the reason, congrats. It’s a game-changer. But now that the box is sitting in your bathroom, staring at you, you might be feeling a tiny pinch of anxiety. Do I need a plumber? Do I need to turn off the main water supply to the whole house? Will I flood my downstairs neighbors?
Take a deep breath. Seriously. In 2026, bidet attachments are designed for people who can barely hold a screwdriver straight. If you can unscrew a lightbulb and tighten a hose, you can do this. Most installations take less than an hour, and many people finish in twenty minutes flat. You don’t need special skills. You just need a little patience and the right steps. Let’s walk through it together, nice and slow, so you feel confident every step of the way.
Gathering Your Gear and Prepping the Space
Before you even think about touching a wrench, let’s get organized. Rushing leads to mistakes, and mistakes lead to wet floors. You want your workspace to be calm and clear. Start by clearing out the area around your toilet. Move any trash cans, rugs, or decorative items out of the way. You’ll need room to kneel and move around. It’s also a smart idea to lay down an old towel or two on the floor. Even if everything goes perfectly, a little residual water might drip when you disconnect hoses, and you’ll thank yourself later for not having to mop up a surprise puddle.
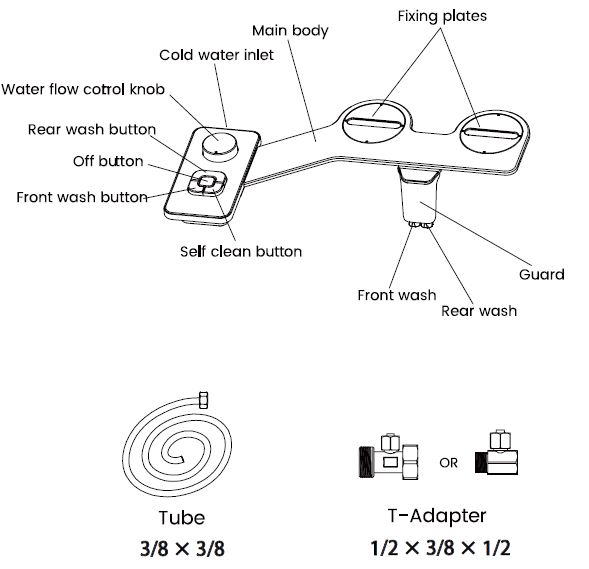
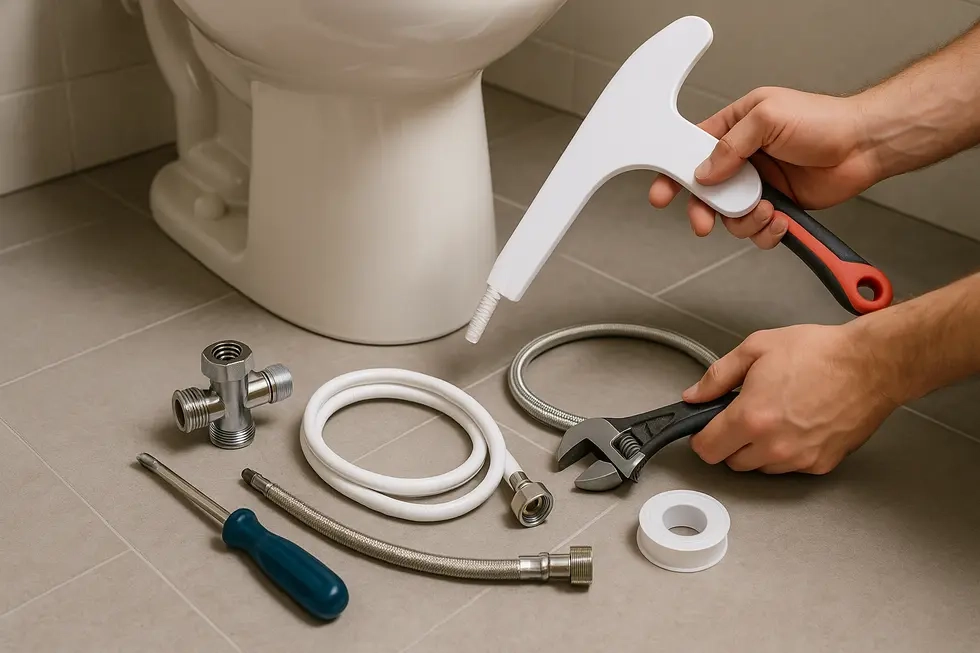
Now, check what’s in the box. Most bidet attachments come with almost everything you need: the bidet unit itself, mounting hardware (usually brackets and screws), a water supply hose, and sometimes a T-valve or splitter. However, there are a few tools you’ll likely need from your own drawer. Grab an adjustable wrench—this is your best friend for the day. You might also need a pair of pliers, though often your hands are enough for the plastic nuts. If you’re installing a warm-water model, you’ll need a second hose to connect to the hot water line, so make sure that’s included or ready. Oh, and grab some Teflon tape (plumber’s tape). It’s cheap, it’s blue or white, and it prevents leaks. Don’t skip it.
One last prep tip: take a quick photo of your current toilet setup with your phone. Snap a picture of how the water hose connects to the wall and the tank. It sounds silly, but when you’re knee-deep in plumbing parts, having a reference image of how it looked before can save you from confusion. Plus, if you ever move or need to remove the bidet, you’ll know exactly how to put it back. Okay, gear checked? Space cleared? Let’s get to work.
Shutting Off the Water and Removing the Seat
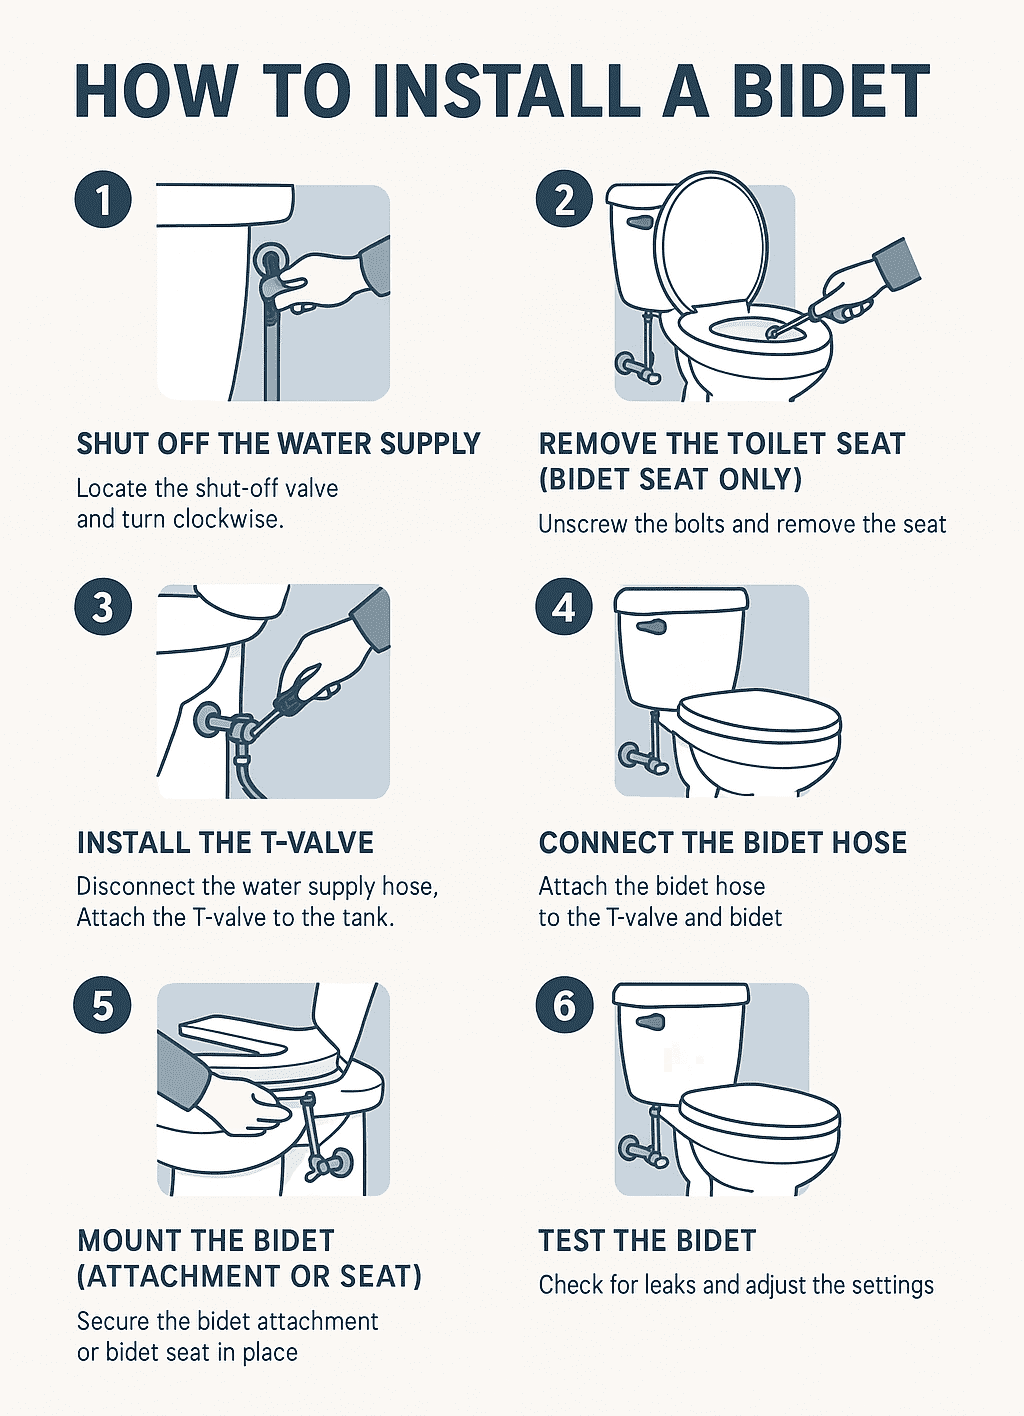
This is the part that makes people nervous, but it’s actually the simplest. Locate the water shut-off valve on the wall behind or beside your toilet. It’s usually a small oval or round handle. Turn it clockwise until it stops. Don’t crank it with all your might; just snug it up. Once it’s off, flush your toilet. This drains most of the water from the tank and bowl. Hold the flush handle down to get as much water out as possible. There will still be a little bit left in the bottom of the tank and the supply line, so keep that towel handy.
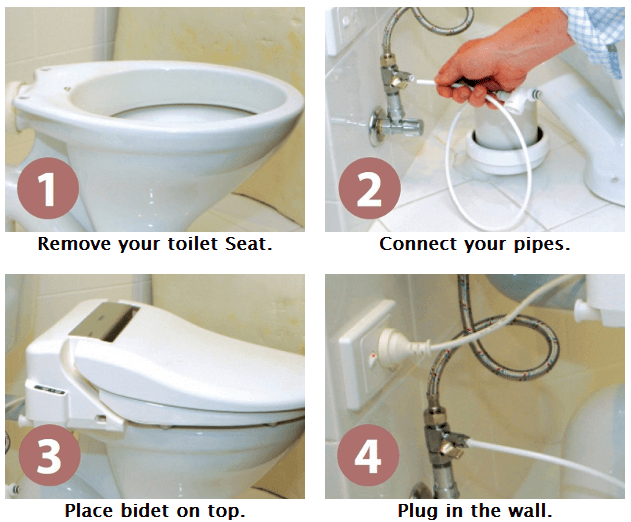
Next, you need to remove your existing toilet seat. Look under the rim of the bowl where the seat hinges attach to the porcelain. You’ll see two plastic or metal nuts. Unscrew them by hand if you can. If they’re stuck, use your pliers gently. Be careful not to scratch the porcelain—it chips easily. Once the nuts are off, lift the entire seat and lid assembly off the toilet. Set it aside in a safe place. You might want to keep it if you plan to reinstall the bidet elsewhere later, or maybe you’ll just toss it. Either way, clean the top of the toilet bowl rim now. It’s much easier to wipe down the porcelain without the seat in the way. Use a mild cleaner and a rag to remove any grime or old adhesive residue. A clean surface ensures your new bidet sits flat and secure.
While you’re here, take a moment to inspect the water supply line coming from the wall. Is it flexible? Is it in good condition? If it’s old, cracked, or rigid metal, consider replacing it with a new flexible braided stainless steel hose while you’re at it. It’s a small upgrade that prevents future headaches. But if it looks fine, just disconnect it from the bottom of the toilet tank. Place the end of the hose in your bucket or over your towel to catch any drips. You should only get a few tablespoons of water. See? Not a flood. You’re doing great.
Installing the T-Valve and Connecting Water Lines
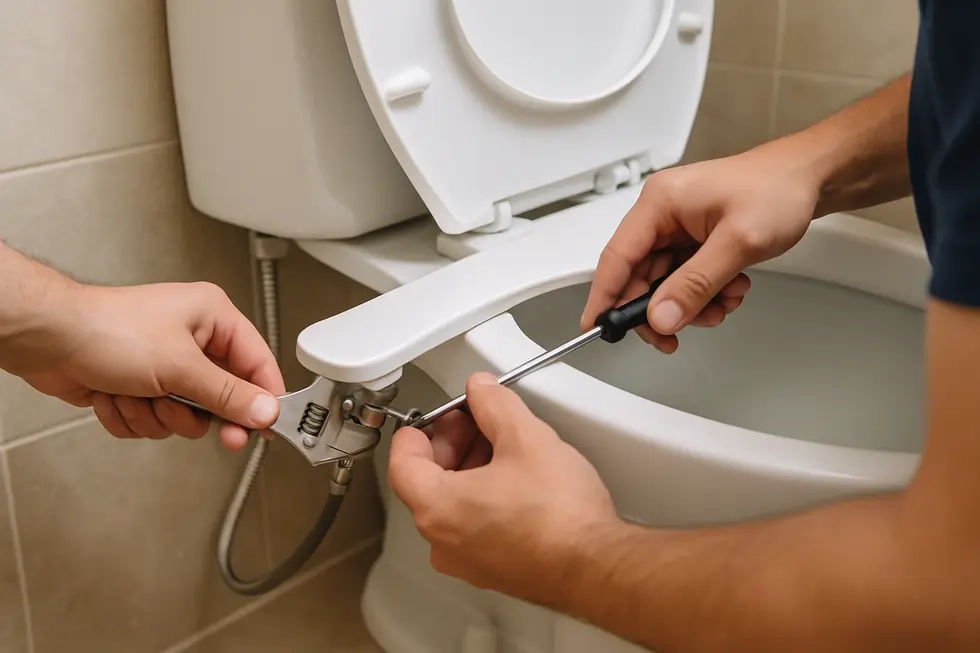
Now comes the plumbing heart of the operation. You need to install a T-valve (also called a splitter or adapter) onto the water supply pipe coming from the wall. This valve allows water to flow to both your toilet tank and your new bidet. Wrap the threads of the wall pipe with two or three layers of Teflon tape. Wrap it clockwise, so when you screw the valve on, the tape doesn’t unravel. Hand-tighten the T-valve onto the wall pipe first, then give it a quarter-turn with your adjustable wrench. Don’t overtighten! Plastic fittings can crack if you go too hard. Snug is enough.
If you’re installing a cold-water-only bidet, this step is straightforward. You’ll attach the provided hose from the T-valve’s side port to the inlet on the bidet attachment. But if you’re installing a warm-water model, things get slightly more complex. You’ll need to connect a second hose from the hot water source. Usually, this means tapping into the hot water line under your sink. You’ll need another T-valve for the sink’s hot water supply. Connect one hose from the sink’s hot water T-valve to the hot water inlet on the bidet. Make sure you keep track of which hose is hot and which is cold. Most bidets have color-coded inlets (red for hot, blue for cold). Mix them up, and you’ll get a nasty surprise later.
Once the valves are in place, reconnect the original hose from the T-valve’s main port to the bottom of your toilet tank. Again, use Teflon tape on the threads, hand-tighten, and then snug with the wrench. Check all your connections. Are they straight? Are they tight? Give them a gentle wiggle. They shouldn’t move. If you’re using a warm-water model, ensure the hoses aren’t twisted or kinked. They need to lie naturally. This is a good time to double-check that you haven’t crossed the hot and cold lines. Trace them with your eyes from the source to the bidet. Red to red, blue to blue. Simple.
Mounting the Bidet Attachment to the Toilet
With the plumbing prepped, it’s time to mount the actual bidet unit. Most attachments slide between the toilet bowl and the seat hinges. Look at the top of your toilet bowl. You’ll see two holes where the seat bolts used to go. Some bidets use these same holes for mounting brackets, while others have their own clamping system that grips the rim of the bowl. Check your manual for the specific method. If it uses brackets, insert them into the holes and secure them from underneath with the provided nuts. If it uses clamps, position the bidet on the rim and tighten the clamps from below.
Place the bidet attachment on top of the toilet bowl. Align it carefully. It should sit centered and flat. If it wobbles, adjust the mounting hardware until it’s stable. A wobbly bidet is annoying and can lead to leaks or breakage over time. Once it’s positioned correctly, you can reattach your toilet seat. Wait—does your bidet come with its own seat? Some do. If yours does, follow the instructions to mount that instead. If not, simply place your original seat back over the bidet unit. The bidet is thin enough that most standard seats fit right over it. Screw the seat nuts back onto the bolts from underneath. Tighten them firmly, but again, avoid cracking the porcelain.
Make sure the control panel or knobs on the bidet are accessible. Most units have the controls on the right side (when you’re sitting down). Ensure nothing is blocking the knobs or buttons. Also, check that the nozzles are retracted and protected. Many bidets have a nozzle guard or cover. Make sure it’s in place. This protects the delicate spray nozzles from getting bumped or dirty. Take a step back and look at it. Does it look straight? Does it feel solid? Give it a gentle push. If it doesn’t budge, you’re golden. If it shifts, tighten those mounts a bit more.
Testing for Leaks and Adjusting Pressure
The moment of truth. Slowly turn the water shut-off valve back on. Counter-clockwise. Do it gradually. Listen for hissing sounds. Watch the connections closely. Do you see any drips? If you do, tighten the connection slightly. If it’s still leaking, turn the water off, undo the connection, add more Teflon tape, and try again. Small leaks are common and easy to fix. Don’t panic. Once the water is fully on and no leaks are visible, flush the toilet a couple of times. This fills the tank and checks the main connection. Everything dry? Excellent.
Now, test the bidet. Turn the knob or press the button to activate the spray. Start with the lowest pressure setting. You might get a burst of air at first—that’s normal. It clears the air out of the lines. After a few seconds, water should spray out. Check the temperature if you have a warm-water model. It might take a minute for hot water to travel from the sink to the toilet, so be patient. Adjust the mix of hot and cold until it’s comfortable. Never test the spray with your hand directly in front of the nozzle at high pressure. It’s stronger than you think. Aim it at the back of the bowl or use a piece of toilet paper to check the flow.
If the pressure is too weak, check that the valves are fully open. If it’s too strong, adjust the regulator on the bidet (if it has one) or use the control knob to lower it. You want a gentle, cleansing stream, not a power washer. Also, check for leaks around the bidet unit itself while it’s operating. Sometimes the pressure reveals a loose fitting that didn’t leak when static. Wipe everything dry with a towel so you can spot new drips easily. If you find a leak, address it immediately. It’s much easier to fix now than after you’ve used it for a week.
Congratulations! You’ve installed your bidet. Take a moment to appreciate your handiwork. Clean up your tools, toss the old packaging, and maybe light a candle. Your bathroom just got a major upgrade. But before you declare victory, there are a few final touches. If your bidet has a remote control or electronic features, insert the batteries or plug it in according to the manual. For non-electric models, you’re all set. Make sure the hoses are tucked neatly behind the toilet so they don’t get kicked or tangled. You can use zip ties or hose clips to keep them organized if needed.
Now, the learning curve. Using a bidet takes a little practice. Don’t expect perfection on day one. Start with low pressure and short bursts. You’ll quickly learn what angle and duration work best for you. Keep some toilet paper nearby for patting dry—most people still use a small amount to dry off, unless you have a model with an air dryer. It’s also a good idea to clean the bidet nozzles regularly. Most units have a self-cleaning function, but a quick wipe with a mild disinfectant once a month keeps everything hygienic. Check the manufacturer’s guidelines for specific cleaning tips.
Finally, share the knowledge. If you live with family or roommates, show them how to use it. Explain the controls. Warn them about the pressure settings. It’s a shared appliance now. And if guests come over, you might want to leave a small note or just be prepared to give a quick tutorial. It’s becoming more common in 2026, but not everyone is familiar with it. Be patient and kind. You’re not just installing a device; you’re introducing a new habit. Enjoy the freshness. Enjoy the savings. And enjoy the fact that you did it yourself.
Installing a bidet attachment is one of those small home improvements that pays off every single day. It’s hygienic, eco-friendly, and surprisingly simple to set up. By following these steps, you’ve avoided the cost of a plumber and gained a skill that might come in handy again. Whether you chose a basic cold-water model or a luxurious warm-water version, you’ve made a choice that benefits your comfort and the planet. So sit back, relax, and enjoy the clean feeling. You earned it.