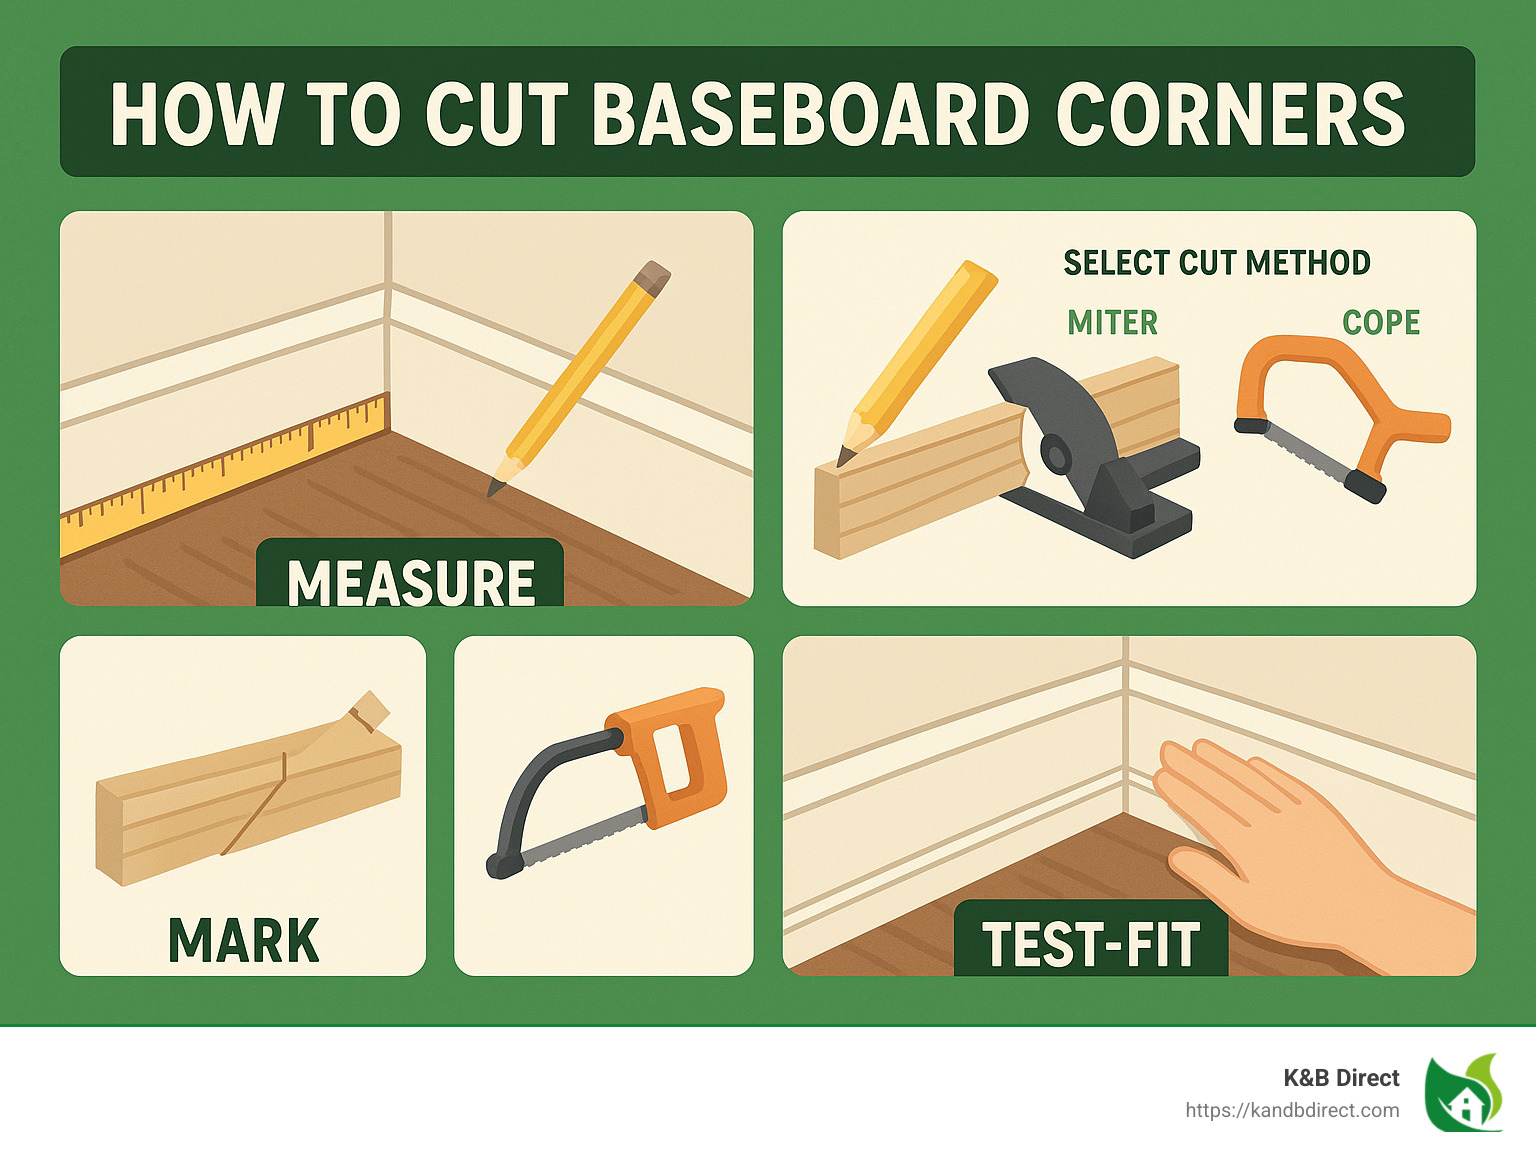
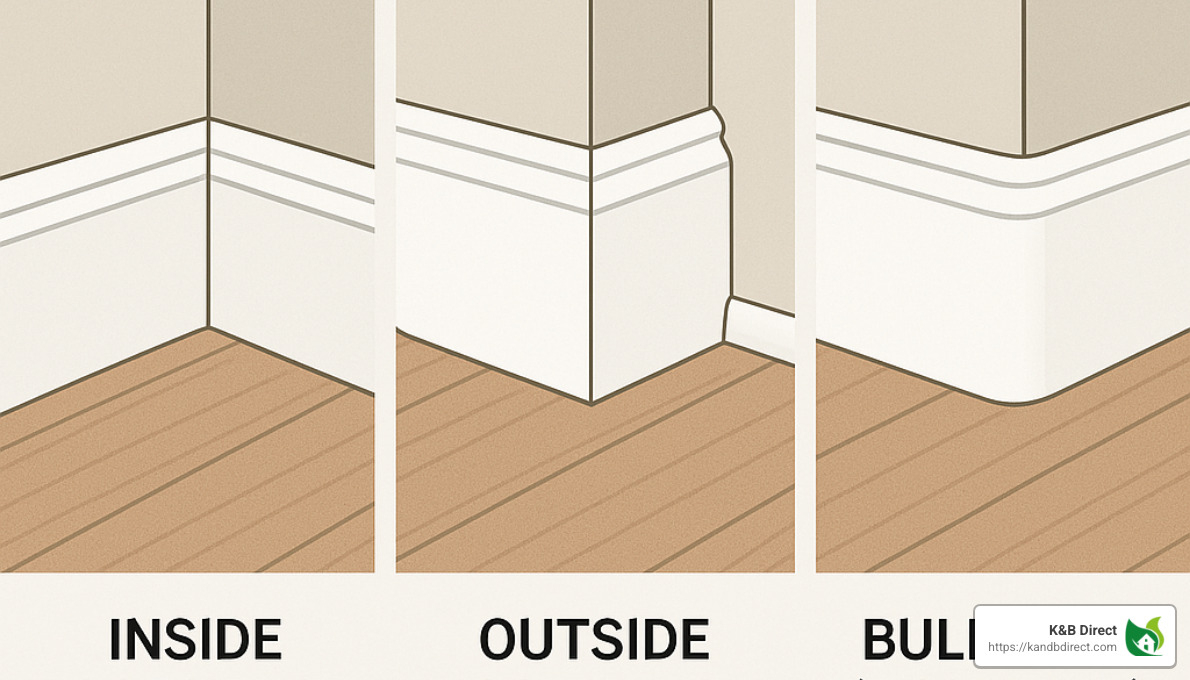
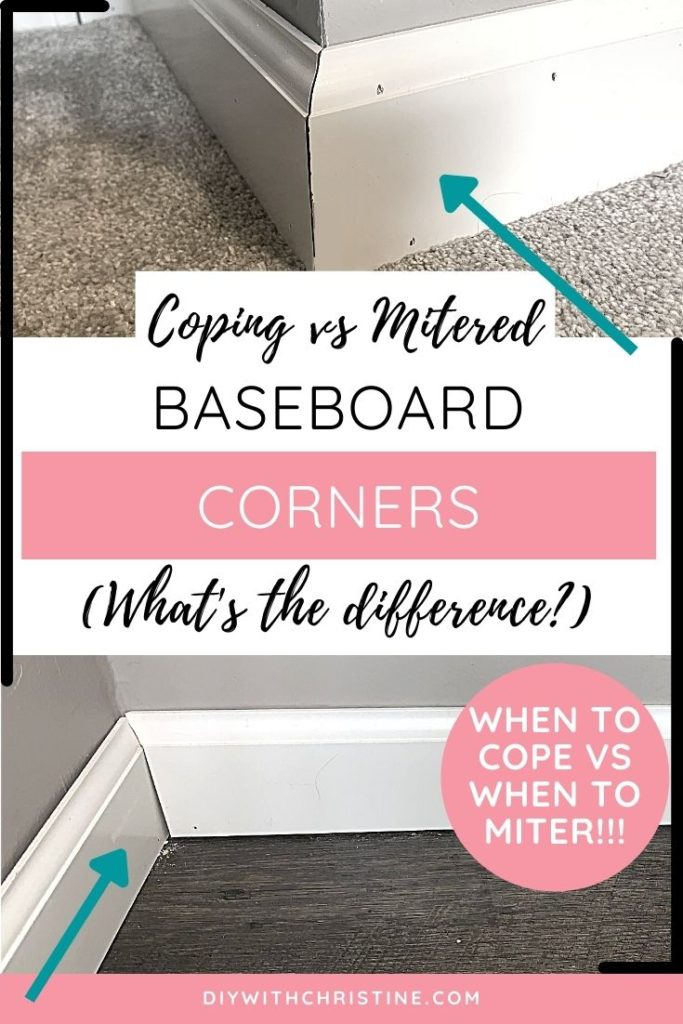
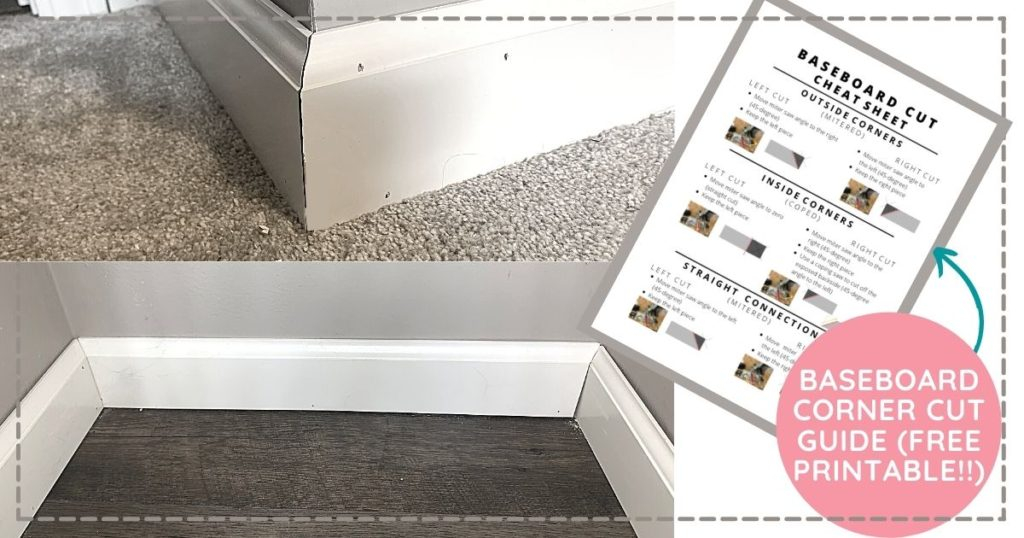
Ever stared at a gap in your baseboard corner and felt that little pang of defeat? You measured twice. You cut once. And yet, there it is—a sliver of daylight where two pieces of wood should be kissing tight. It’s frustrating. It makes the whole room look unfinished, no matter how perfect the rest of the paint job is. We’ve all been there. The culprit isn’t usually your skill level; it’s the method. Most people try to miter inside corners, forcing two 45-degree angles to meet in a world where walls are rarely, if ever, perfectly square.
But there’s a better way. An older way. It’s called coping, and it’s the hidden trick that separates the amateurs from the pros. Instead of trying to force two angled cuts together, you sculpt one piece of trim to fit snugly against the face of the other. It sounds complicated, maybe even a bit scary if you’ve never held a coping saw before. But honestly? It’s forgiving. It’s precise. And once you get the hang of it, you’ll wonder why you ever bothered with those messy caulk lines to hide your mistakes. Let’s dive into how you can master this technique and get those crisp, clean corners you’ve been dreaming of.
Why Miters Fail and Coping Wins
Let’s talk about why the standard miter joint often lets us down. In a perfect world, every corner in your house would be exactly 90 degrees. If that were true, cutting two pieces at 45 degrees would create a seamless join. But houses settle. Foundations shift. Drywall gets hung with slight variations. In 2026, even with modern laser levels and precision tools, most inside corners are off by a degree or three. Maybe it’s 88 degrees. Maybe it’s 92. When you try to jam two rigid 45-degree cuts into an imperfect angle, you get gaps. Big ones. Or worse, you get a joint that looks tight from the front but pops open at the back.
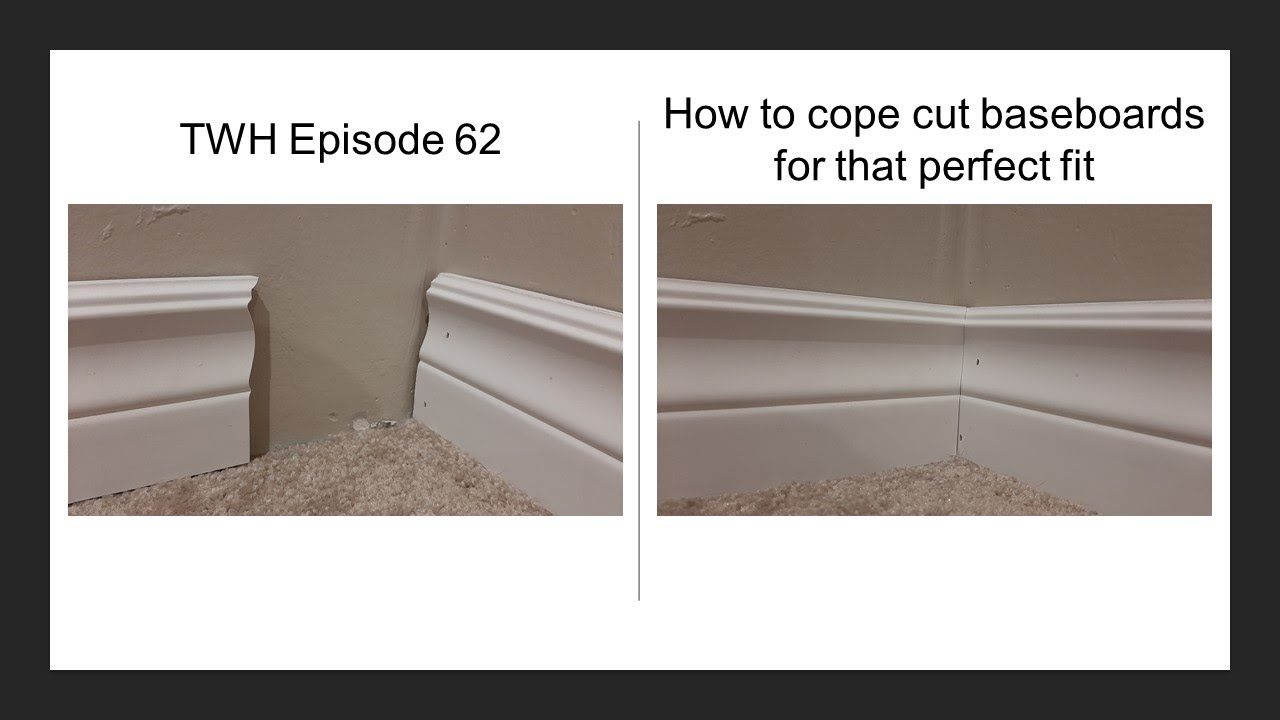
Coping solves this by changing the geometry entirely. Instead of two angled ends meeting, you have one piece installed square to the wall (butt-cut), and the second piece shaped to follow the exact profile of the first. Think of it like a puzzle piece. The coped end wraps around the face of the butt-cut piece. Because it’s following the contour, it doesn’t matter if the wall angle is slightly off. The joint stays tight because the wood is physically overlapping, not just touching at a fragile point. This is especially crucial for materials like wood that expand and contract with humidity changes. A coped joint moves with the house; a mitered joint fights it.
This technique isn’t just for baseboards, either. Crown molding, chair rails, and even complex colonial profiles benefit hugely from coping. The visual result is cleaner, sharper, and far more professional. No more thick beads of caulk trying to hide a half-inch gap. Just pure, tight woodwork. It’s an age-old carpenter’s trick that has stood the test of time because it simply works better. Once you see the difference, you won’t want to go back.
Gathering Your Arsenal: Tools That Matter
You don’t need a shop full of expensive machinery to cope trim effectively. In fact, some of the best results come from simple, hand-held tools. The star of the show, obviously, is the coping saw. But not just any coping saw will do. Look for one with a comfortable handle and, crucially, a frame that allows you to rotate the blade. This flexibility is key when you’re navigating tight curves in detailed molding profiles. You’ll also want fine-toothed blades—usually 15 to 20 teeth per inch. Coarse blades tear out the delicate details of the wood, leaving you with a jagged edge that’s hard to fit.
Next up, you’ll need a miter saw or a miter box and hand saw. Wait, didn’t we just say miters are bad? Well, you still need to make an initial cut. To cope a piece, you first cut it at a 45-degree angle (or sometimes slightly less, depending on the wall) to expose the profile line you’ll be following. This is called the "reveal." A power miter saw makes this quick and consistent, but a simple miter box works just fine for smaller jobs. Just ensure your stop blocks are secure so your cut is straight and repeatable.
Don’t forget the supporting cast. A sharp utility knife or a dedicated trimming knife is essential for cleaning up the cut after you’ve sawn through the bulk of the material. Sandpaper blocks or small files help smooth out any rough spots without rounding over the crisp edges of the profile. And finally, keep a pencil handy. Marking your cut line clearly before you start sawing can save you from costly mistakes. Some pros also use a block plane for final adjustments, but for most DIYers, a sharp knife and some patience are enough. Having the right tools ready before you start keeps the workflow smooth and prevents that mid-project scramble.
The Setup: Cutting the Reveal
Before you can sculpt the perfect fit, you need to expose the shape you’re going to copy. This step is called cutting the reveal. Take your piece of trim—the one that will be coped—and set your miter saw to 45 degrees. But here’s a pro tip: if you know your walls are slightly out of square, you might adjust this angle. For now, let’s stick with the standard 45. Place the molding in the saw exactly as it will sit on the wall. This is critical. If you’re doing crown molding, remember it sits at an angle between the wall and ceiling. Use spring clamps or a specialized crown stop to hold it securely in that position.
Make your cut. You’re not trying to be perfect here; you’re just trying to expose the cross-section of the molding. The goal is to see the silhouette of the profile clearly. Once the cut is made, look at the end grain. You should see the layers of the design—the curves, the beads, the flat sections. This is your map. If the cut is fuzzy or torn, take a moment to clean it up with a sharp utility knife or a bit of sandpaper. You need a clear, crisp line to follow with your coping saw. Trying to cope a ragged edge is like trying to trace a blurry photo; you’ll end up guessing, and guessing leads to gaps.
Some people prefer to cut the reveal at 46 or 47 degrees instead of 45. Why? Because it removes a tiny bit more material from the back, ensuring that only the very front edge of the profile makes contact with the adjoining piece. This creates a tighter visual line and hides any minor imperfections in the back of the cut. It’s a subtle trick, but it can make a noticeable difference in the final look. Experiment with a scrap piece first to see what works best for your specific molding style. Once you’re happy with the reveal, you’re ready for the main event.
The Cut: Following the Profile
Now comes the part that feels like magic. Pick up your coping saw. Notice that the blade is thin and flexible. You want to cut along the line created by your 45-degree reveal, but here’s the key: you aren’t cutting on the line. You’re cutting just outside of it, leaving the line visible. Why? Because you can always shave off more wood, but you can’t add it back. Start at the top or bottom edge, wherever the profile is simplest. Keep the saw frame perpendicular to the face of the board, but tilt the blade slightly backward (away from the waste side) as you cut. This undercut ensures that the front face of the molding fits tightly against the other piece, while any slight gaps at the back are hidden in the shadow of the joint.
Move slowly. Let the saw do the work. Don’t force it. If you have a complex profile with deep curves, rotate the saw frame as you go to keep the blade aligned with the direction of the cut. This prevents the blade from binding or snapping. It’s a rhythmic process. Saw, pause, check your line, saw again. If you wander off the line, don’t panic. You can correct minor deviations with a file or sandpaper later. The goal is to remove the bulk of the waste material while staying close to the profile shape. Think of it as sculpting rather than just cutting. You’re revealing the shape that’s already hiding inside the wood.
For intricate details, like small beads or sharp corners, you might need to make relief cuts. These are small cuts into the waste area that allow you to remove chunks of wood without stressing the blade. It’s like carving a turkey; you remove the big sections first, then refine the details. Take your time here. Rushing leads to tear-out, and tear-out means a sloppy fit. If you break a blade, don’t worry. It happens to everyone. Swap it out and keep going. The more you practice, the smoother your strokes will become, and the cleaner your cuts will look.
Refining the Fit: The Secret to Perfection
You’ve made your cut. Now you have a piece of trim that roughly matches the profile of the other piece. But it’s probably not perfect yet. This is where the real craftsmanship happens. Take your coped piece and dry-fit it against the installed butt-cut piece. Press it firmly into place. Look for gaps. Where does it touch? Where does it pull away? You’ll likely see some high spots—areas where the wood is preventing the two pieces from sitting flush. Mark these areas with a pencil.
Use a sharp utility knife, a rasp, or a file to carefully remove these high spots. Work in small increments. Shave off a little bit, then test the fit again. Repeat this process until the joint is tight and seamless. This iterative approach is the hidden trick within the trick. It’s not about getting it right on the first try; it’s about refining the fit until it’s glove-tight. Pay special attention to the top edge of the molding, since that’s the most visible part. If the top is tight but there’s a small gap at the bottom, it’s often acceptable because shadows and baseboard shoes can hide it. But the top needs to be flawless.
If you’re working with softwoods like pine, be gentle. They dent and tear easily. Hardwoods and MDF are more forgiving in terms of sanding, but they require sharper tools to cut cleanly. For MDF, a sharp knife is often better than sandpaper, which can fuzz up the edges. Remember, the goal is a clean, crisp line where the two profiles meet. If you’ve removed too much material, don’t despair. You can use a tiny bit of wood filler, but ideally, you want to avoid that. A well-coped joint shouldn’t need filler. It should stand on its own merit.
Even with the best intentions, things can go wrong. One common issue is blade wander. This happens when the coping saw drifts off the line, usually because the blade is dull or the user is pushing too hard. The fix? Change your blade frequently. A fresh blade cuts faster and straighter. Also, focus on keeping steady, even pressure. Let the teeth do the cutting. Another frequent problem is tear-out on the face of the molding. This leaves a ragged edge that ruins the visual flow of the profile. To prevent this, score the cut line with a utility knife before you start sawing. This severs the surface fibers and gives you a cleaner edge.
What if your walls are wildly out of square? Say, more than 3 or 4 degrees off? In these cases, a standard 45-degree reveal might not be enough. You may need to adjust your initial miter cut to match the actual wall angle. Use a digital angle finder to measure the corner, divide that number by two, and set your saw accordingly. Then, cope as usual. This extra step ensures that the bulk of the waste is removed correctly, making the final fitting much easier. Don’t try to force a square cut into a skewed corner; you’ll just fight the wood the whole way.
Finally, don’t neglect the importance of lighting. It’s hard to see fine details and small gaps in dim light. Use a bright work light to illuminate your joint as you fit it. Shadows can hide imperfections, leading you to think a fit is better than it actually is. Good lighting reveals the truth. And if you’re still struggling, practice on scrap pieces. Seriously. Grab some leftover trim and spend an hour just coping random joints. The muscle memory you build will pay off tenfold when you’re working on the actual project. Confidence comes from competence, and competence comes from repetition.
Mastering the art of coping inside corners transforms your trim work from amateurish to artisanal. It takes a bit more time upfront than slamming two miters together, but the result is worth every minute. No more ugly caulk lines. No more gaps that reopen with the seasons. Just clean, tight joints that look like they were made for each other. So next time you’re facing a tricky corner, reach for your coping saw. Embrace the process. Enjoy the rhythm of the cut. And take pride in knowing you’re using a technique that has defined quality carpentry for generations. It’s not just about fixing a corner; it’s about elevating your craft.