You know that feeling when you pull into your driveway and just sigh? Maybe the siding looks a bit tired, or the landscaping has seen better days. It’s hard to fix the whole house in a day. But there is one tiny spot that holds so much power. It’s the front door. Think about it. It’s the handshake of your home. It’s the first thing people see, and honestly, it’s the first thing you see when you come home from a long, draining day at work.
In 2026, we are all looking for ways to make our spaces feel more like sanctuaries without spending a fortune. You don’t need a massive renovation budget to make a statement. A simple bucket of paint and a Saturday afternoon can completely shift the vibe of your property. It’s not just about aesthetics, though that’s a huge part of it. It’s about pride. It’s about walking up to a door that says, "Welcome," instead of one that whispers, "I’ve been neglected." Let’s talk about how to get that right.
Why This Small Project Packs Such a Big Punch
It might seem silly to obsess over a single door. After all, it’s just wood or fiberglass, right? But psychologists and real estate experts have been saying for years that this small surface area does heavy lifting. It sets the tone for the entire facade. When you drive by a house with a crisp, vibrant door, the whole place looks cared for. It suggests that the inside is probably nice too. It’s a mental shortcut our brains take.
According to recent trends in home improvement, this is still one of the highest ROI (return on investment) projects you can do. And I’m not just talking about money, although a fresh look can definitely help if you’re thinking of selling. I’m talking about emotional return. Imagine painting your door a deep, calming navy blue. Every time you walk in, you feel a sense of stability. Or maybe a bright yellow that makes you smile before you even unlock the deadbolt. It changes your mood. It’s a small act of self-care for your home.
Plus, let’s be real. It’s fast. You aren’t tearing down walls or waiting weeks for contractors. You can literally start at 9 AM and be done by dinner. That immediacy is satisfying in a way that big projects just aren’t. You get to see the transformation happen in real time. There is something deeply human about that process—taking something worn and making it new again with your own two hands. It connects you to your space in a way that buying new furniture never could.
Picking the Perfect Hue Without the Panic
Choosing a color is where most people get stuck. They stand in the hardware store aisle, staring at hundreds of swatches, feeling overwhelmed. Don’t overthink it. Start by looking at what you already have. What color is your brick? Your siding? Your roof? You want contrast, but you also want harmony. If your house is beige or gray, you have a blank canvas. Almost anything works. But if you have red brick, you might want to avoid a door that clashes, like a bright orange.
Classic choices are classic for a reason. A bold red door is timeless. It says energy and warmth. In 2026, we are also seeing a lot of earthy tones taking center stage. Think olive greens, terracottas, and muted blues. These colors feel grounded. They connect the home to the natural world around it. If you live in a neighborhood with strict HOA rules, check those first. But if you have freedom, lean into what speaks to you. Do you want to stand out? Go dark charcoal or black for a modern, sleek look. Want to feel cheerful? Try a soft coral or buttercream.
Here is a trick that saves a lot of regret: buy sample pots. Paint a large piece of poster board or a section of the door itself (if you can hide it later). Look at it in the morning light, the harsh afternoon sun, and the evening shadow. Colors change drastically depending on the light. A blue that looks crisp at noon might look muddy at dusk. Take your time with this step. It’s better to spend an extra twenty dollars on samples than to hate your door for the next five years. Trust your gut, but verify with light.
The Secret Sauce Is All in the Prep Work
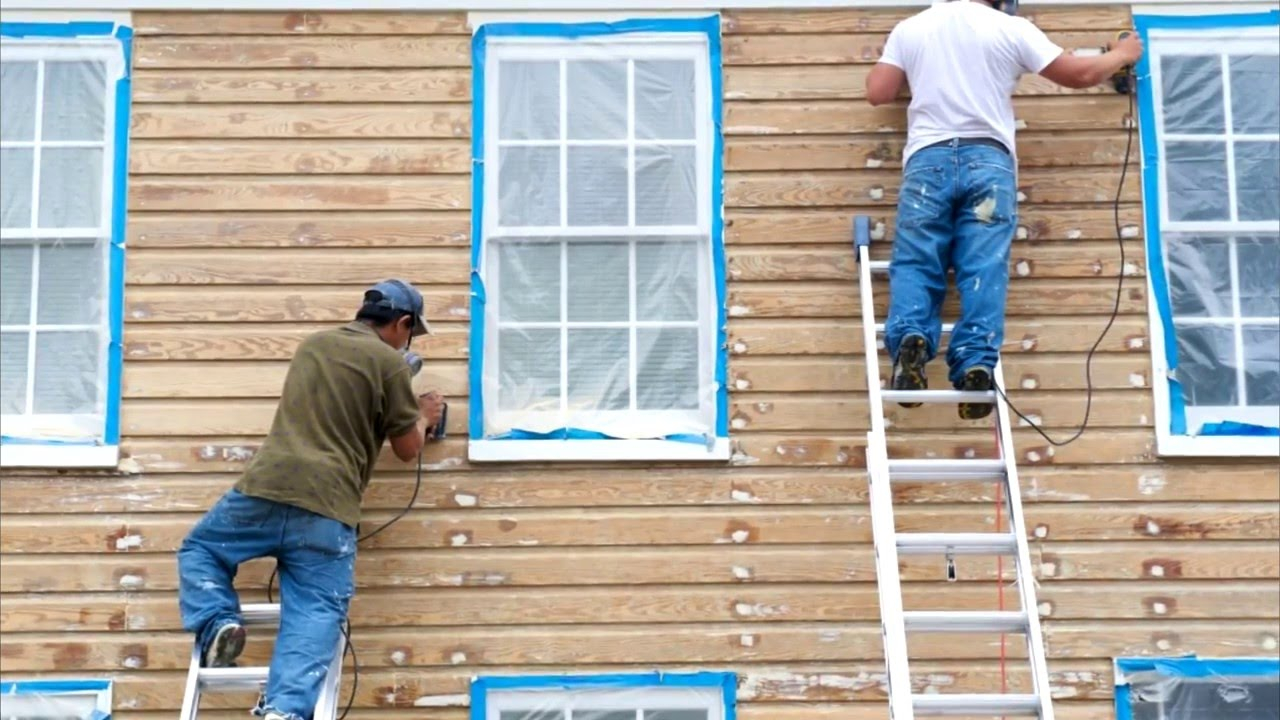
I know, I know. You want to skip to the fun part. You want to dip that brush and see the color appear. But if you skip prep, you will hate the result. Peeling paint, drips, and a rough texture are not charming. They look sloppy. So, let’s talk about the unglamorous stuff. First, you need to clean the door. Not just a wipe down. Scrub it. Use a degreaser if you have to. Doors get gross. They collect pollen, car exhaust, and hand oils from years of pushing them open. If you paint over dirt, the paint won’t stick. It’ll chip off in a month.
Next, sand it. You don’t need to strip it to bare wood unless the old paint is failing badly. Just scuff it up. Use 120-grit sandpaper. You want to create a little tooth for the new paint to grab onto. Wipe away all the dust with a tack cloth. Don’t use a regular rag; it leaves lint. Lint is the enemy of a smooth finish. While you are at it, look for dents or scratches. Fill them with wood filler, let it dry, and sand it smooth. This step takes maybe an hour, but it makes the difference between a DIY job and a pro job.
Don’t forget the hardware. You can leave the knobs and knockers on if you tape them off meticulously, but honestly? It’s easier to take them off. Put them in a baggie and label it. It lets you paint right up to the edge without worrying about getting gloss on your brass handle. Also, check the weather. Don’t paint if it’s going to rain in the next 24 hours. Humidity and extreme heat can mess with how the paint cures. Aim for a mild, dry day. Your future self will thank you for the patience.
Choosing the Right Tools for a Smooth Finish
You might think any brush will do. It won’t. Cheap brushes shed bristles. And finding a stray bristle in your dried paint is heartbreaking. Invest in a high-quality angled sash brush. The angle helps you cut in around the panels and edges cleanly. For the flat parts, a small foam roller is a game changer. It eliminates brush marks. The combination of brushing the details and rolling the flats gives you that factory-smooth look. It’s a technique pros use, and it’s easy to learn.
Paint type matters too. You need exterior-grade paint. Interior paint will peel and fade under UV rays. Look for acrylic latex or oil-based enamel specifically designed for doors and trim. These paints are harder and more durable. They resist scratching and sticking. In 2026, many brands offer low-VOC options that smell less and are better for the environment. Read the label. It should say "exterior" and "door/trim." Don’t try to save money by using leftover wall paint. It’s too soft. It won’t hold up to the constant opening and closing.
Tape is your friend, but don’t rely on it entirely. Blue painter’s tape is good, but press the edges down firmly with a putty knife. If air gets under the tape, paint bleeds through. And remove the tape while the paint is still slightly tacky. If you wait until it’s fully dry, the tape might pull off some of your fresh paint with it. That jagged edge is annoying to fix. Keep a damp rag nearby for quick cleanup of mistakes. Wet paint wipes away easily. Dry paint requires scraping, which risks damaging the finish.
The Painting Process: Step-by-Step Simplicity
Start with the primer if you are changing colors drastically or if you sanded down to bare wood. Primer helps the topcoat adhere and ensures the true color shows through. One coat is usually enough. Let it dry completely according to the can’s instructions. Rushing this leads to disaster. Once primed, you are ready for the color. Stir the paint well. Pour it into a small tray or a handy paint cup. Dip your brush only about a third of the way up the bristles. Too much paint causes drips.
Paint in a specific order to avoid trapping yourself. Start with the recessed panels. Use your brush for the corners and edges, then roll the center. Move to the horizontal rails next, then the vertical stiles. Finally, paint the outer frame. This method ensures you don’t accidentally lean against wet paint or miss a spot. Apply thin coats. Two thin coats are always better than one thick, gloppy coat. Thick paint takes forever to dry and is prone to running. Let the first coat dry fully before applying the second. Patience is key here.
Check for drips as you go. Gravity is relentless. If you see a run, smooth it out immediately with your brush. Don’t let it dry. Once the second coat is on, step back. Look at it from different angles. Does it look even? Are there any missed spots? Touch them up now. When you are satisfied, let it cure. Curing is different from drying. It might feel dry to the touch in a few hours, but it reaches full hardness over a few days. Try not to slam the door for at least 24 to 48 hours. Treat it gently.
The paint is dry. You’re almost done. But don’t stop there. This is where you add personality. Clean your hardware before putting it back on. Brass polish or a simple soap scrub can make old knobs look brand new. If the hardware is really dated, consider replacing it. New black matte handles are very popular in 2026 and look sharp against almost any door color. It’s a small detail, but shiny, clean hardware signals quality. It shows you care about the little things.
Think about the surrounding area too. Does your door number need updating? A modern font in a contrasting color can look sleek. Maybe add a new house number plaque. Or consider the lighting. A fresh coat of paint reflects light differently. Make sure your porch light is working and clean. A warm bulb can make your new door color glow in the evening. It extends the curb appeal into the night. You want that welcome feeling to last all day and all night.
Finally, style the entrance. A new doormat, a potted plant, or a seasonal wreath can tie everything together. If you painted your door a deep green, maybe add some ferns. If it’s bright red, maybe keep the decor minimal and modern. The door is the star, but the supporting cast matters. It creates a cohesive look. Stand on the sidewalk and look at your house. Does it make you happy? Does it feel like you? If yes, you’ve succeeded. It’s not just about resale value. It’s about living in a space that reflects who you are.
So, there you have it. Transforming your curb appeal doesn’t require a contractor or a second mortgage. It requires a little bit of elbow grease, some thoughtful color choice, and the willingness to spend a day outside. The result is a home that feels fresher, brighter, and more inviting. Whether you are planning to sell soon or just want to love your home more, this project delivers. Go ahead. Pick up that brush. Your front door is waiting to say hello.