Ever wake up with a thud? You know the sound. That hollow, annoying knock when your bed frame shifts just a tiny bit against the drywall. It’s maddening. For years, we’ve accepted it as part of having a bed. But it doesn’t have to be that way. There is a better solution, and honestly, it looks way cooler too. We are talking about the wall-mounted headboard.
It’s not just about stopping the noise. Though, let’s be real, that silence is golden. It’s about creating a space that feels intentional. Like a hotel suite, but yours. And the best part? You don’t need a contractor. You don’t even need a huge budget. You just need a weekend, some basic tools, and the willingness to drill a few holes. By Sunday evening, you could be leaning back against a plush, stable surface that actually stays put. Sounds nice, right? Let’s make it happen.
Why Go Wall-Mounted? Stability Meets Style
Let’s talk about why this method is gaining so much traction in 2026. Traditional headboards attach to the bed frame. The problem? Bed frames move. People toss and turn. Kids jump on beds (even when they aren’t supposed to). This movement creates that dreaded gap between the headboard and the wall. Dust bunnies love that gap. Bugs might too. It’s a hygiene nightmare and an eyesore.
When you mount directly to the wall studs, you eliminate the variable of the moving bed frame entirely. The headboard becomes part of the architecture of the room. It’s fixed. Solid. Unmovable. According to recent design trends, this "built-in" look is hugely popular because it makes small rooms feel larger. There’s no bulky frame taking up visual space. Just clean lines and a focal point that draws the eye.
Plus, think about the versatility. Whether you want a modern, minimalistic slab of wood or a tufted, luxurious panel, the mounting principle is the same. You get unmatched stability. No more banging. No more shifting. Just pure, unadulterated comfort. It transforms a bedroom from a place where you just sleep into an actual grown-up space. It’s a small change with a massive impact on how the room feels.
Gathering Your Arsenal: Tools and Materials
Before you start swinging hammers, you need to get your stuff together. Don’t worry, you probably have most of this in your garage or closet. If not, a quick trip to the hardware store will set you back less than fifty bucks. The key here is preparation. Nothing kills a weekend project faster than realizing you’re missing a specific screw size at 8 PM on Saturday.
First, the basics. You’ll need a stud finder. Do not skip this. Guessing where the studs are is a recipe for disaster. You also need a level, a tape measure, and a pencil. For drilling, a power drill with both drill bits and driver bits is essential. If you are dealing with heavy materials, you might want an impact driver, but a standard drill usually does the trick for headboards.
For materials, it depends on your design. If you’re going for a wooden look, you’ll need plywood or solid wood boards. For a upholstered look, you’ll need foam, batting, and fabric. But the most critical component is the hardware. You need heavy-duty lag screws or carriage bolts that are long enough to go through your headboard material and deep into the wall studs. Generally, 3-inch screws are a safe bet. Also, grab some washers. They distribute the load and prevent the screw head from pulling through the wood.
Designing Your Dream Headboard
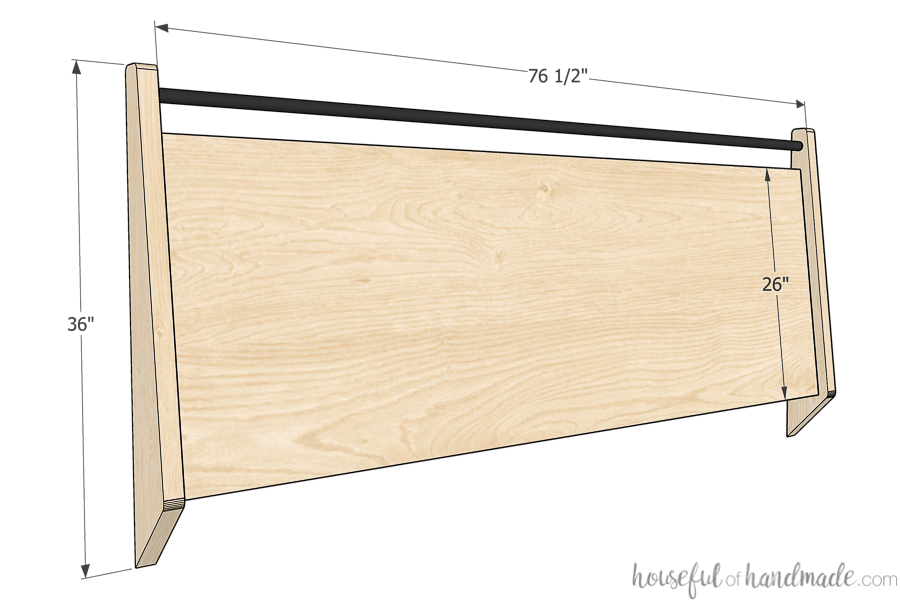
Now for the fun part. What do you want it to look like? This is where you get to be creative. Since you are building it yourself, you control the size. Standard headboards are often too narrow or too wide. Measure your bed first. A king bed is 76 inches wide. You might want your headboard to be 80 inches to give it some presence. Or maybe you want it floor-to-ceiling for a dramatic effect. The choice is yours.
If you are new to woodworking, keep it simple. A rectangular panel with rounded corners is timeless and easy to build. You can stain it, paint it, or leave it natural. Pine is a great beginner wood because it’s soft and cheap. Oak is harder and looks premium but costs more. If you want padding, you can glue high-density foam to the wood before covering it with fabric. This adds that luxury hotel feel without the sewing machine hassle.
Remember to account for the height. You want enough height to sit up comfortably against it. Usually, 40 to 50 inches above the mattress is the sweet spot. But if you have high ceilings, going taller can balance the room. Sketch it out on paper first. Visualize it in your space. Make sure it doesn’t block any outlets or light switches. These little details matter. A beautiful headboard is useless if you can’t plug in your phone.
Finding the Studs: The Foundation of Security
This is the most important step. Seriously. Do not rush this. Your headboard is only as strong as its connection to the wall. Drywall alone cannot support the weight of a headboard, especially if you lean against it. You must hit the studs. In most homes built after the 1950s, studs are spaced 16 inches apart on center. But don’t assume. Verify.
Use your stud finder to locate the edges of the studs. Mark the center of each stud with a pencil. It’s helpful to draw a vertical line up the wall so you can see exactly where you can drill. You want to hit at least two studs. For a king-size headboard, hitting three or four is even better. More attachment points mean less stress on each individual screw. It distributes the weight evenly.
What if your design doesn’t align with the studs? You have options. You can build a cleat system. This involves attaching a horizontal wooden board (the cleat) to the wall studs first. Then, you attach your headboard to that cleat. This gives you flexibility in where the headboard sits horizontally while still anchoring securely to the studs. It’s a pro tip that saves a lot of headaches. Just make sure the cleat is screwed into every stud it crosses.
The Build: Cutting, Assembling, and Finishing
With your design finalized and studs marked, it’s time to build. If you’re using wood, cut your panels to size. A circular saw is great for straight cuts, but many hardware stores will cut wood for you if you provide the measurements. Take advantage of that. It saves time and ensures straight edges. Sand all the edges smooth. Nobody wants a splinter in their back while reading in bed.
If you’re upholstering, lay your fabric face down on the floor. Place the foam on top, then the wood panel. Pull the fabric tight around the edges of the wood and staple it to the back. Start in the middle of each side and work your way out to the corners. Think of it like wrapping a present, but tighter. Smooth out any wrinkles as you go. This takes patience, but the result is worth it.
Once the physical headboard is assembled, it’s time for the finish. If it’s wood, apply your stain or paint. Let it dry completely. This might take a few hours, so use this time to clean up your workspace. Prep the area where the bed will go. Move the mattress aside. You want clear access to the wall. Check your hardware one last time. Ensure your screws are the right length. You don’t want to drill into electrical wires behind the wall, so stay centered on the stud marks.
It’s Sunday afternoon. The moment of truth. Lift the headboard into position. This is definitely a two-person job. Have your helper hold it steady against the wall, aligned with your pencil marks. Use the level to make sure it’s perfectly straight. An crooked headboard will drive you crazy every time you look at it. Adjust until the bubble is centered.
Pre-drill your holes through the headboard and into the studs. This prevents the wood from splitting. Then, drive in your lag screws. Tighten them firmly, but don’t over-torque. You want it snug, not stripped. If you used a cleat system, hang the headboard on the cleat and secure it from the bottom or top with smaller screws to prevent lifting. Give it a good shake. Push against it. Lean on it. It shouldn’t budge. Not even a millimeter.
Once it’s secure, push your bed back into place. Notice the difference? No gap. No wobble. Just a seamless transition from mattress to wall. Step back and admire your work. You did this. In one weekend. You saved money, learned a new skill, and upgraded your living space. It feels pretty good, doesn’t it? Take a photo. You earned it.
So, there you have it. A secure, stylish, wall-mounted headboard built in just two days. It’s not just about furniture; it’s about taking control of your environment. It’s about solving that annoying rattle that’s been bothering you for years. And it’s about proving to yourself that you can create something beautiful and functional with your own hands.
Don’t let the idea of drilling into walls scare you. With the right prep and a bit of confidence, it’s straightforward. The rewards far outweigh the effort. Imagine waking up tomorrow, leaning back against your new headboard, and hearing… nothing. Just quiet. Stability. Comfort. That’s the power of a job well done. Now, go enjoy your new sanctuary. You’ve earned some rest.