Ever stared at a wall where you desperately need both a light switch and a power outlet, but there’s only one lonely electrical box staring back at you? It’s a classic renovation headache. You want the convenience of plugging in your phone charger right next to the lamp you’re controlling, but you don’t want to tear open the drywall to run new lines. That’s exactly where the combo device steps in. It’s a clever little piece of hardware that packs two functions into a single-gang frame, saving space and sanity.
But let’s be real for a second. Looking at the back of one of these units can feel like trying to read ancient hieroglyphs. There are brass screws, silver screws, maybe a broken tab, and a ground terminal. If you’ve ever felt a pang of anxiety thinking about mixing up the hot and neutral wires, you aren’t alone. Electricity demands respect, not fear, but getting the wiring wrong isn’t just an inconvenience—it’s a safety hazard. In 2026, with smart homes becoming the norm and DIY culture stronger than ever, knowing how to handle these dual-purpose devices is a skill that pays off.
This isn’t just about connecting wires. It’s about understanding the flow of power in your home. Whether you are replacing an old, cracked unit or installing a new setup in a cramped kitchen corner, the principles remain the same. We’re going to walk through this together, step by step. No jargon without explanation, no assuming you already know what a "traveler" wire is. Just clear, honest advice on how to get the job done right, safely, and with confidence.
Understanding the Anatomy of a Combo Device
Before you even touch a screwdriver, you need to know what you’re holding. A combo switch-outlet looks like a standard duplex receptacle from the front, but half of it is a toggle or rocker switch. Inside, however, the magic happens. These devices are designed to fit into a standard single-gang electrical box, which is roughly 2 inches wide and 3.5 inches tall. This compact design is their biggest selling point. In older homes or tight spaces like behind a sofa or in a narrow hallway, finding room for two separate devices is often impossible.
On the side of the device, you’ll notice a series of terminals. Typically, there are brass-colored screws for the hot (live) wires and silver-colored screws for the neutral wires. There’s also a green screw for the ground. Here is the tricky part that trips up most beginners: the connection between the switch and the outlet inside the plastic housing. In many modern combo devices, the hot side might have a breakable tab connecting the switch input to the outlet input. Other times, they are completely isolated. You need to check the manufacturer’s instructions because this varies. If the tab is intact and you want independent control, you’ll need to break it. If you leave it, the switch might control the outlet, or they might share power in a way you didn’t intend.
Another thing to look for is the rating. Most residential combo devices are rated for 15 amps, matching standard household circuits. But if you’re working in a garage or workshop with heavy-duty tools, you might encounter 20-amp versions. These have a T-shaped neutral slot on the outlet face. Mixing these up is a bad idea. A 15-amp device on a 20-amp circuit can overheat if too much load is drawn through the outlet portion while the switch is handling a separate load. Always match the device rating to your circuit breaker. It’s a small detail, but it keeps your house from becoming a fire hazard.
Safety First: Tools and Precautions
Let’s pause. Before we talk about which wire goes where, we need to talk about staying alive. Electricity doesn’t care if you’re tired, distracted, or confident. It bites hard. The absolute first step in any electrical project is turning off the power. Not just flipping the switch on the wall—that only cuts power to the light fixture, not the wires in the box. You need to go to your main service panel and flip the correct circuit breaker to the OFF position. If your breakers aren’t labeled, now is the time to figure out which one controls your workspace. Turn it off, then try to turn on the light. Nothing? Good. But don’t trust it yet.
You need a non-contact voltage tester. These are inexpensive, pen-like tools that beep or light up when they sense live voltage. Test every wire in the box. Check the black wires, the white wires, and even the bare copper grounds occasionally, just to be sure there’s no stray feedback. In 2026, these testers are more sensitive and reliable than ever, but they aren’t infallible. Always assume a wire is live until you’ve proven it dead. Wear safety glasses too. Old wires can crumble, and dust from drilling or prying open boxes can fly into your eyes. It’s not glamorous, but it’s smart.
Gather your tools before you start. You’ll need a quality set of screwdrivers—both flathead and Phillips. Wire strippers are essential; using a knife to strip insulation is a recipe for nicking the copper, which creates weak points that can heat up and fail. Line-man pliers for twisting wires together and needle-nose pliers for bending hooks around screws will make your life easier. And please, use a headlamp or a work light plugged into a different circuit. Working in the dark is frustrating and dangerous. Having your hands free to hold wires while you see what you’re doing makes a huge difference in the quality of your connections.
Scenario One: Independent Control from Separate Sources
This is the most complex but also the most flexible wiring scenario. Imagine you have a box where two different cables come in. One cable brings power from the panel for the outlet, and another cable brings power from a different source (or perhaps the same panel but a different circuit, though this is rare and usually code-prohibited in a single box unless specified) for the switch. More commonly, this setup involves one cable bringing constant power to the outlet, and a second cable running from the switch to a light fixture. Wait, that’s not separate sources for the device itself, that’s a switch loop. Let’s clarify.
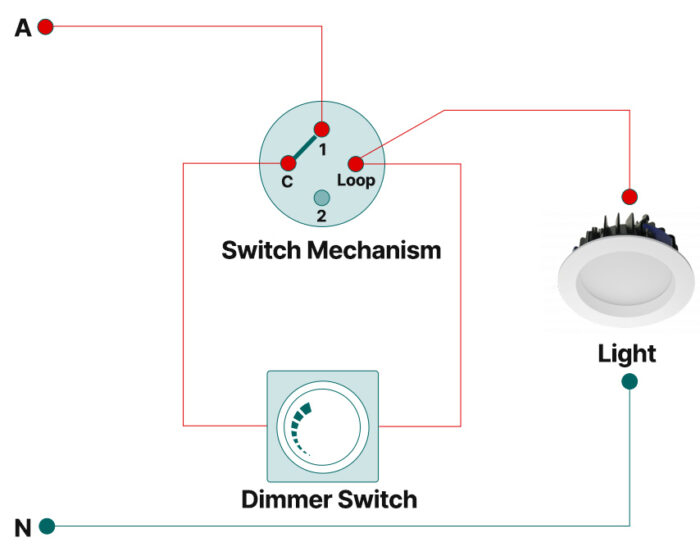
True independent control usually means the outlet is always hot, and the switch controls a separate light, but both feed into this one box. In this case, you likely have two distinct cables entering the box. Cable A has constant hot and neutral. Cable B goes to a light fixture. To wire this, you connect the constant hot wire (black) from Cable A to the brass screw on the outlet side of the combo device. You connect the neutral (white) from Cable A to the silver screw on the outlet side. Now, the outlet is live. For the switch, you take the hot wire going to the light (from Cable B) and connect it to one terminal on the switch. Then, you need to feed power to the other side of the switch. You do this by jumping a short piece of wire (a pigtail) from the constant hot on the outlet to the other switch terminal. This way, the switch has power to send to the light when flipped.
Why would you do this? It’s perfect for a bedroom entrance. You want an outlet that’s always on for your vacuum or phone charger, but you also want the switch right there to control the ceiling fan or overhead light. The key here is keeping the neutrals separate if they belong to different circuits, but if they are on the same circuit, you can splice them together. Always check local codes. In many jurisdictions, all neutrals in a box must be tied together if they are on the same phase. Confusing? Yes. That’s why labeling your wires with tape before you disconnect anything is a lifesaver. Take a photo with your phone before you touch a single screw. Your future self will thank you.
Scenario Two: Switched Outlet vs. Always-On Outlet
Here is a common point of confusion. Do you want the switch to control the light fixture down the hall, or do you want the switch to turn the outlet itself on and off? These are two very different outcomes. If you want the switch to control a remote light, you follow the logic in the previous section. But if you want the switch to control the plug-in lamp sitting right next to it, the wiring changes slightly. This is often used in living rooms where you want to plug a floor lamp into the wall and control it with a switch near the door, rather than reaching behind the sofa.
In this "switched outlet" configuration, the hot wire coming into the box connects to the switch terminal first. Then, a jumper wire runs from the other side of the switch to the brass screw on the outlet. The neutral wire connects directly to the silver screw on the outlet. When you flip the switch, it completes the circuit to the outlet, sending power to whatever is plugged in. The downside? You lose the ability to have an always-on plug in that specific half of the device. Some combo devices allow you to split the outlet, making one half switched and the other always on, but this is less common in standard combo switch-receptacle units than in standard duplex receptacles with a broken tab.
Check the device carefully. If it’s a true combo unit, the switch and outlet are often internally linked in a way that prevents easy splitting without external jumpers. If you need one half hot and one half switched, you might be better off using a standard duplex receptacle with a broken tab and a separate switch, if space allows. But if you’re stuck with the combo, accept that the switch likely controls the entire outlet or a remote light. Don’t force a configuration the device wasn’t designed for. It leads to loose connections and arcing. Simplicity is safety. If you need complex control, consider a smart plug instead of rewiring the wall.
Common Mistakes and Troubleshooting Tips
Even pros mess up. It happens. The most frequent error I see is reversing the hot and neutral wires. While AC current alternates direction, the neutral wire is bonded to ground at the panel, making it safer to touch (though you still shouldn’t). Connecting the hot wire to the silver screw and the neutral to the brass screw won’t necessarily stop the device from working, but it creates a shock hazard. The shell of the outlet or the switch mechanism could become energized. Always double-check your color coding. Black (or red) to brass. White to silver. Green or bare to green. It’s a mantra for a reason.
Another biggie is the "backstabbing" method. Many devices have holes in the back where you can push the wire in to make contact, rather than wrapping it around the screw. Don’t do this. Backstabs are notorious for failing over time. The spring-loaded contact loosens, creates resistance, heats up, and eventually melts the plastic or starts a fire. Always use the side screws. Strip about 3/4 inch of insulation, bend the wire into a half-circle hook, and wrap it clockwise around the screw. Tighten it down firmly. The wire should not slip out if you tug on it. A solid mechanical connection is the foundation of a safe electrical system.
If you finish wiring and the device doesn’t work, don’t panic. Go back to the breaker. Is it definitely on? Use your voltage tester again. Did you break the tab when you shouldn’t have? Or did you forget to break it when you needed to? Check your splices. Are the wire nuts tight? Did you cap off any unused wires properly? Sometimes the issue isn’t the combo device at all, but a loose connection in a junction box upstream. Trace the path. Start from the panel and work your way out. Electrical troubleshooting is logical deduction. Eliminate variables one by one. And if you smell burning plastic or see scorch marks, stop immediately. Call a licensed electrician. No DIY project is worth risking your home.
Let’s be honest. Not every job is a DIY candidate. If you open your electrical box and find a spaghetti monster of wires—multiple cables, different colors, cloth-insulated vintage wiring, or aluminum wires—you should probably step back. Aluminum wiring, common in homes built between the mid-1960s and early 1970s, requires special connectors and antioxidants to prevent oxidation and fire hazards. Standard copper-only devices can be dangerous when connected directly to aluminum. If you see silver-colored wires that aren’t tinned copper, call a pro.
Also, consider your local codes. In 2026, many regions have adopted stricter NEC (National Electrical Code) updates requiring AFCI (Arc-Fault Circuit Interrupter) or GFCI (Ground-Fault Circuit Interrupter) protection in more areas of the home, including living rooms and bedrooms. Installing a standard combo device on a circuit that now requires AFCI protection might be a code violation. An electrician will know if you need to upgrade the breaker or the device itself. They also carry insurance. If you wire it wrong and your house burns down, your homeowner’s insurance might deny the claim if they find unpermitted, substandard work.
Finally, trust your gut. If you feel overwhelmed, confused, or unsafe, stop. There is no shame in hiring an expert. Electrical work is invisible once it’s done, but its consequences are permanent. A licensed electrician can install a combo device in 15 minutes, ensuring it’s safe, code-compliant, and functional. Think of the cost not as an expense, but as an investment in peace of mind. You’ve learned the theory here, you understand the concepts, and that knowledge helps you communicate with the pro. But letting them handle the live wires? That’s often the smartest move you can make.
Wrapping up, wiring a combo outlet and switch device is a manageable task for those with some experience and a healthy respect for electricity. It saves space, adds functionality, and cleans up the look of your walls. Remember to identify your wiring scenario clearly—independent control or switched outlet—before you start. Use the right tools, prioritize safety by verifying power is off, and make solid, screw-terminal connections. Avoid backstabs, respect the color codes, and know your limits.
Whether you choose to tackle this yourself or call in a professional, understanding how these devices work empowers you to maintain your home better. You’re not just swapping parts; you’re managing the energy that powers your life. Keep your connections tight, your tests thorough, and your curiosity alive. With the right approach, you’ll have a sleek, functional wall setup that serves you well for years to come. Stay safe, and happy wiring.