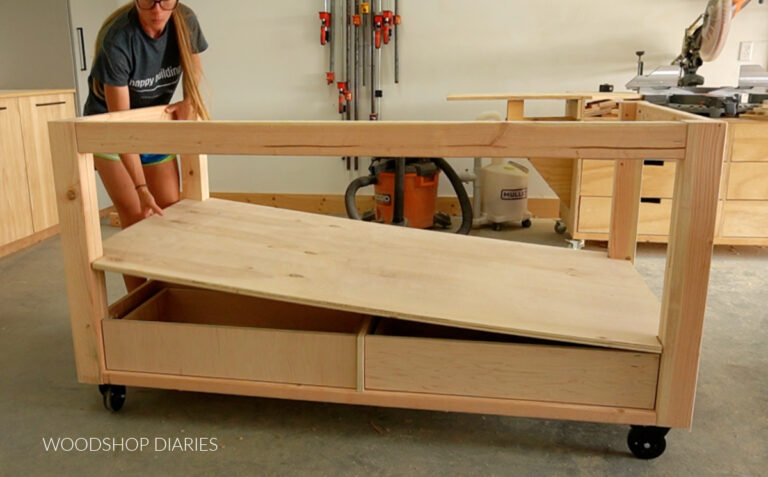
You know the feeling. You’re in the zone. The glue is setting, the cut is perfect, and you reach for that one specific chisel. But it’s not there. It’s buried under a pile of sandpaper scraps, three different types of screws, and a half-eaten sandwich from last Tuesday. You sigh. The momentum is gone. You spend ten minutes hunting. By the time you find it, you’ve forgotten why you needed it in the first place.
It doesn’t have to be like this.
A messy workbench isn’t just annoying; it’s a creativity killer. In 2026, we have access to better hardware, smarter materials, and more DIY resources than ever before. Yet, most of us are still stuffing our tools into dark, bottomless pits we call "drawers." The problem isn’t that you’re disorganized. The problem is that your storage system wasn’t designed for how you actually work.
Let’s fix that. Not with expensive, pre-made cabinets that don’t fit your space. But with a custom approach. A system that respects your tools. And your sanity.
Why Most Drawers Fail Before You Even Build Them
Here’s the hard truth: standard drawers are terrible for workshops. They are designed for clothes or kitchen utensils. Flat, uniform items. Tools are weird. They are heavy, sharp, irregular, and often covered in dust or oil. When you toss a hammer into a deep, empty box, it doesn’t stay put. It slides. It bangs against other metal. It creates a jumbled mess that gets worse every time you open it.
Most people make the mistake of building the bench first and thinking about storage later. This is backwards. Your storage needs should dictate the structure of your bench. If you wait until the end, you’ll end up with awkward gaps or drawers that are too shallow for your power drills and too deep for your hand planes. It’s a compromise nobody wants.
Think about safety, too. An organized workbench is a safe workbench. When you can see where your chisels are, you’re less likely to grab a handful of sharp edges blindly. Studies on workshop efficiency show that workers spend up to 20% of their time just looking for tools. That’s huge. By designing a system that keeps things visible and accessible, you aren’t just tidying up; you’re reclaiming hours of your life. And preventing accidents.
The Anatomy of a Drawer That Works
So, what makes a drawer actually stay organized? It starts with dimensions. Stop guessing. Pull out your tools. Lay them on the floor. Group them by task. Now measure the biggest item in each group. That is your minimum height and width. Don’t build a drawer that is 12 inches deep if your longest screwdriver is only 8 inches. You’ll just waste space and create a black hole at the back where small parts go to die.
Material choice matters more than you think. Plywood is great for the box itself because it’s stable and strong. But for the interior? Consider lining the bottom with a non-slip mat or even a thin layer of cork. It stops tools from sliding around when you yank the drawer open. For heavier items, reinforce the bottom with an extra strip of hardwood. You don’t want the bottom sagging after six months of holding your impact driver.
Hardware is the unsung hero here. Cheap slides will bind up with sawdust. Invest in full-extension ball-bearing slides. Yes, they cost more. But being able to pull the drawer all the way out means you can see everything inside. No more reaching into the dark abyss. In 2026, there are also soft-close options that are surprisingly durable and keep the noise down. A slamming drawer is a recipe for loose joints and spilled bits.
Custom Dividers: The Secret Sauce
This is where the magic happens. Fixed dividers are okay, but adjustable ones are better. Why? Because your tool collection changes. You might buy a new set of wrenches next month. Or stop using that old router bit. If your dividers are glued in place, you’re stuck. Use a slot system. Cut grooves into the sides of the drawer box. Then, make thin plywood dividers that slide into these slots. You can move them, add them, or remove them as needed.
For small items—screws, nails, dowels—don’t just throw them in a bin. Use modular containers. Small plastic bins or even repurposed food containers work wonders. But here’s the trick: label them. Clearly. And use a consistent labeling system. Whether it’s a label maker or just a sharpie, knowing exactly what is in that tiny box saves mental energy. You shouldn’t have to guess if the box contains 1-inch brads or 1.5-inch finish nails.
Consider vertical storage for flat items. Chisels, files, and saw blades take up a lot of horizontal space if laid flat. But if you stand them up on their ends, separated by thin dividers, they take up a fraction of the room. Plus, you can see every single tool at a glance. It’s like a library for your cutting edges. This simple shift in orientation can double your usable space in a single drawer.
Zone-Based Organization for Real Life
Stop organizing by tool type. Start organizing by task. This is a concept that professional chefs use in their kitchens, and it works perfectly in the woodshop. Create zones. A "finishing zone" drawer might hold sandpaper, stains, brushes, and rags. A "joinery zone" drawer holds clamps, glue, and measuring squares. When you are sanding a table, you only need to open one drawer. Everything you need is right there.
This approach reduces movement. Less walking around the shop means more focus. It also helps with cleanup. When you’re done with a task, you know exactly where everything goes back. There’s no decision fatigue. You don’t have to wonder, "Does this clamp go with the screws or the hammers?" It goes in the joinery drawer. Done.
Map out your zones based on your most common projects. If you do a lot of box making, have a dedicated drawer for small clamps and precision squares. If you do furniture repair, have a zone for adhesives and fillers. Be honest about what you actually do, not what you think you should do. If you haven’t used that dovetail jig in two years, maybe it doesn’t need prime real estate in your main drawer bank. Move it to secondary storage.
Maintenance Habits That Stick
Even the best-designed system will fail if you don’t maintain it. But maintenance doesn’t mean spending your Saturday cleaning. It means building habits that take seconds. The "one-touch" rule is powerful. When you pick up a tool, put it back in its designated spot immediately after use. Don’t set it on the bench "for now." Now becomes never.
Schedule a quick five-minute reset at the end of every session. Just enough time to wipe down the drawer fronts, check that dividers are straight, and ensure no stray screws are left behind. This prevents the gradual creep of clutter. It’s much easier to keep a system tidy than to rescue it from chaos once a month.
Also, be ruthless. Every few months, do an audit. Take everything out of a drawer. Wipe it clean. Ask yourself: Have I used this in the last six months? If the answer is no, and it’s not a seasonal tool, consider moving it to long-term storage or getting rid of it. Hoarding tools you don’t use just clogs up your efficient system. Keep the drawers lean. Keep them mean.
Adapting Your System as You Grow
Your skills will improve. Your tools will change. Your drawer system needs to be flexible enough to grow with you. This is why modular designs are so important. Maybe you start with basic plywood boxes. Later, you might want to add foam inserts for delicate instruments. Or switch out plastic bins for wooden trays that match your bench aesthetic. That’s fine. The core structure should allow for these upgrades without requiring a total rebuild.
Don’t be afraid to experiment. Try a new divider layout. See if vertical storage works for your marking gauges. If it doesn’t, change it. The beauty of a DIY system is that it’s yours. There are no rules written in stone. If you find that you always reach for your tape measure and it’s in the wrong drawer, move it. Listen to your workflow. Let your frustrations guide your improvements.
In 2026, there are also smart tags and inventory apps that can help you track what you have. While this might seem overkill for a home shop, for some, it’s a game-changer. You could tag your high-value tools and get an alert if they aren’t returned to their spot. Technology can support your organization, but it shouldn’t replace the fundamental habit of putting things away. Use it as a helper, not a crutch.
At the end of the day, an organized workbench is about more than just efficiency. It’s about respect. Respect for your craft. Respect for your tools. And respect for your own time. When you walk into your shop and see a clean, ordered space, you feel ready to create. The anxiety of clutter fades away. You can focus on the wood, the joinery, the design.
Imagine opening a drawer and seeing exactly what you need. No digging. No frustration. Just pure, unadulterated access. That feeling is worth the effort of building it right. It transforms your workshop from a storage unit into a true creative sanctuary.
So, take a look at your current setup. What’s driving you crazy? Is it the loose screws? The hidden chisels? Pick one drawer. Just one. Redesign it this weekend. Use the principles of zoning, custom dividers, and proper sizing. Feel the difference. Then move to the next one. Slowly, surely, you’ll build a system that actually stays organized. And you’ll wonder how you ever worked any other way.