It starts with a single step. You’re walking to the kitchen for that midnight glass of water, trying to be a ninja so you don’t wake the house, and then—creak. It’s loud. It’s judgmental. It sounds like the floorboards are personally offended by your presence. We’ve all been there. That annoying squeak isn’t just a noise; it’s a disruption to the peace of your home. In 2026, as we spend more time than ever working and living in our spaces, that little sound can feel like a major intrusion.
But here’s the thing: your floor isn’t broken. Well, probably not. It’s just talking. Wood is a living, breathing material, even after it’s been cut and polished. It expands when it’s humid and shrinks when it’s dry. It moves. And when two pieces of wood rub against each other, or when a nail loosens its grip on a joist, you get that signature squeak. It’s physics, plain and simple. But knowing why it happens doesn’t make it any less irritating when you’re trying to sneak past a sleeping baby or hide from your cat at 3 AM.
The good news? You don’t need to rip up your entire house to fix it. Most squeaks are minor annoyances with straightforward fixes. Whether you’re dealing with an old Victorian charmer or a newer build that’s settling in, there are ways to silence those boards. This guide will walk you through exactly what’s going on under your feet, how to find the trouble spots, and the best tricks to keep your floors quiet for good. Let’s get into it.
The Science Behind the Squeak
So, why do floors actually make noise? It’s rarely just one thing. Usually, it’s a combination of friction and movement. Think of your floor system like a sandwich. You have the finish flooring (the hardwood you see), the subfloor (the plywood underneath), and the joists (the structural beams holding everything up). Ideally, these three layers are glued, nailed, or screwed together tightly so they move as one unit. But over time, things shift.
When the wood dries out, especially in winter when heating systems are blasting away moisture, the boards shrink. This creates tiny gaps. When you step on a board, it bends slightly. If it’s not secured tightly to the subfloor or joist, it rubs against the nail shank or the adjacent board. That rubbing creates friction, and friction creates sound. It’s basically the same principle as running your finger around the rim of a wine glass, just much less musical and way more annoying.
Another culprit is the fasteners themselves. Nails can loosen over decades of foot traffic. Screws might back out if they weren’t driven in correctly during installation. Even the glue between the subfloor and joists can fail if it wasn’t applied properly or if moisture got in there. In newer homes built in the last few years, sometimes the issue is just "settling." The house is finding its equilibrium, and until it does, you might hear some groans and creaks. It’s normal, but that doesn’t mean you have to live with it forever.
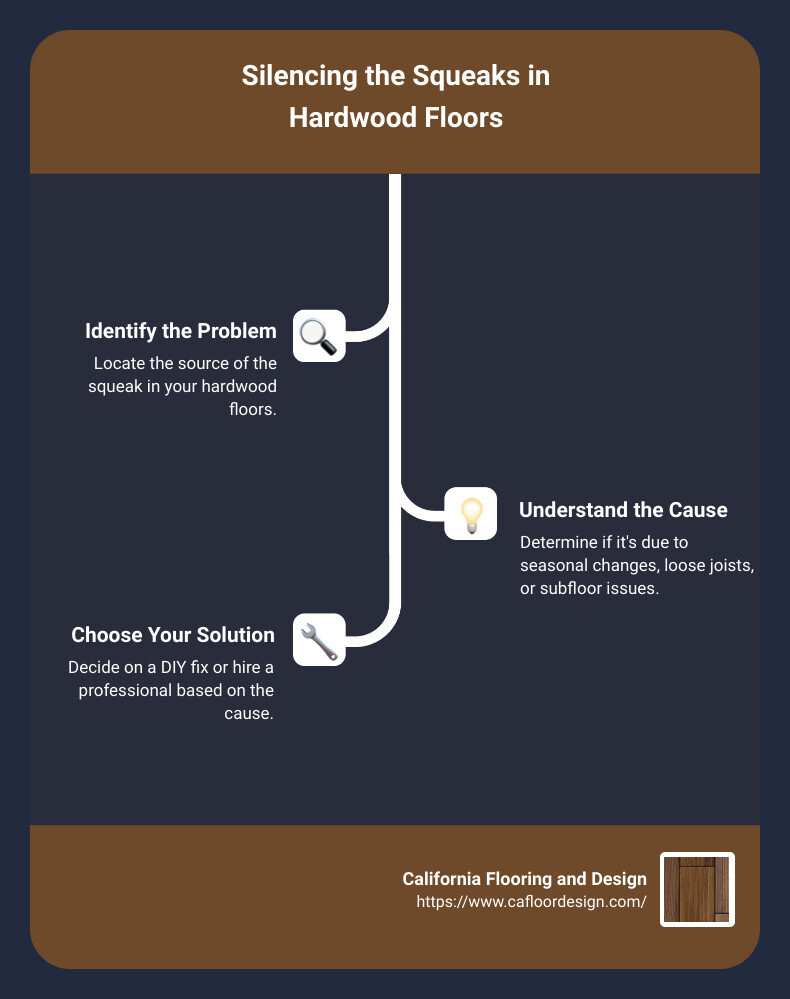
Diagnosing the Noise: Finding the Culprit
Before you grab a hammer, you need to know where the noise is coming from. This is half the battle. You can’t fix what you can’t find. Start by walking slowly across the room. Listen closely. Try to isolate the exact board or area that squeaks. Sometimes it’s a specific spot near a wall; other times, it’s a whole section of the hallway. Mark the spot with a piece of painter’s tape so you don’t lose it.
Next, figure out if you can access the floor from below. Do you have a basement or crawl space underneath? If yes, congratulations. You have a huge advantage. Have someone walk on the floor above while you stand below with a flashlight. Watch the joint between the subfloor and the joist. If you see movement or a gap opening up when your partner steps on the squeaky spot, you’ve found the problem. It means the subfloor isn’t attached tightly to the joist.
If you don’t have access from below, don’t worry. You can still fix it from the top, but you’ll need to be a bit more surgical. You’ll need to locate the joists first. Use a stud finder to map out where the joists run beneath your flooring. Knowing this is crucial because most effective fixes involve anchoring the floor to these structural supports. If you just screw into random spots, you might hit empty air or, worse, damage plumbing or electrical wires. Take your time here. Accuracy matters.
Quick Fixes: The Low-Effort Solutions
Let’s start with the easiest stuff. These aren’t permanent miracles, but they can take the edge off a minor squeak without requiring any tools. The oldest trick in the book is powder. Baby powder, baking soda, or powdered graphite can work wonders for squeaks caused by boards rubbing against each other. Sprinkle a generous amount over the seam of the squeaky board. Then, use a soft brush or a cloth to work it deep into the cracks.
The idea is that the powder acts as a lubricant. It reduces the friction between the wood surfaces, so when they move, they slide silently instead of grinding noisily. Graphite is usually the most effective because it’s slicker and doesn’t clump up with moisture like baking soda might. Just be careful with graphite—it’s dark and can stain light-colored carpets or grout if you’re not careful. Wipe up any excess immediately.
Another low-effort hack involves adjusting the humidity in your home. Since wood swells and shrinks with moisture changes, keeping a consistent humidity level (around 40-50%) can minimize movement. In the dry winter months, running a humidifier might stop new squeaks from forming or lessen existing ones. It’s not a fix for a loose nail, but it helps prevent the wood from shrinking enough to create gaps in the first place. Think of it as preventive medicine for your floors.
Fixing from Below: The Basement Advantage
If you have access from underneath, you’re in luck. This is the cleanest way to fix squeaks because you don’t have to drill into your beautiful finished floor. The most common method here is using shims. If you see a gap between the joist and the subfloor when someone walks above, gently tap a wooden shim into that gap. Coat the shim with carpenter’s glue before inserting it for a stronger hold. Don’t hammer it in too hard, or you’ll lift the floor up and create a hump. Just snug it in tight.
Another great option from below is adding blocking. This involves cutting a piece of 2×4 wood to fit snugly between two joists, right under the squeaky area. Secure it with screws or nails to both joists. This adds stiffness to the floor system and prevents the subfloor from flexing. It’s a bit more labor-intensive than shims, but it’s incredibly effective for larger areas of squeaking. It essentially reinforces the structure where it’s weak.
You can also use specialized brackets or screws designed for subfloor repair. Products like the "Squeak-Ender" or similar kits allow you to pull the subfloor down tight against the joist without lifting it. These devices use a bracket and a screw mechanism to tighten the connection. They’re pricey compared to a simple shim, but they’re engineered specifically for this problem and often come with instructions that make the job foolproof. If you’re handy, this is a solid weekend project.
Fixing from Above: When You Have No Choice
No basement? No problem. You can fix squeaks from the top, but you have to be careful to hide your work. If you have carpet, it’s easy. You can use special "break-away" screws that snap off below the surface of the carpet padding. You drive them through the carpet into the joist, and the head snaps off, leaving no trace. It’s magic. Just make sure you hit the joist, or the screw won’t hold anything.
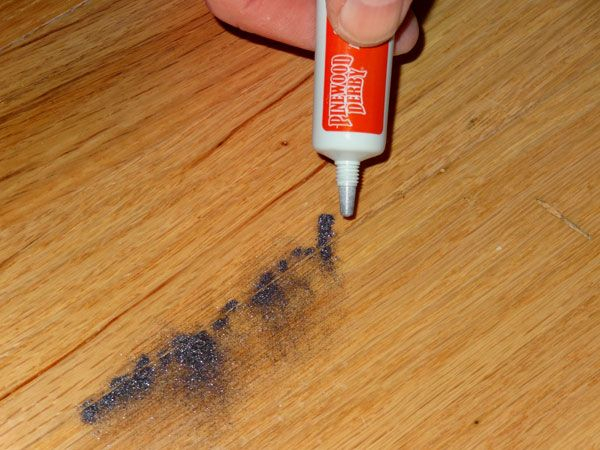
For hardwood floors, it’s trickier because you don’t want visible screw heads. One method is to drill pilot holes at an angle (toenailing) through the tongue of the board into the joist below. Then, drive in a finishing nail or screw. You’ll need to fill the hole with wood putty that matches your floor color. If done carefully, it’s nearly invisible. Another option is to use adhesive injection kits. These allow you to drill a tiny hole and inject glue into the gap between the subfloor and the finish floor. It bonds the layers back together without any hardware.
There’s also the option of replacing a board if it’s severely damaged or warped. This is a last resort. You’d need to cut out the offending board and install a new one, securing it properly with glue and nails. It’s invasive and requires matching the wood species and finish, which can be tough. Only do this if the board itself is the problem, not just the attachment. Most of the time, securing the existing board is enough.
Fixing the squeak is great, but preventing it from coming back is better. The key is controlling the environment. Wood floors hate extreme changes in temperature and humidity. Keep your home’s climate as stable as possible. Use humidifiers in the winter and dehumidifiers in the summer if needed. Avoid letting water sit on the floor, and clean up spills immediately. Moisture is the enemy of a quiet floor.
Regular maintenance also helps. Check for loose rugs or mats that might be causing uneven wear. Make sure your furniture legs have felt pads to distribute weight evenly and prevent denting or stressing specific floorboards. If you notice a small squeak starting, address it early. A little powder or a quick shim can stop a minor issue from becoming a major headache later. Don’t wait until the whole floor sounds like a haunted house.
Finally, if you’re installing new floors in 2026 or beyond, pay attention to the installation process. Ensure the subfloor is flat, dry, and securely fastened before the hardwood goes down. Use high-quality adhesives and fasteners. Ask your installer about their methods for preventing squeaks. A good pro will take the time to acclimate the wood to your home’s humidity levels before installing it. This step alone can prevent a huge number of issues down the road. It’s worth the extra wait.
Living with a creaky floor doesn’t have to be your fate. With a bit of detective work and some simple tools, you can reclaim the silence in your home. Whether you choose the quick powder trick or the more involved shim method, the goal is the same: peace and quiet. So, go ahead. Walk softly. Your floors will thank you. And if they don’t? Well, now you know exactly what to do about it.