Ever stared at a wall covered in peeling, beige floral paper from the 1980s and felt a deep, existential dread? You are not alone. It’s that one home improvement task everyone puts off until it becomes unavoidable. Maybe you’re buying an old house, or maybe you just finally decided that the avocado green borders have had their day. Whatever the reason, staring down a room full of glued-on paper feels like climbing Everest without oxygen. But here is the secret: it’s not magic. It’s chemistry and patience. And honestly? It’s way easier than you think if you stop fighting the wall and start working with it.
Most people try to rip it off dry. That is mistake number one. You’ll tear the paper, leave the backing, ruin the drywall, and end up crying in the corner with a putty knife in your hand. Don’t do that. Professional painters have been doing this for decades, and they don’t use brute force. They use heat, moisture, and the right tools to make the adhesive give up the ghost. By the time you finish reading this, you’ll know exactly how to tackle even the most stubborn, multi-layered nightmares without turning your living room into a construction zone disaster. Let’s get those walls bare and ready for something beautiful.
Gathering Your Arsenal Before You Start
You wouldn’t try to bake a cake without flour, right? Same logic applies here. Walking into a wallpaper removal job unprepared is a recipe for frustration. The first thing you need is protection. Not just for yourself, but for your floors and furniture. Water and old glue are messy. They drip. They splash. They find their way into cracks you didn’t know existed. So, grab some heavy-duty plastic drop cloths. Not the thin painter’s tape kind that tears if you look at it wrong. Get the thick, woven plastic ones. Tape them down good. Use blue painter’s tape on the baseboards and trim. You do not want to spend three hours scraping glue off your oak molding later. Trust me on this.
Next, let’s talk tools. You need a scoring tool. This looks like a little wheel with tiny teeth. It punches thousands of microscopic holes in the wallpaper so your water or steam can actually get to the glue behind it. Without this, you’re just wetting the surface, and the water will bead up and roll off like rain on a duck’s back. You also need a wide putty knife or a dedicated wallpaper scraper. Look for one with a flexible blade. Rigid blades dig into the drywall and create gouges that you’ll have to spackle later. A flexible blade slides under the paper without biting into the gypsum. Oh, and grab a spray bottle. A garden sprayer is even better if you have a big room. You want to saturate the wall, not mist it.
Don’t forget the safety gear. Old wallpaper glue can contain mold spores or weird chemicals, especially if the house was built before 1990. Wear safety glasses to keep dripping goo out of your eyes. A mask is smart too, mostly because sanding and scraping creates dust that you really don’t want in your lungs. And gloves. Your hands will be wet and pruny within twenty minutes if you skip the gloves. Get a pair of rubber dishwashing gloves. They give you grip and keep your skin from getting irritated by the stripping solutions. Having everything laid out before you start means you won’t have to stop mid-scrape to run to the hardware store. Momentum is key here.
Knowing What You Are Up Against
Not all wallpaper is created equal. Some peels off in satisfying, long sheets like a banana. Others fight you every inch of the way. Before you start spraying water everywhere, you need to figure out what kind of beast you are dealing with. The easiest test is the "corner peel." Find a loose edge, maybe near a seam or a corner, and try to pull it. If it comes off dry and leaves nothing behind, congratulations. You have strippable wallpaper. You can just pull it off. Stop reading and go enjoy your free time. But if it tears, or if only the top layer comes off leaving a papery backing, you have traditional wallpaper. This is where the work begins.
Then there is vinyl-coated wallpaper. This stuff is waterproof. Literally. If you spray water on it, it just sits there. You absolutely must score this type heavily. The plastic coating prevents moisture from reaching the glue, so those little holes from your scoring tool are critical. If you skip scoring, you will waste hours spraying water that does nothing. Another tricky type is foil or metallic wallpaper. This stuff tears easily and often has a mylar backing that is a pain to remove. Be gentle with your scoring tool here, or you’ll shred it into tiny, unmanageable pieces. Sometimes, for foil, it’s better to use a steamer right away rather than trying to soak it.
Older homes might have layers. Like, five layers. Someone in the 70s put paper over the 50s paper, and someone in the 90s added a border. If you suspect multiple layers, you might need to attack them one by one. Don’t try to strip them all at once. Get the top layer off, clean the residue, then assess the next layer. Also, check if the previous owners painted over the wallpaper. Yes, people do this. It’s a crime against interior design, but it happens. If the wall feels hard and shiny and doesn’t absorb water, it might be painted. In that case, you’ll need to score it deeply and maybe use a stronger chemical stripper because paint seals the moisture out just like vinyl does. Knowing your enemy helps you choose the right weapon.
The Soak and Score Method for Moderate Jobs
For most standard wallpapers, the soak and score method is the gold standard. It’s cheap, effective, and doesn’t require renting expensive equipment. Start by scoring the wall. Hold your scoring tool flat against the paper and move it in circular motions. Cover the entire section you plan to work on. Don’t press too hard; you just want to puncture the surface, not carve into the drywall underneath. Once scored, it’s time to mix your solution. You can buy commercial wallpaper strippers, but honestly, a mix of hot water and white vinegar works wonders. Try a ratio of one part vinegar to two parts hot water. The acid in the vinegar helps break down the starch-based adhesives used in older papers.
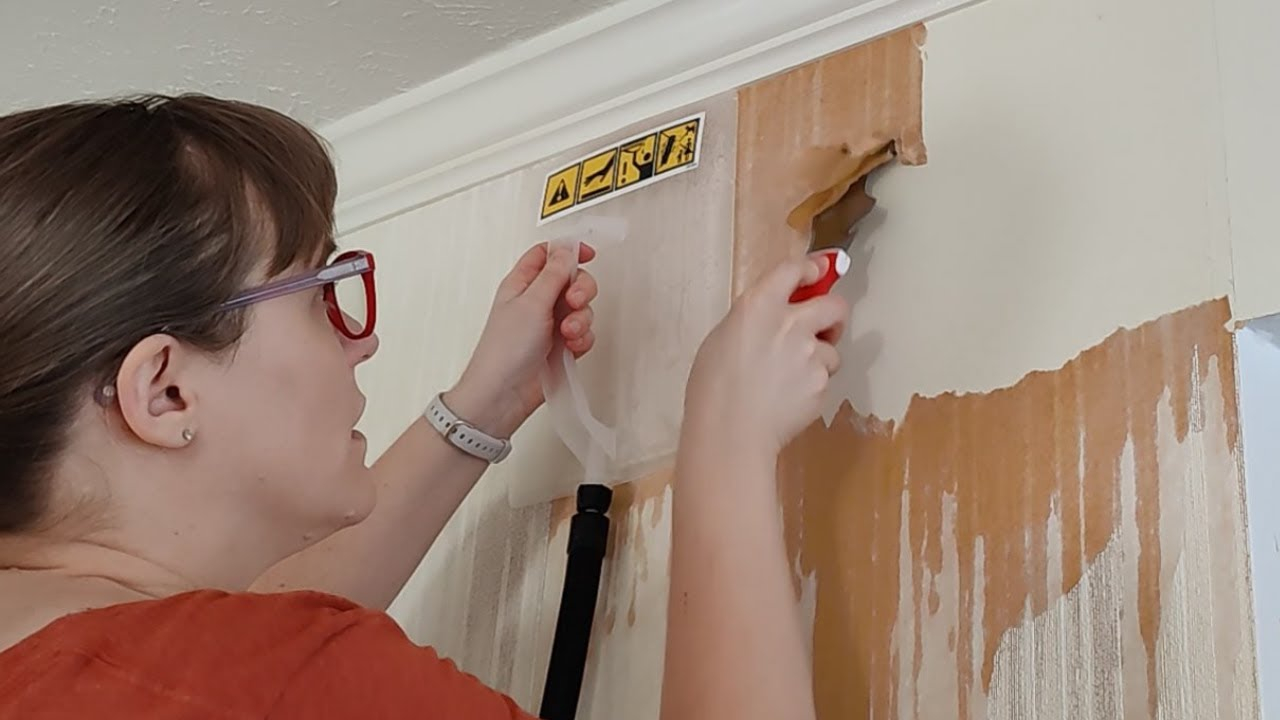
Spray the solution generously onto the wall. You want it dripping wet. Let it sit. This is the part where patience pays off. Wait at least fifteen to twenty minutes. You need the water to soak through those score holes and soften the glue. If the wall dries out, spray it again. The paper should look dark and saturated. When you think it’s ready, test a small area with your scraper. Slide the blade under the paper at a low angle. If it lifts easily, great. If it resists, wait longer. Forcing it will damage the wall. Work in small sections, maybe four feet by four feet. Don’t try to soak the whole room at once, or the first part will dry out before you get back to it.
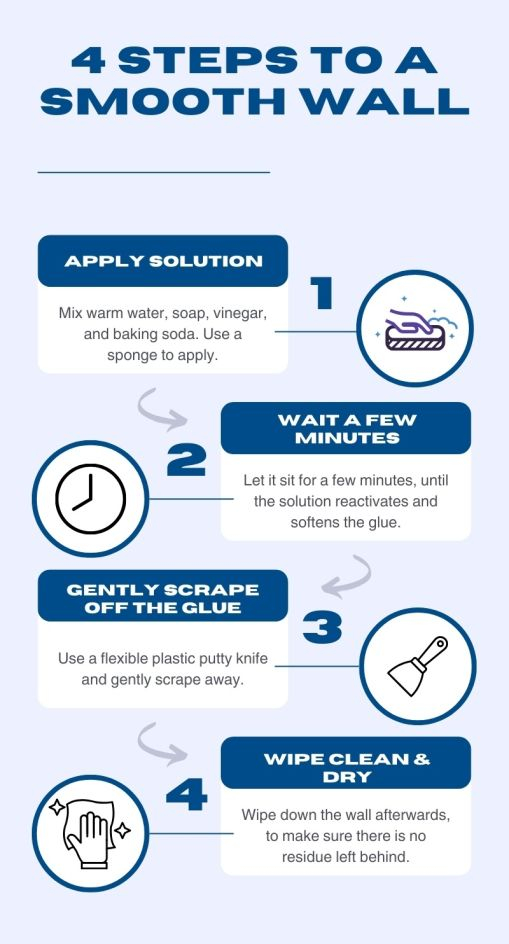
As you scrape, keep a trash bag handy. Wet wallpaper is heavy and messy. Peel it off in strips if you can, and toss it directly into the bag. Don’t let it pile up on the floor; it becomes a slippery hazard. After the paper is off, you’ll likely see leftover glue residue. This is normal. Don’t panic. Mix a bucket of warm water with a few drops of dish soap. Use a large sponge or a rag to wash the walls. This removes the sticky film and prepares the surface for priming. If the glue is really stubborn, you might need to scrub a bit with a non-abrasive scouring pad. Just be gentle. You want smooth walls, not scratched ones. Rinse with clean water and let it dry completely before moving on.
Bringing in the Heat: Using a Steamer
Sometimes, water and vinegar just don’t cut it. Maybe the glue is industrial strength. Maybe the paper is fifty years old and brittle. Or maybe you’re just tired of waiting for it to soak. That’s when you bring in the big guns: a wallpaper steamer. Steamers use hot vapor to penetrate the paper and melt the adhesive bond far more effectively than water alone. You can rent these from most hardware stores for a reasonable daily fee. They look intimidating, but they’re actually pretty simple to use. Fill the tank with water, plug it in, and wait for it to heat up. It usually takes about ten to fifteen minutes to start producing steam.
Hold the steamer plate against the wall for about thirty to sixty seconds. You’ll see the paper darken and maybe even bubble slightly. That’s the glue melting. Don’t hold it in one spot too long, or you can damage the drywall or create a steam burn on your hand. Move the plate around slowly. Once the section is heated, use your scraper to lift the paper. It should come off in warm, gooey sheets. It’s strangely satisfying. The heat makes the adhesive lose its grip, so you don’t have to scrape as hard. This is a huge advantage if you’re worried about damaging the plaster or drywall underneath. Less force means fewer repairs later.
Be careful with steam, though. It’s hot. Really hot. Wear long sleeves and gloves to protect your arms from the vapor. And watch out for the hose; it gets hot too. Make sure the room is well-ventilated. Steam adds a lot of humidity to the air, which can make the room feel like a sauna. Open windows or run a fan to keep the air moving. Also, don’t use a steamer on walls that have been painted with oil-based paint or if you suspect there’s asbestos in the texture (common in homes built before 1980). Steam can loosen asbestos fibers, which is a health hazard you definitely want to avoid. If you’re unsure, get it tested first. Safety first, always.
Dealing with the Aftermath and Wall Repair
So, the paper is gone. You’re standing in front of a bare wall. It probably looks terrible. There are patches of old glue, maybe some torn drywall paper, and definitely some uneven spots. Don’t worry. This is expected. No one expects the wall to be perfect right after stripping. The next step is cleaning and repairing. Start by giving the walls a final wipe-down with a mixture of water and TSP (trisodium phosphate) or a heavy-duty degreaser. This removes any remaining oily residue from the glue or the stripper. Rinse well with clean water. Let the walls dry completely. This might take a day or two, depending on the humidity. Do not skip this drying step. Painting over damp walls is a disaster waiting to happen.
Once dry, inspect the surface. Look for any gouges or tears in the drywall paper. If you see brown paper sticking up, don’t pull it. Seal it with an oil-based primer or a shellac-based primer like BIN. This prevents the moisture from your joint compound from bubbling the paper further. For small holes or dents, use a lightweight spackling compound. Apply it with a putty knife, let it dry, and sand it smooth. For larger areas where the drywall face is torn, you might need to apply a thin layer of joint compound over the whole section. Feather the edges so it blends seamlessly with the rest of the wall. Sand everything with fine-grit sandpaper (120 or 150 grit) until it’s smooth to the touch.
Priming is non-negotiable. Never, ever paint directly over a stripped wallpaper wall without primer. The remaining adhesive can bleed through the paint, causing yellow stains or poor adhesion. Use a high-quality stain-blocking primer. This seals the surface, ensures uniform absorption, and gives your topcoat something to grip onto. It also helps hide any minor imperfections you missed during sanding. Think of primer as insurance. It costs a little extra now, but it saves you from having to repaint the whole room in six months because the paint is peeling or staining. Take your time here. A good prime job makes the final paint look professional.
Let’s be real: removing wallpaper is tedious. It’s not glamorous. But it’s manageable if you keep your expectations realistic. Don’t try to do the whole house in a weekend. Pick one room. Maybe a small bathroom or a bedroom. Get that done first. Celebrate the victory. Then move on to the next. Rushing leads to mistakes, and mistakes lead to more work. Take breaks. Step outside. Get some fresh air. Your arms will get tired from scraping, and your back will ache from looking up. Listen to your body. Stretch. Hydrate. It’s a marathon, not a sprint.
If you hit a wall that just won’t budge, don’t be afraid to call in a pro. Seriously. Some wallpapers, especially those installed with epoxy adhesives or on plaster that’s crumbling, are beyond the scope of a typical DIY weekend. There’s no shame in hiring a painter for the tough stuff. It might cost a few hundred dollars, but it could save you days of frustration and potential repair costs. Weigh the value of your time against the cost of labor. Sometimes, paying someone else to deal with the nightmare is the best investment you can make in your sanity.
Finally, remember why you’re doing this. You’re not just removing paper. You’re uncovering the potential of your home. You’re creating a blank canvas for your own style. Imagine that wall painted in your favorite color. Imagine the light hitting the smooth, clean surface. Keep that image in your mind when your arm hurts and the glue is stubborn. It’s worth it. Every strip you remove brings you closer to a space that feels like yours. So put on some good music, grab your scraper, and get to work. You’ve got this. And hey, if you mess up a little, that’s okay. Walls are forgiving. Spackle fixes almost everything.