You know that feeling when you walk into a room and something just feels… off? Maybe the paint is a shade too bright, or the furniture arrangement is clunky. But often, it’s the little details. Specifically, that weird, jagged gap where the door frame meets the floor trim. It’s like two strangers trying to shake hands but missing each other’s grip entirely. It looks unfinished. It looks cheap. And honestly? It drives me crazy every time I see it.
We’ve all been there. You spend weeks picking out the perfect baseboards. You sand, you prime, you paint. You install them with care. Then you get to the door casing, and suddenly, the profiles don’t match. The thicknesses are different. There’s a gaping hole that caulk can’t hide, no matter how much you try. In 2026, with so many DIY resources available, you’d think this would be a solved problem. Yet, I still see homeowners struggling with this exact issue in online forums and renovation blogs.
But here’s the good news. There is a fix. And it’s not some complicated carpentry trick that requires a degree in engineering. It’s called a plinth block. It’s a small, simple piece of wood that acts as a bridge between your door casing and your baseboard. It’s elegant. It’s classic. And best of all, it’s surprisingly easy to install. Let’s dive into how you can use this humble hero to transform your trim work from "meh" to magnificent.
What Exactly Is a Plinth Block?
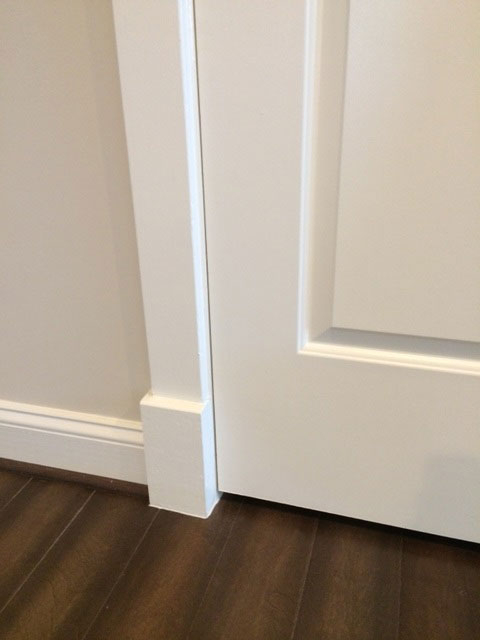
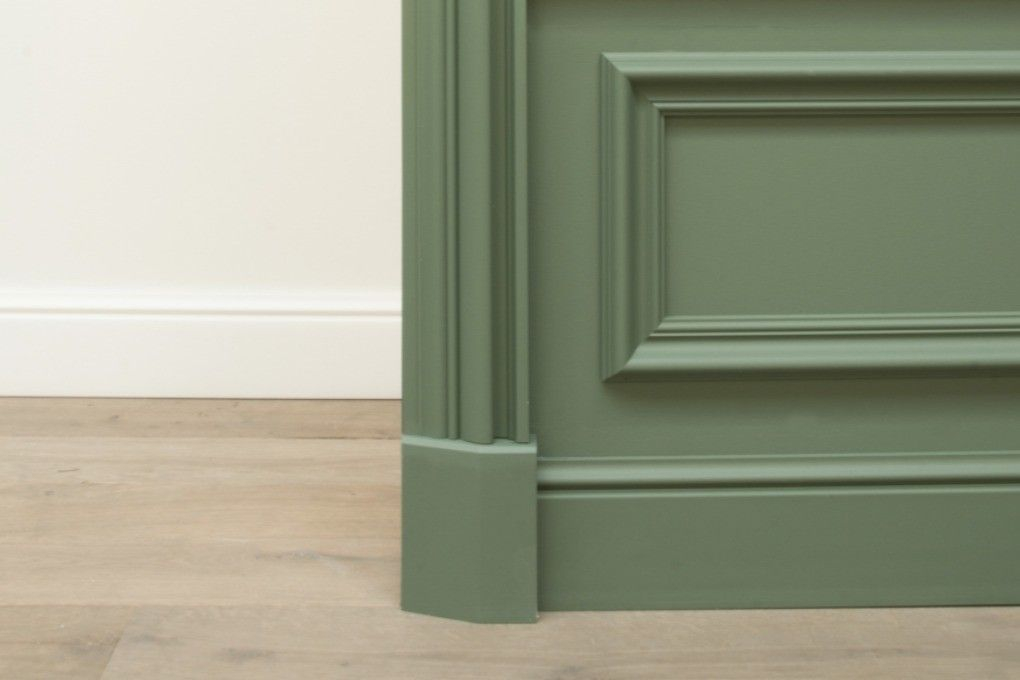
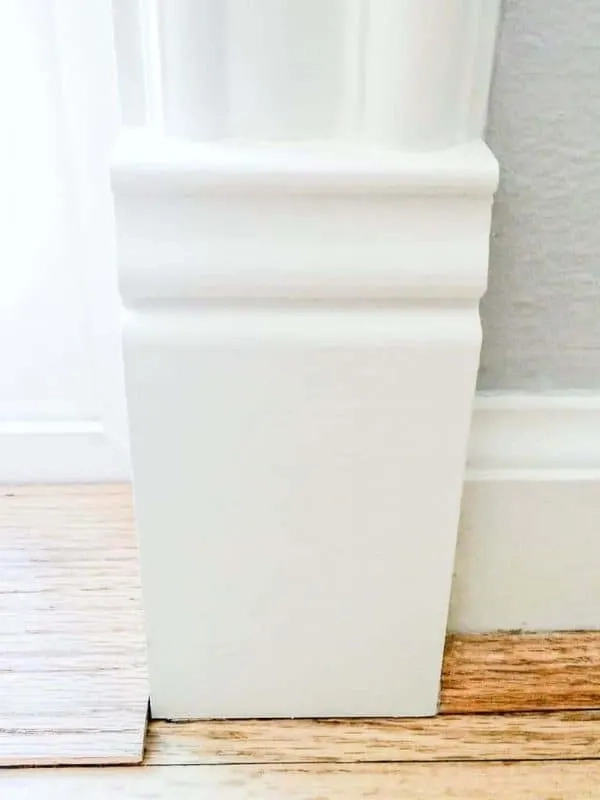
So, what is this mysterious "plinth block" everyone is talking about? If you’ve ever looked at old Victorian homes or classic colonial architecture, you’ve seen them. They’re those square or rectangular blocks at the bottom of door frames. Think of them like the pedestal of a column. In classical architecture, columns sit on plinths. In your hallway, your door casing sits on a plinth block. It’s a nod to history, sure, but it’s also a incredibly practical solution for modern homes.
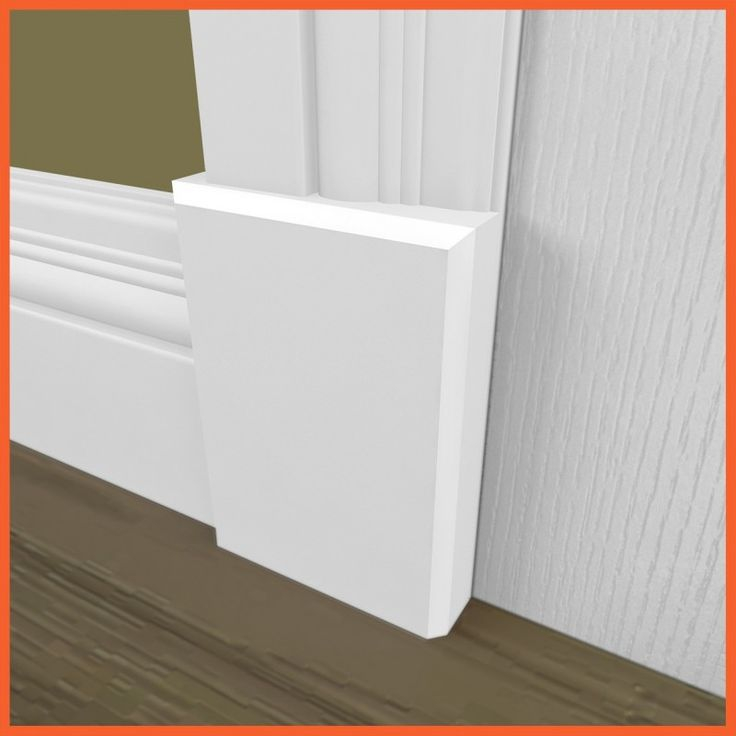
The main job of a plinth block is to solve the transition problem. Door casings (the trim around the door) are usually thicker than baseboards. When they meet, you get an awkward step-down. Or, if the profiles don’t match, you get a weird gap. A plinth block is wider and thicker than both the casing and the baseboard. It sits at the bottom of the casing, and the baseboard butts right up against it. This creates a clean, intentional line. No gaps. No awkward steps. Just a smooth, professional look.
According to recent trends in 2025 and 2026, plinth blocks are making a huge comeback. People are tired of the ultra-minimalist, gap-filled look. They want character. They want warmth. Sites like Jen Wood House and The Handyman’s Daughter have been shouting from the rooftops about how easy these are to add. And they’re right. You don’t need to be a master carpenter. You just need a saw, some glue, and a bit of patience. It’s a small change that makes a massive difference in the perceived quality of your home’s finish.
Why Your Trim Looks Awkward (And How Plinths Fix It)
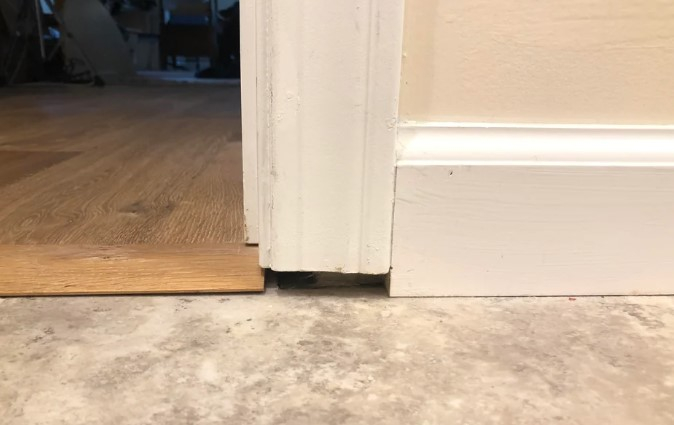
Let’s talk about why this happens in the first place. Why do door casings and baseboards rarely play nice together? Well, it’s mostly about manufacturing standards. Most door casings are sold in standard widths, often 2-1/4 inches or 3-1/2 inches. Baseboards, on the other hand, come in all sorts of heights and thicknesses. Often, the baseboard is thinner than the casing. So when you run the baseboard up to the door, it doesn’t flush up. It leaves a reveal. A gap. And if you try to miter it, it looks even worse because the angles don’t align.
This is what designers call an "awkward transition." It’s visual noise. Your eye trips over it. As noted by sources like House Digest, the bottoms of door frames are often just plain "ugly" because of this mismatch. The casing isn’t flush with the floor, and the profile clashes with the baseboard. It’s a recipe for dissatisfaction. You could try to shim the baseboard out, but that’s messy and rarely looks good. You could try to scribe the casing, but that’s advanced-level stuff.
Enter the plinth block. By installing a block that is wider than the casing and thicker than the baseboard, you create a new reference point. The baseboard doesn’t need to match the casing anymore. It just needs to butt up cleanly against the side of the plinth block. The plinth block absorbs the difference in thickness. It hides the gap. It creates a deliberate architectural feature instead of an accidental flaw. It’s like putting a frame around a picture. Suddenly, everything looks intentional. Purposeful. Clean.
Choosing the Right Materials and Sizes
Now that you’re convinced, let’s talk materials. You might be thinking, "Do I need to buy special plinth blocks?" The answer is: maybe, but probably not. Many lumberyards and millwork companies sell pre-made plinth blocks that match specific door casing profiles. This is the easiest route, as mentioned by A Concord Carpenter. If you can find a block that matches your existing trim, grab it. It saves time and ensures a cohesive look.
But what if you can’t find a match? Or what if you want a custom look? No worries. You can make your own. And it’s simpler than you think. All you need is a piece of wood that’s wider than your door casing and thicker than your baseboard. For example, if your casing is 3/4 inch thick and 2-1/4 inches wide, and your baseboard is 1/2 inch thick, you’ll want a plinth block that’s at least 7/8 inch thick and 3 inches wide. This gives you enough surface area to attach the casing and the baseboard securely.
Poplar and pine are great choices for painted trim. They’re easy to cut, sand, and paint. If you’re staining your trim, you’ll want to match the wood species to your existing doors and baseboards. Oak, maple, or walnut work well, depending on what you have. The key is proportion. The block shouldn’t be so big that it looks bulky, but it needs to be substantial enough to look intentional. A good rule of thumb is to make the block about 1/2 inch wider than the casing on each side. So if your casing is 2-1/4 inches wide, a 3-1/4 inch wide block works perfectly. It’s all about balance.
Step-by-Step Installation Guide
Ready to get your hands dirty? Let’s walk through the installation. First, remove the existing door casing if it’s already installed. If you’re doing this during a new install, even better. Measure the height of your baseboard. You want the top of the plinth block to align with the top of the baseboard, or sit slightly higher for a more pronounced look. Mark this height on the wall next to the door jamb.
Cut your plinth blocks to size. You’ll need one for each side of the door. Make sure the cuts are square. Use a miter saw for the best results. Sand the edges smooth. Now, apply construction adhesive to the back of the block and press it firmly against the wall, aligning it with your mark. It should be flush with the edge of the door jamb. Nail it in place using finish nails. Aim for the studs if you can, but drywall anchors work too if you’re careful.
Next, reinstall the door casing. Cut the vertical casing pieces so they sit directly on top of the plinth block. They shouldn’t go all the way to the floor. Leave a tiny gap (about 1/16 inch) between the bottom of the casing and the top of the plinth block for expansion, though many pros just butt them tight. Nail the casing to the jamb and the wall. Finally, cut your baseboard. Butt it squarely against the side of the plinth block. No miter needed. Just a clean, 90-degree cut. Nail it in place. Fill any nail holes, caulk the seams, and paint. Boom. Done.
Common Mistakes to Avoid
Even though this is a simple project, there are pitfalls. The biggest mistake? Poor alignment. If your plinth block isn’t perfectly vertical, your entire door frame will look crooked. Use a level. Seriously. Don’t eyeball it. Take the extra minute to ensure it’s plumb. Also, make sure the block is flush with the face of the door jamb. If it sticks out too far, the casing won’t sit right. If it’s recessed, you’ll get a shadow line that looks messy.
Another common error is ignoring the floor. Floors aren’t always level. If your floor slopes, your plinth block might need to be scribed to the floor contour. This means tracing the shape of the floor onto the bottom of the block and cutting it to match. It’s a bit more work, but it prevents unsightly gaps at the bottom. If you skip this step on an uneven floor, you’ll end up caulking a huge gap, which never looks as good as a tight fit.
Lastly, don’t skimp on the finish. Caulk is your friend, but don’t overdo it. A thin bead along the seams where the plinth meets the wall, the casing, and the baseboard is enough. Too much caulk looks sloppy. And when painting, use a high-quality brush to get into the corners. A crisp paint job makes the whole assembly look built-in and professional. Remember, the goal is to make it look like it was always there. Not like a band-aid fix.
Here’s a secret: plinth blocks aren’t just for doors. Once you master them, you’ll start seeing opportunities everywhere. Have a tricky transition where two different types of flooring meet? A plinth block can act as a threshold or a decorative end cap. Dealing with a staircase where the baseboard runs into the skirt board? A plinth block can provide a clean termination point. As noted by Finish Carpentry Help, these blocks are great for floor transitions and level changes.
They also work wonders in corners. If you have an outside corner where two walls meet and the baseboards don’t miter well, a plinth block can serve as a corner post. It adds weight and visual interest to the room. It breaks up long stretches of wall and adds a sense of rhythm to your trim work. In 2026, interior designers are loving this layered, architectural approach. It’s about adding depth and detail without overwhelming the space.
Think about built-ins too. If you’re adding bookshelves or window seats, plinth blocks at the base can ground the structure. They make freestanding furniture look built-in. They hide the gap between the furniture and the floor. It’s a small detail, but it elevates the entire piece. So don’t limit yourself to doorways. Look around your home. Where else could a little block of wood solve a big problem? The possibilities are endless.
So, there you have it. The awkward gap between your door casing and baseboard doesn’t have to be a source of stress. With a few simple tools and some basic woodworking skills, you can install plinth blocks that not only fix the problem but add a touch of classic elegance to your home. It’s a small investment of time and money that pays off in spades. Every time you walk through that doorway, you’ll notice the difference. And so will your guests.
Don’t be intimidated by the term "plinth block." It sounds fancy, but it’s really just a block of wood with a big job. It bridges the gap. It smooths the transition. It brings order to chaos. And in a world that often feels chaotic, isn’t that what we all want a little more of? A bit of order. A bit of beauty. A bit of peace. So grab your saw, pick up some wood, and give it a try. You might just find that you enjoy the process as much as the result. After all, there’s something deeply satisfying about fixing something with your own two hands. It’s real. It’s tangible. And it’s yours.